DIY: All Seats Removal + Cloth Removal / Replacement
 04-19-2011, 11:19 PM
#1

DIY: All Seats Removal + Cloth Removal / Replacement
Hey Everyone,
This is my first DIY, and I could only snap a few pictures with my phone in the process, so I will do the best I can. Please take note these photo's were taken with a cellphone, not a real camera.
This DIY is for the Removal of the Front and Back Seats, as well as the Removal of the Cloth on the seats and the re-installation of Cloth, Leather, etc. (I took pictures while switching from cloth to Katzkin Leather). I will be attaching pictures at the end of the post. I wi
Part A: Removing the Front Seats
Step 1: **SEE PHOTOS 1 & 2** Start by removing the four (4) bolts holding down the bottom of the front seat. You will have to move the seat back and forth respectively to remove them. You can use a Ratchet for three (3) of the four bolts (I had to use a wrench for the front one closest to the center console). These are 12mm. There will be two bolts on the front and two bolts on the back, underneath the seat (As shown in pictures).
Step 2: **SEE PHOTOS 3 & 4 & 5** After removing the bolts, you will be able to lift the bottom of the seat right out - BUT - You must disconnect the wires for the Airbag (PICTURE 3). To do this, you will start by either cutting the zip-ties holding the wires, or using a tool to remove them properly from the hole they are sitting in on the frame of the seat (PICTURE 4). You will also have to remove the holder as seen in PICTURE 5 which holds the connector unit for the Airbag wire. Now time to take out the seat! You may have to lift the front end higher first, but it will come out.
Step 3: **SEE PHOTOS 6,7,8,9 ** Now to remove the top of the seat. There are four (4) 14mm bolts holding the seat in place - Two on each side respectively. In order to access these bolts, you will have to first unzip the back of the seat (PICTURE 6). Once unzipped, you can roll the seat up on the side to see the two (2) of the four bolts. (PICTURE 7 & 8) Remove these bolts, and do so the same on the other side of the seat. Once these are removed, the seat will come out. (PICTURE 9)
Part B: Removing the Back Seats
Step 1: **SEE PHOTO 10** To remove the bottom of the back seat(s), simply pull up on them. They will take some force, but they will pop out of place. (PICTURE 10)
Step 2: **SEE PHOTOS 11,12**To remove the top of the back seats, you will have to remove two (2) 14mm bolts (PICTURE 11). Remove these two (2) bolts, and lift up on the seat a few inches, and then towards yourself to pop it up and out of place. (PICTURE 12)
Now you have just removed the Front and Back Seats in your car. **This next section is for the removal of the cloth covering and re-installation of cloth, leather, pleather, etc.**
Part A: Removing the Cloth
Step 1: **SEE PHOTOS 13, 14, 15** Removing the cloth is a very timely process, and there are a few ways you can do it. You can either cut the metal rings, or bend them outwards and remove them. (PICTURE 13) They are all looped around both the cushioning and a small metal bar that acts as a frame. Personally, I cut them all and used needle-nose pliers to twist them out of place. **THERE ARE LOTS OF RINGS ON EACH SEAT**. Some have over 20, some have over 40. Remove all these rings to remove the cloth covering. (PICTURE 14)
IF you are having a hard time finding all the rings, simply look on the seats to where the seams are. Wherever the seat appears to be "Sucked" in on a line, that is most likely where the metal rings will be. (PICTURE 15) Some are very hard to get at, which is why cutting them is much easier. ALSO: There are metal wings all over the bottom of the seats.
Step 2: **SEE PHOTOS 16,17,18** Now that the cloth seats are off of the seats, you can re-install them, whether it be cloth, leather, or whatever you prefer. To do this, you can either purchase more metal rings and re-insert them where the old ones were, OR, like myself, use high-grade Zip-ties and cut them short.
Using Zip-Ties will be most easy because you can get all of them in place easily and they are quick and convenient for tightening. Tighten all the ties till they are almost touching the metal frame that they go around on the seat. (PICTURE 16, 17, 18)
Once this is all done, you should be left with re-conditioned seats.
SEE PHOTO #19 (LAST ONE) for a picture of my (Almost finished) front and back seats.
That is my quick DIY, sorry I never had much time to type it up.
Thanks, hopefully it helps.
 04-19-2011, 11:45 PM
#5
I just read and realized I missed that when removing the bottom and top of the front seat, you will have to cut two (2) metal rings that attach the fabric together, as well as a zip-tie that holds the top bar and bottom bar of the seats together at the back (I have included a picture below of each)


 10-10-2015, 06:28 PM
#12
Registered

Join Date: Apr 2015
Posts: 29
Likes: 0
Received 0 Likes
on
0 Posts
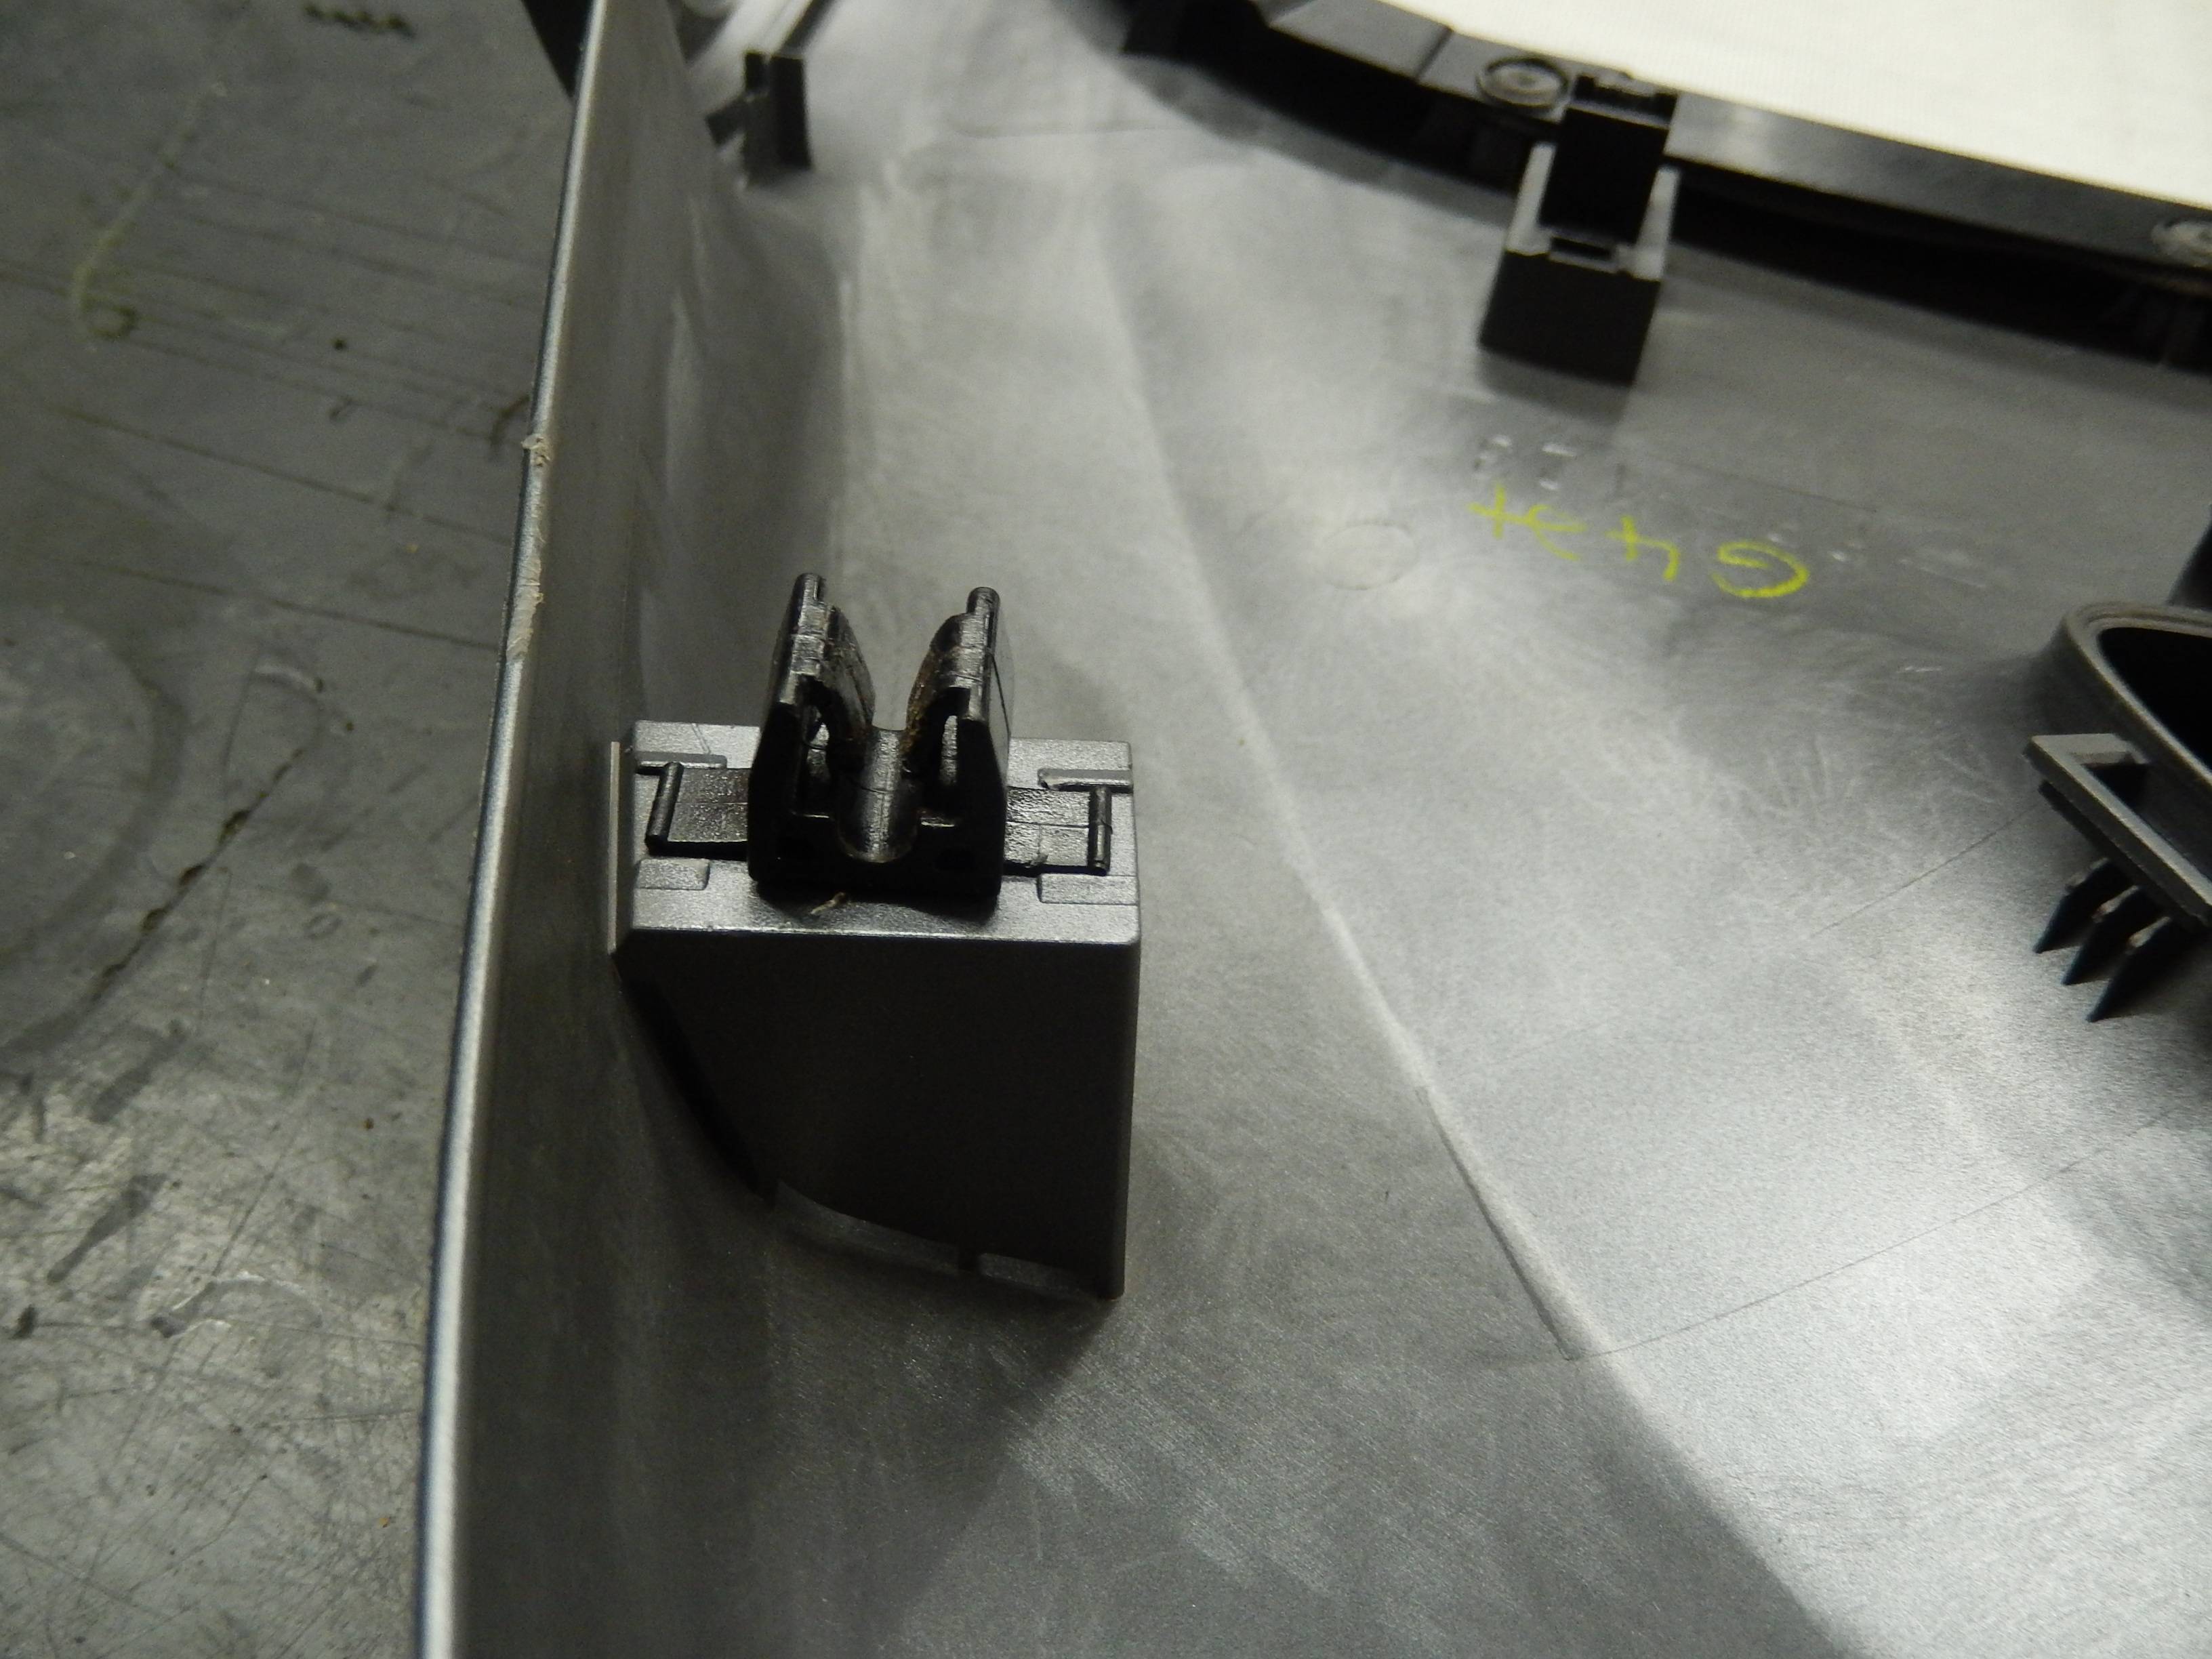
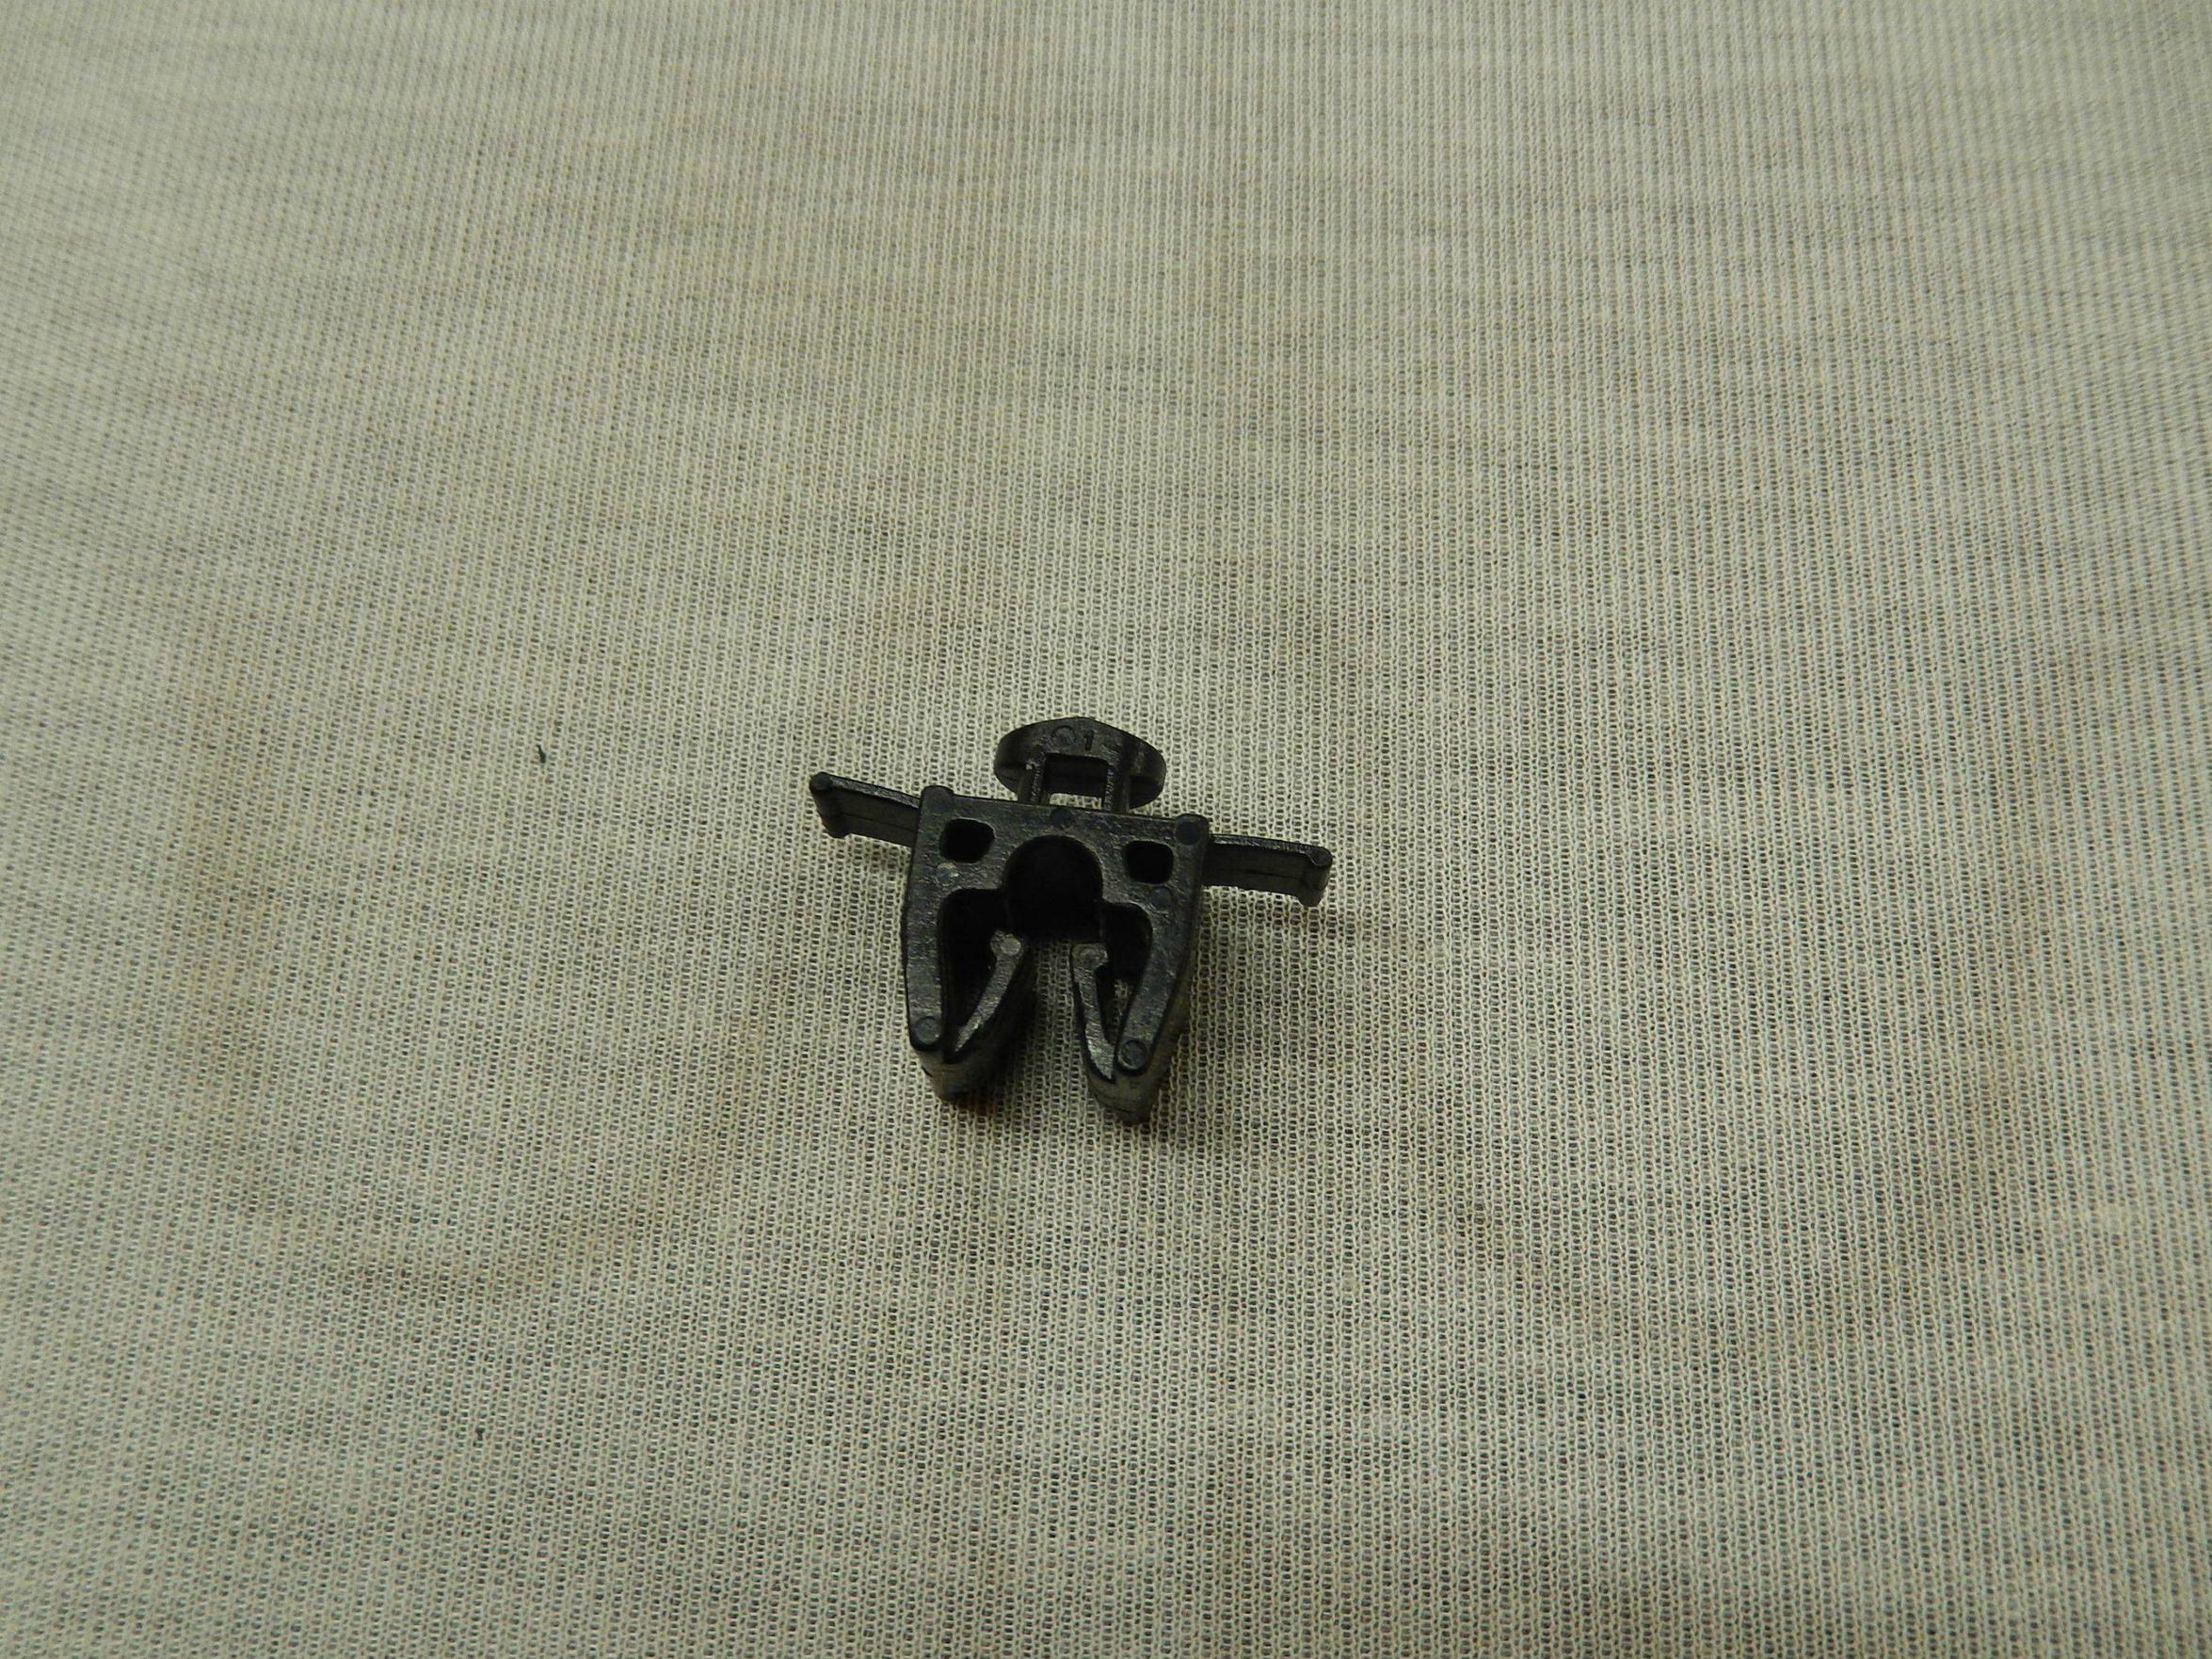
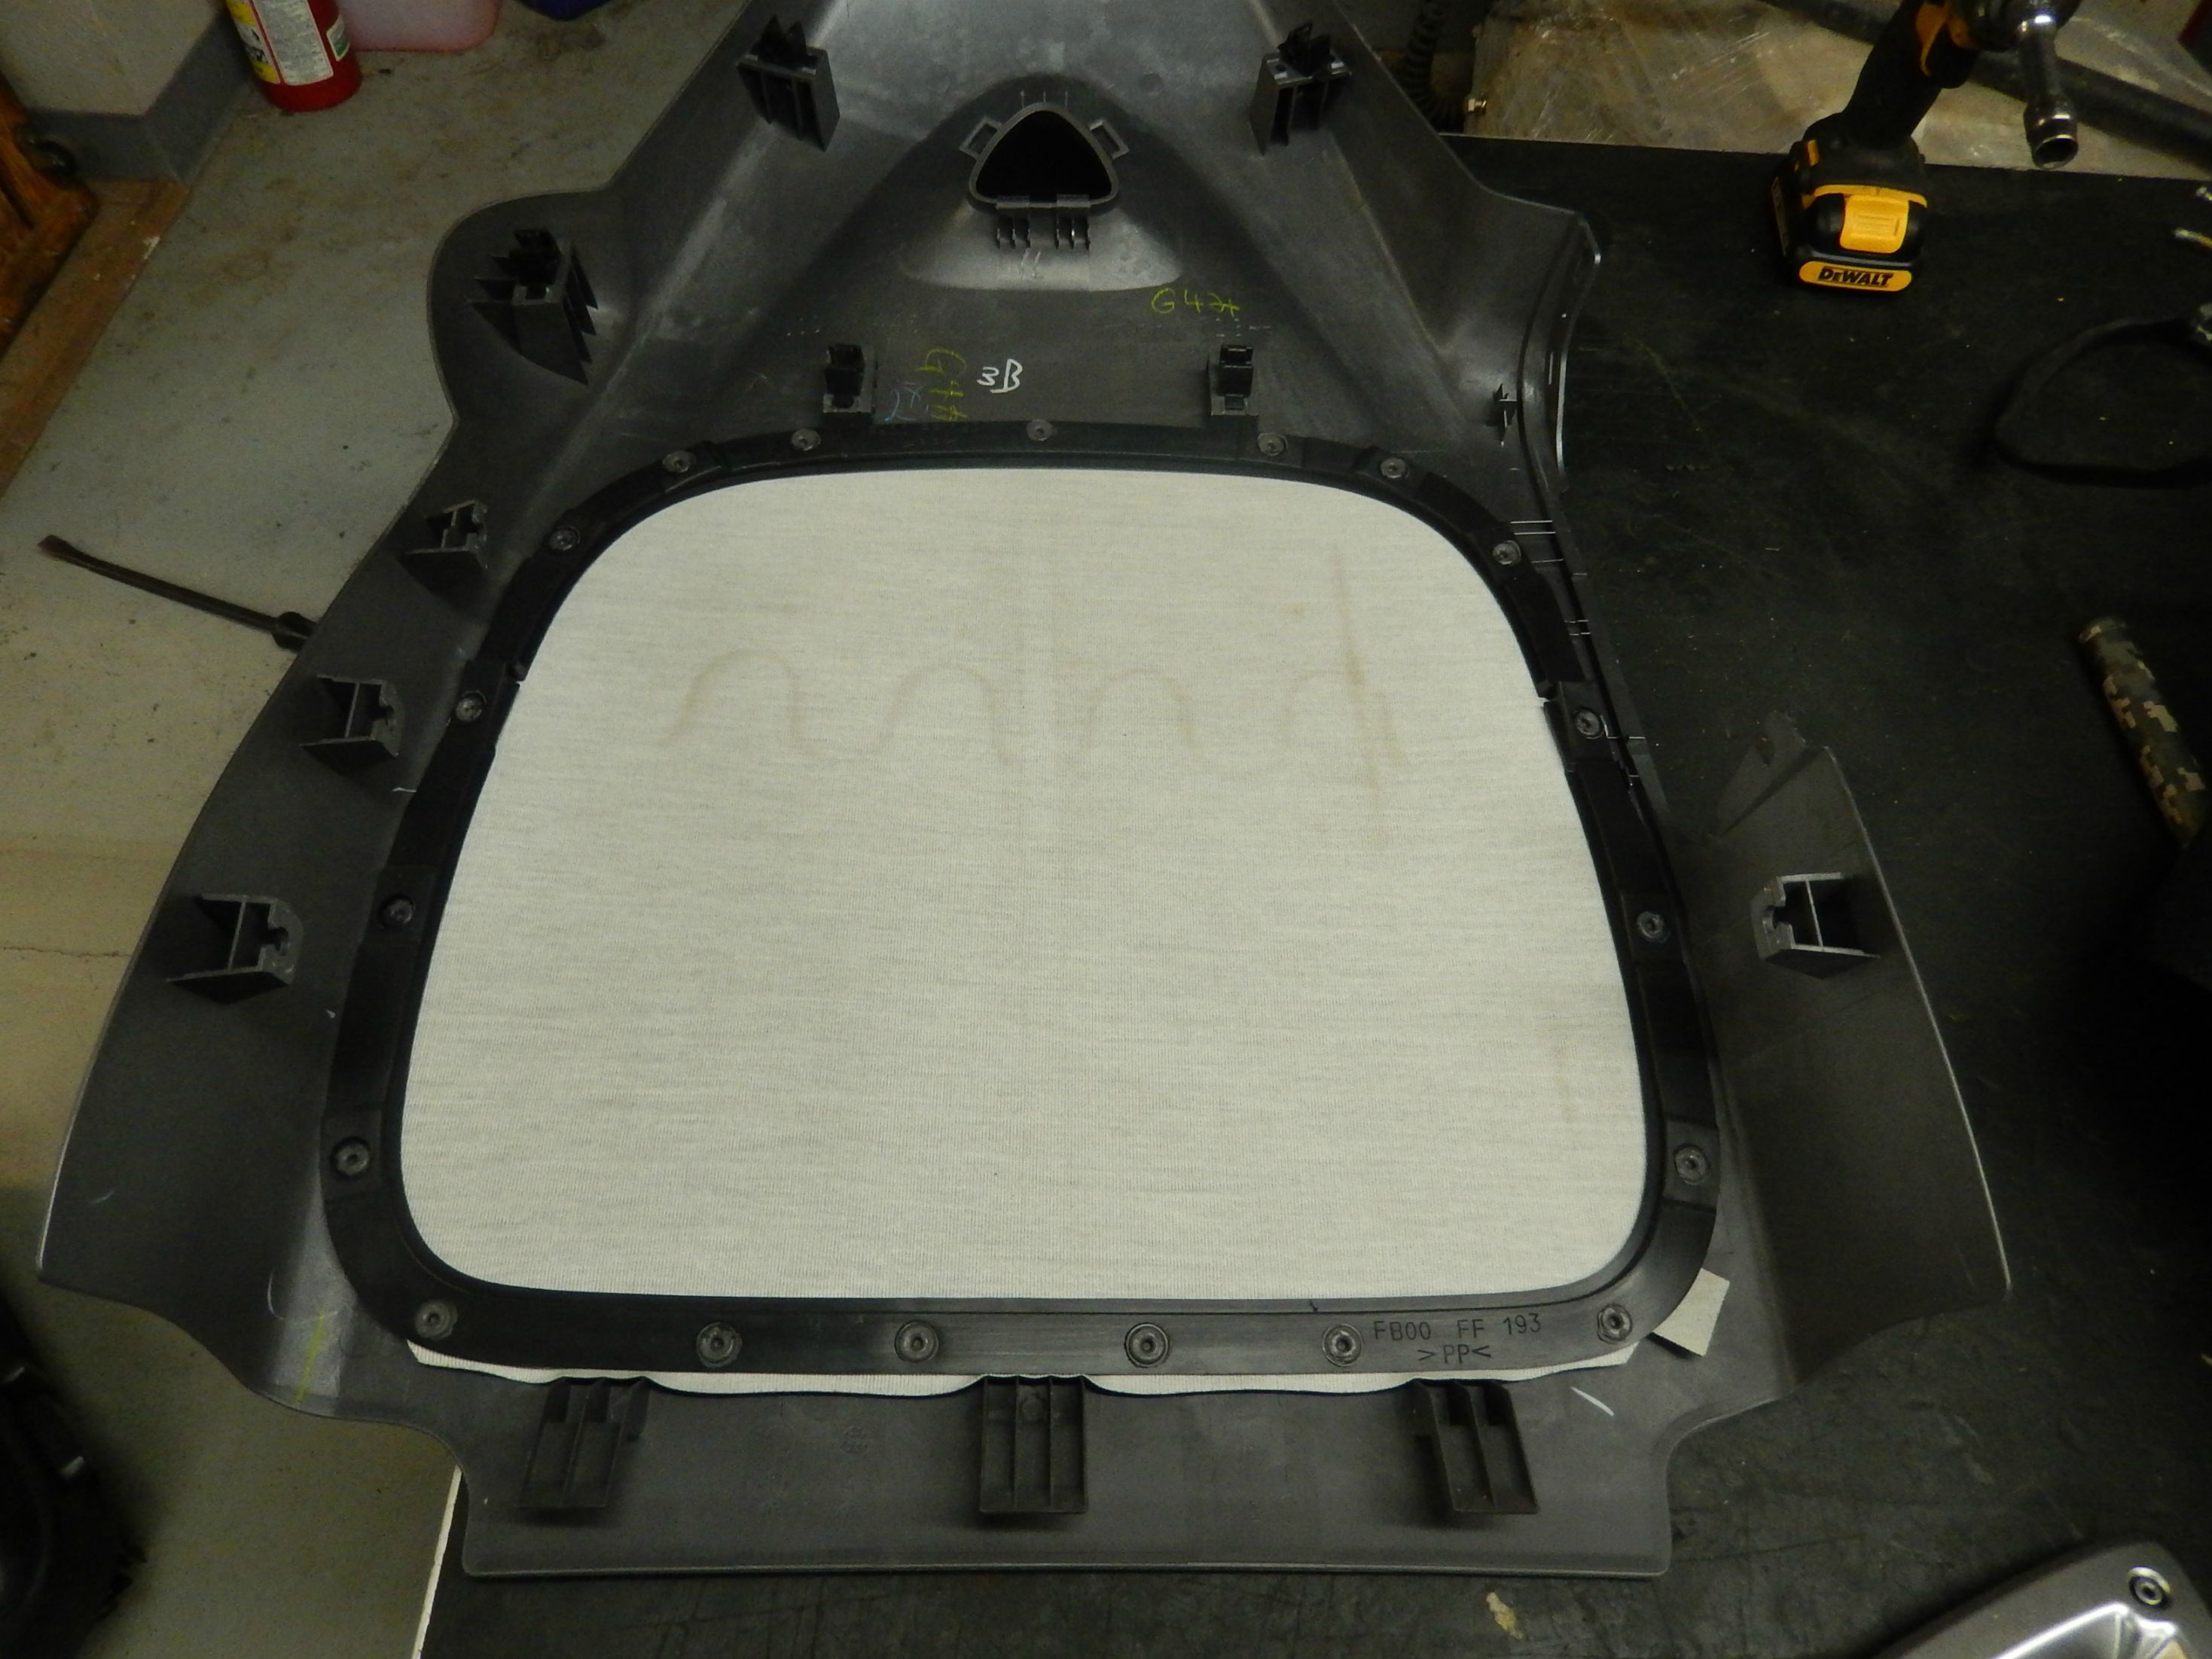
For leather seats the back plastic removal
Here is what the back of the leather seats look like. I was struggling with these for 15 minutes trying to figure out how they were attached.
The clips are very strong. I used a prybar. to get the two below the "rotor"
GOOD LUCK!!

<blockquote class="imgur-embed-pub" lang="en" data-id="Rvg4Z"><a href="//imgur.com/Rvg4Z">RX8 Leather seat back</a></blockquote>
The clips are very strong. I used a prybar. to get the two below the "rotor"
GOOD LUCK!!
<blockquote class="imgur-embed-pub" lang="en" data-id="Rvg4Z"><a href="//imgur.com/Rvg4Z">RX8 Leather seat back</a></blockquote>
05-25-2016, 09:21 PM
#13

How do you remove the frame? I just picked up an RX8, and it has dog hair and trash between the seat and the centre console. Removing the entire seat (not just the cushion) would make vacuuming the carpet much easier!
I got the rear seat cushions out and cleaned up there. Thanks!
I got the rear seat cushions out and cleaned up there. Thanks!
05-26-2016, 07:52 AM
#14
Registered
Join Date: Apr 2015
Posts: 29
Likes: 0
Received 0 Likes
on
0 Posts
How do you remove the frame? I just picked up an RX8, and it has dog hair and trash between the seat and the centre console. Removing the entire seat (not just the cushion) would make vacuuming the carpet much easier!
I got the rear seat cushions out and cleaned up there. Thanks!
I got the rear seat cushions out and cleaned up there. Thanks!
04-25-2019, 07:04 PM
#15

I just read and realized I missed that when removing the bottom and top of the front seat, you will have to cut two (2) metal rings that attach the fabric together, as well as a zip-tie that holds the top bar and bottom bar of the seats together at the back (I have included a picture below of each)
08-16-2019, 01:19 PM
#16
Registered

Join Date: Dec 2010
Posts: 11
Likes: 0
Received 0 Likes
on
0 Posts
I know this is late, but I just found the thread and fought with the same issue. Use "right click" on the photo "open in new tab"... worked like a charm

Thread
Thread Starter
Forum
Replies
Last Post
oxyg2n
Series I Interior, Audio, and Electronics
1
02-15-2005 05:47 AM
cloth, disassembly, diy, fabric, front, interior, katzkin, katzkins, mazda, mazdaspeed, removal, replacement, rx8, seat, seats