LS3 TR6060 swap - finished, debugged, track proven
 10-14-2015, 10:23 PM
#1
Registered
Thread Starter

LS3 TR6060 swap - finished, debugged, track proven
Last year I chimed in on one of the discussions and promised a write up... Since then many write ups have been done and many projects have been finished whilst documented start to finish.
So first of all, huge thumbs to all of you out there, I really enjoy seeing how much talent, creativity, and determination people have when it comes to this type of stuff.
This thread might be a bit of a "too little too late" thing, but nonetheless I believe it is worth sharing, even if it is just my way to reflect and vent frustrations so often encountered during the last 2 years.
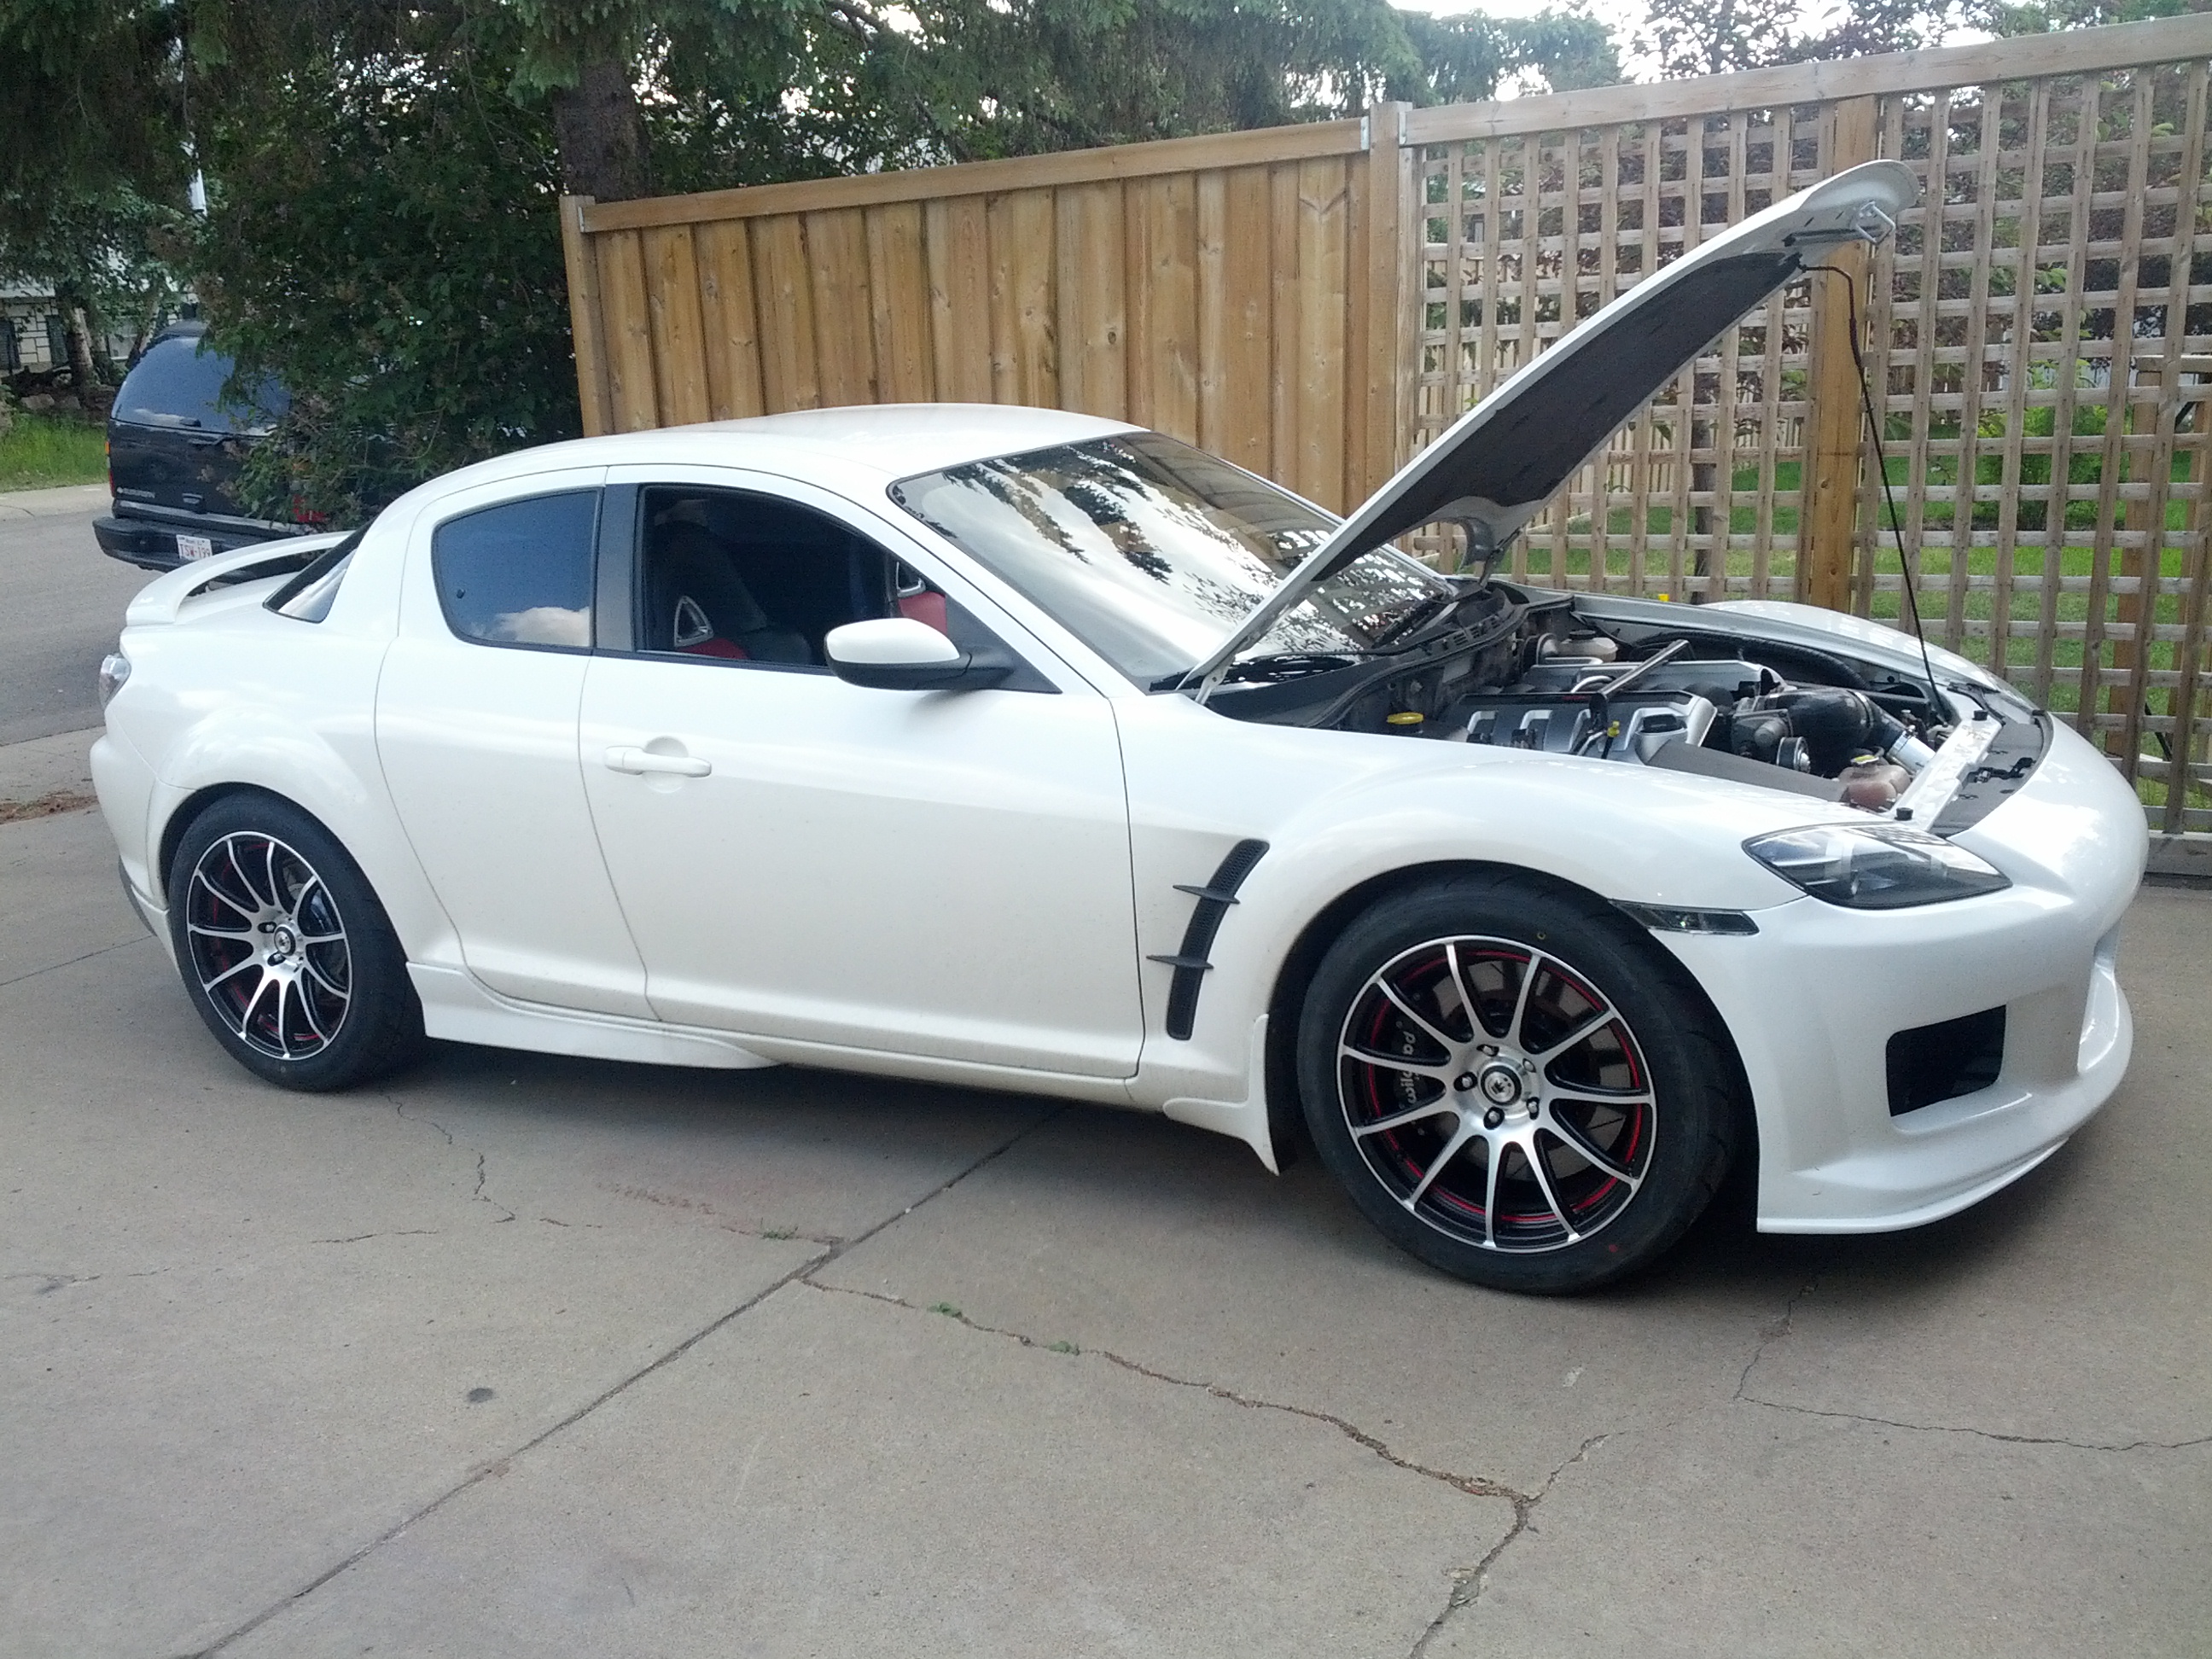
For those of you with short attention spans like myself... I better throw in a picture:
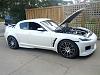
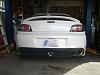
So there she is, just last week, prior to a track day.
Now lets go back couple of years and start from the beginning.
Disclaimer:
It does not actually take 2 years to complete this swap, but life gets in the way when you have to show up for work most days and don't have a full time nanny.
Timeline goes something like this...
Oct 2013 - an idea is born
Oct 2013 - a detailed cost analysis is completed using Excel spreadsheets (at present - cost exceeded by about 200%)
Nov 2013 - a low mileage RX8 of the preferred colour is purchased with the sole intent of gutting its rotary soul
Dec 2013 - a complete LS3 TR6060 pullout from a 2012 Camaro SS found for a somewhat reasonable price
Jan 2014 - the work starts...
The vision was simple; to build a seamlessly swapped daily driver, with weekend track capability. In order to do this few criteria needed to be met: Working gauges and dash that does not resemble a Christmas tree, working A/C, nothing loud and obnoxious, complete interior in good shape, ride quality good enough for trips, yet favourable balance and spirited track behaviour.
Now it is also worth mentioning, that when I started this there were essentially no "swap kit" options available for this type of thing. Steve at LS1RX8 just finished his own swap and helped me to get started with one of his "beta" kits, which helped in terms of positioning the engine, steering rack, and other stuff he has trialled himself. In the end, I'd say it saved me many hours of trial / error fitment, but really only got me about 40% there in the big picture.
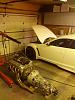
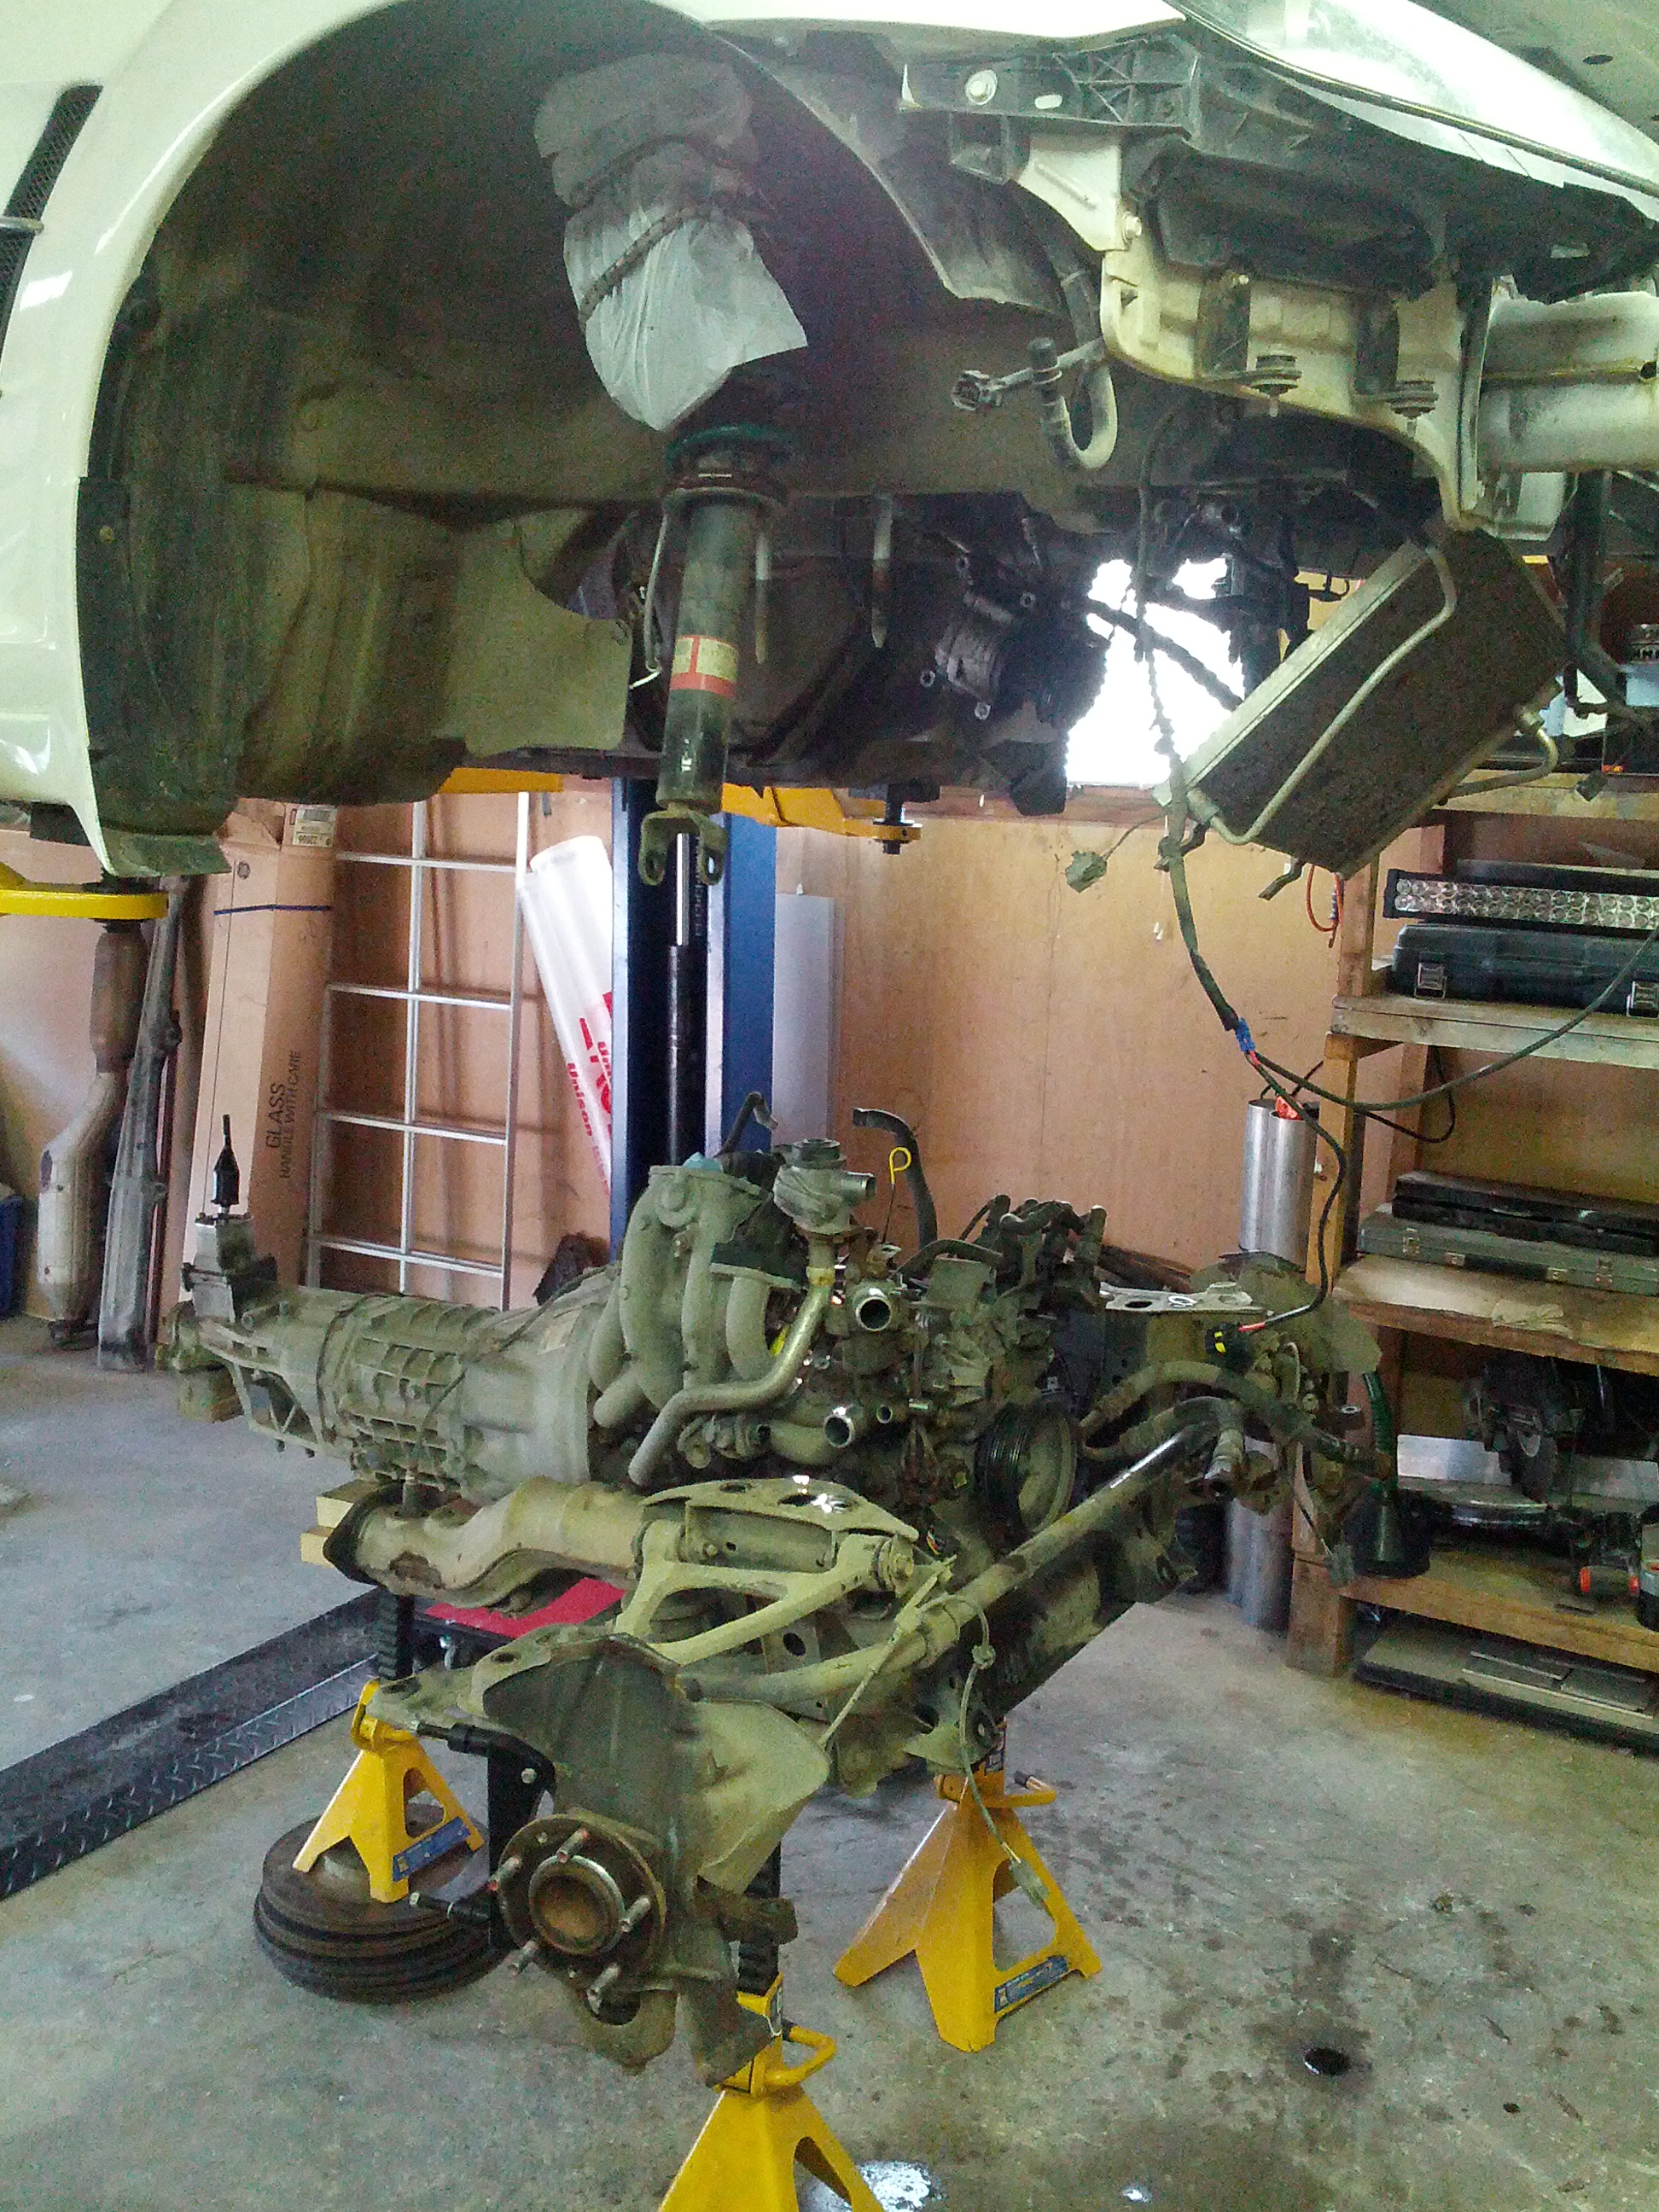
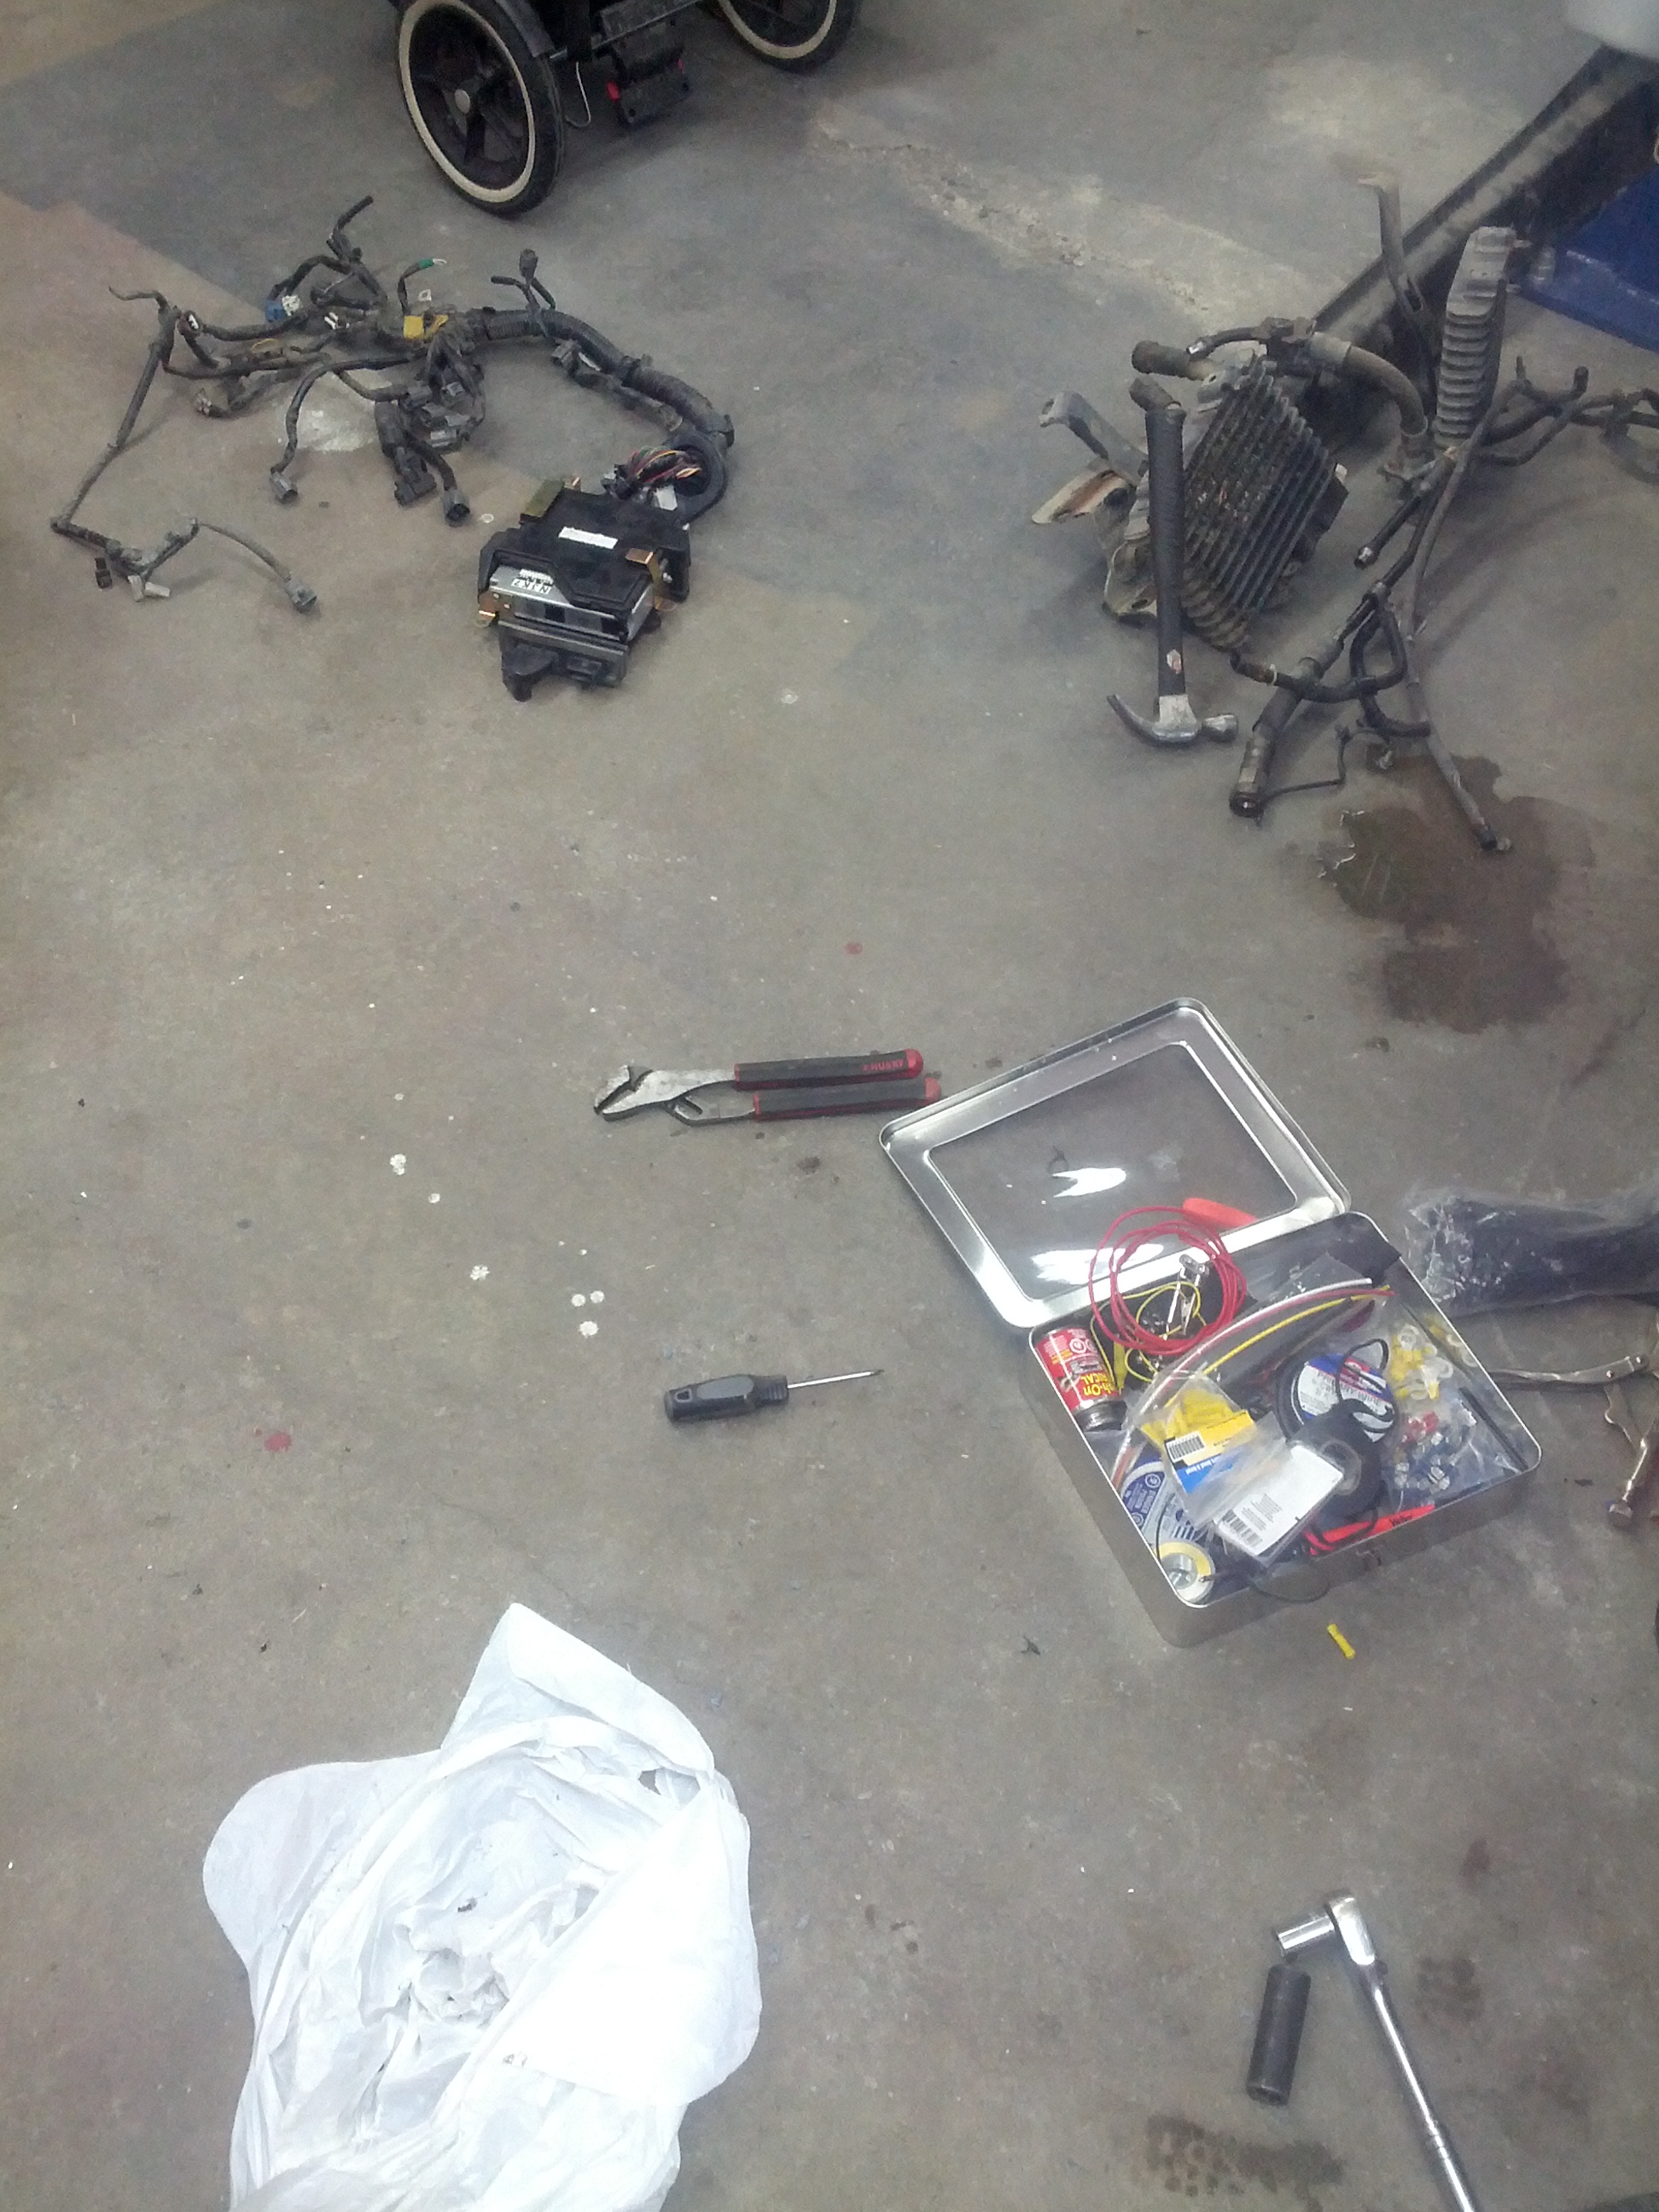
PART I - out with the old

Wow, my garage really is a mess...
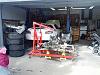
I am at this point realizing how poorly I have documented everything... It seems the more challenging a certain step the less pictures I took. Oh well, do not rely on this for DIY instructions
A date with a grinder and a sledge hammer, and some time later:
To be continued in a day or 2...
So first of all, huge thumbs to all of you out there, I really enjoy seeing how much talent, creativity, and determination people have when it comes to this type of stuff.
This thread might be a bit of a "too little too late" thing, but nonetheless I believe it is worth sharing, even if it is just my way to reflect and vent frustrations so often encountered during the last 2 years.
For those of you with short attention spans like myself... I better throw in a picture:
So there she is, just last week, prior to a track day.
Now lets go back couple of years and start from the beginning.
Disclaimer:
It does not actually take 2 years to complete this swap, but life gets in the way when you have to show up for work most days and don't have a full time nanny.
Timeline goes something like this...
Oct 2013 - an idea is born
Oct 2013 - a detailed cost analysis is completed using Excel spreadsheets (at present - cost exceeded by about 200%)
Nov 2013 - a low mileage RX8 of the preferred colour is purchased with the sole intent of gutting its rotary soul
Dec 2013 - a complete LS3 TR6060 pullout from a 2012 Camaro SS found for a somewhat reasonable price
Jan 2014 - the work starts...

The vision was simple; to build a seamlessly swapped daily driver, with weekend track capability. In order to do this few criteria needed to be met: Working gauges and dash that does not resemble a Christmas tree, working A/C, nothing loud and obnoxious, complete interior in good shape, ride quality good enough for trips, yet favourable balance and spirited track behaviour.
Now it is also worth mentioning, that when I started this there were essentially no "swap kit" options available for this type of thing. Steve at LS1RX8 just finished his own swap and helped me to get started with one of his "beta" kits, which helped in terms of positioning the engine, steering rack, and other stuff he has trialled himself. In the end, I'd say it saved me many hours of trial / error fitment, but really only got me about 40% there in the big picture.
PART I - out with the old
Wow, my garage really is a mess...

I am at this point realizing how poorly I have documented everything... It seems the more challenging a certain step the less pictures I took. Oh well, do not rely on this for DIY instructions
A date with a grinder and a sledge hammer, and some time later:

To be continued in a day or 2...
Last edited by Pistonized; 10-14-2015 at 10:36 PM.

 10-15-2015, 12:52 PM
#3
What am I doing here?

Join Date: Mar 2006
Location: 2017 Miata RF Launch Edition
Posts: 3,606
Received 649 Likes
on
510 Posts
I'm highly interested in seeing how you handled the engine management and talking to the instrument cluster.
I've seen stuff like this where people have used an Arduino system to control the cluster.
I've seen stuff like this where people have used an Arduino system to control the cluster.
10-15-2015, 09:53 PM
#4
Registered
Thread Starter
I'm highly interested in seeing how you handled the engine management and talking to the instrument cluster.
I've seen stuff like this where people have used an Arduino system to control the cluster.
I've seen stuff like this where people have used an Arduino system to control the cluster.
I am afraid that my solution won't be as impressive to share, however is fine for local law enforcement and road worthiness. And most importantly it is simple and cheap. Let me just throw few more pics out there and once I get to the electrical I will elaborate.
FYI, my cruise control and traction control do not work, and I am not sure whether the effort is worth it.
10-15-2015, 10:43 PM
#5
Registered
Thread Starter
PART II... in with the new:
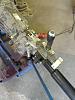
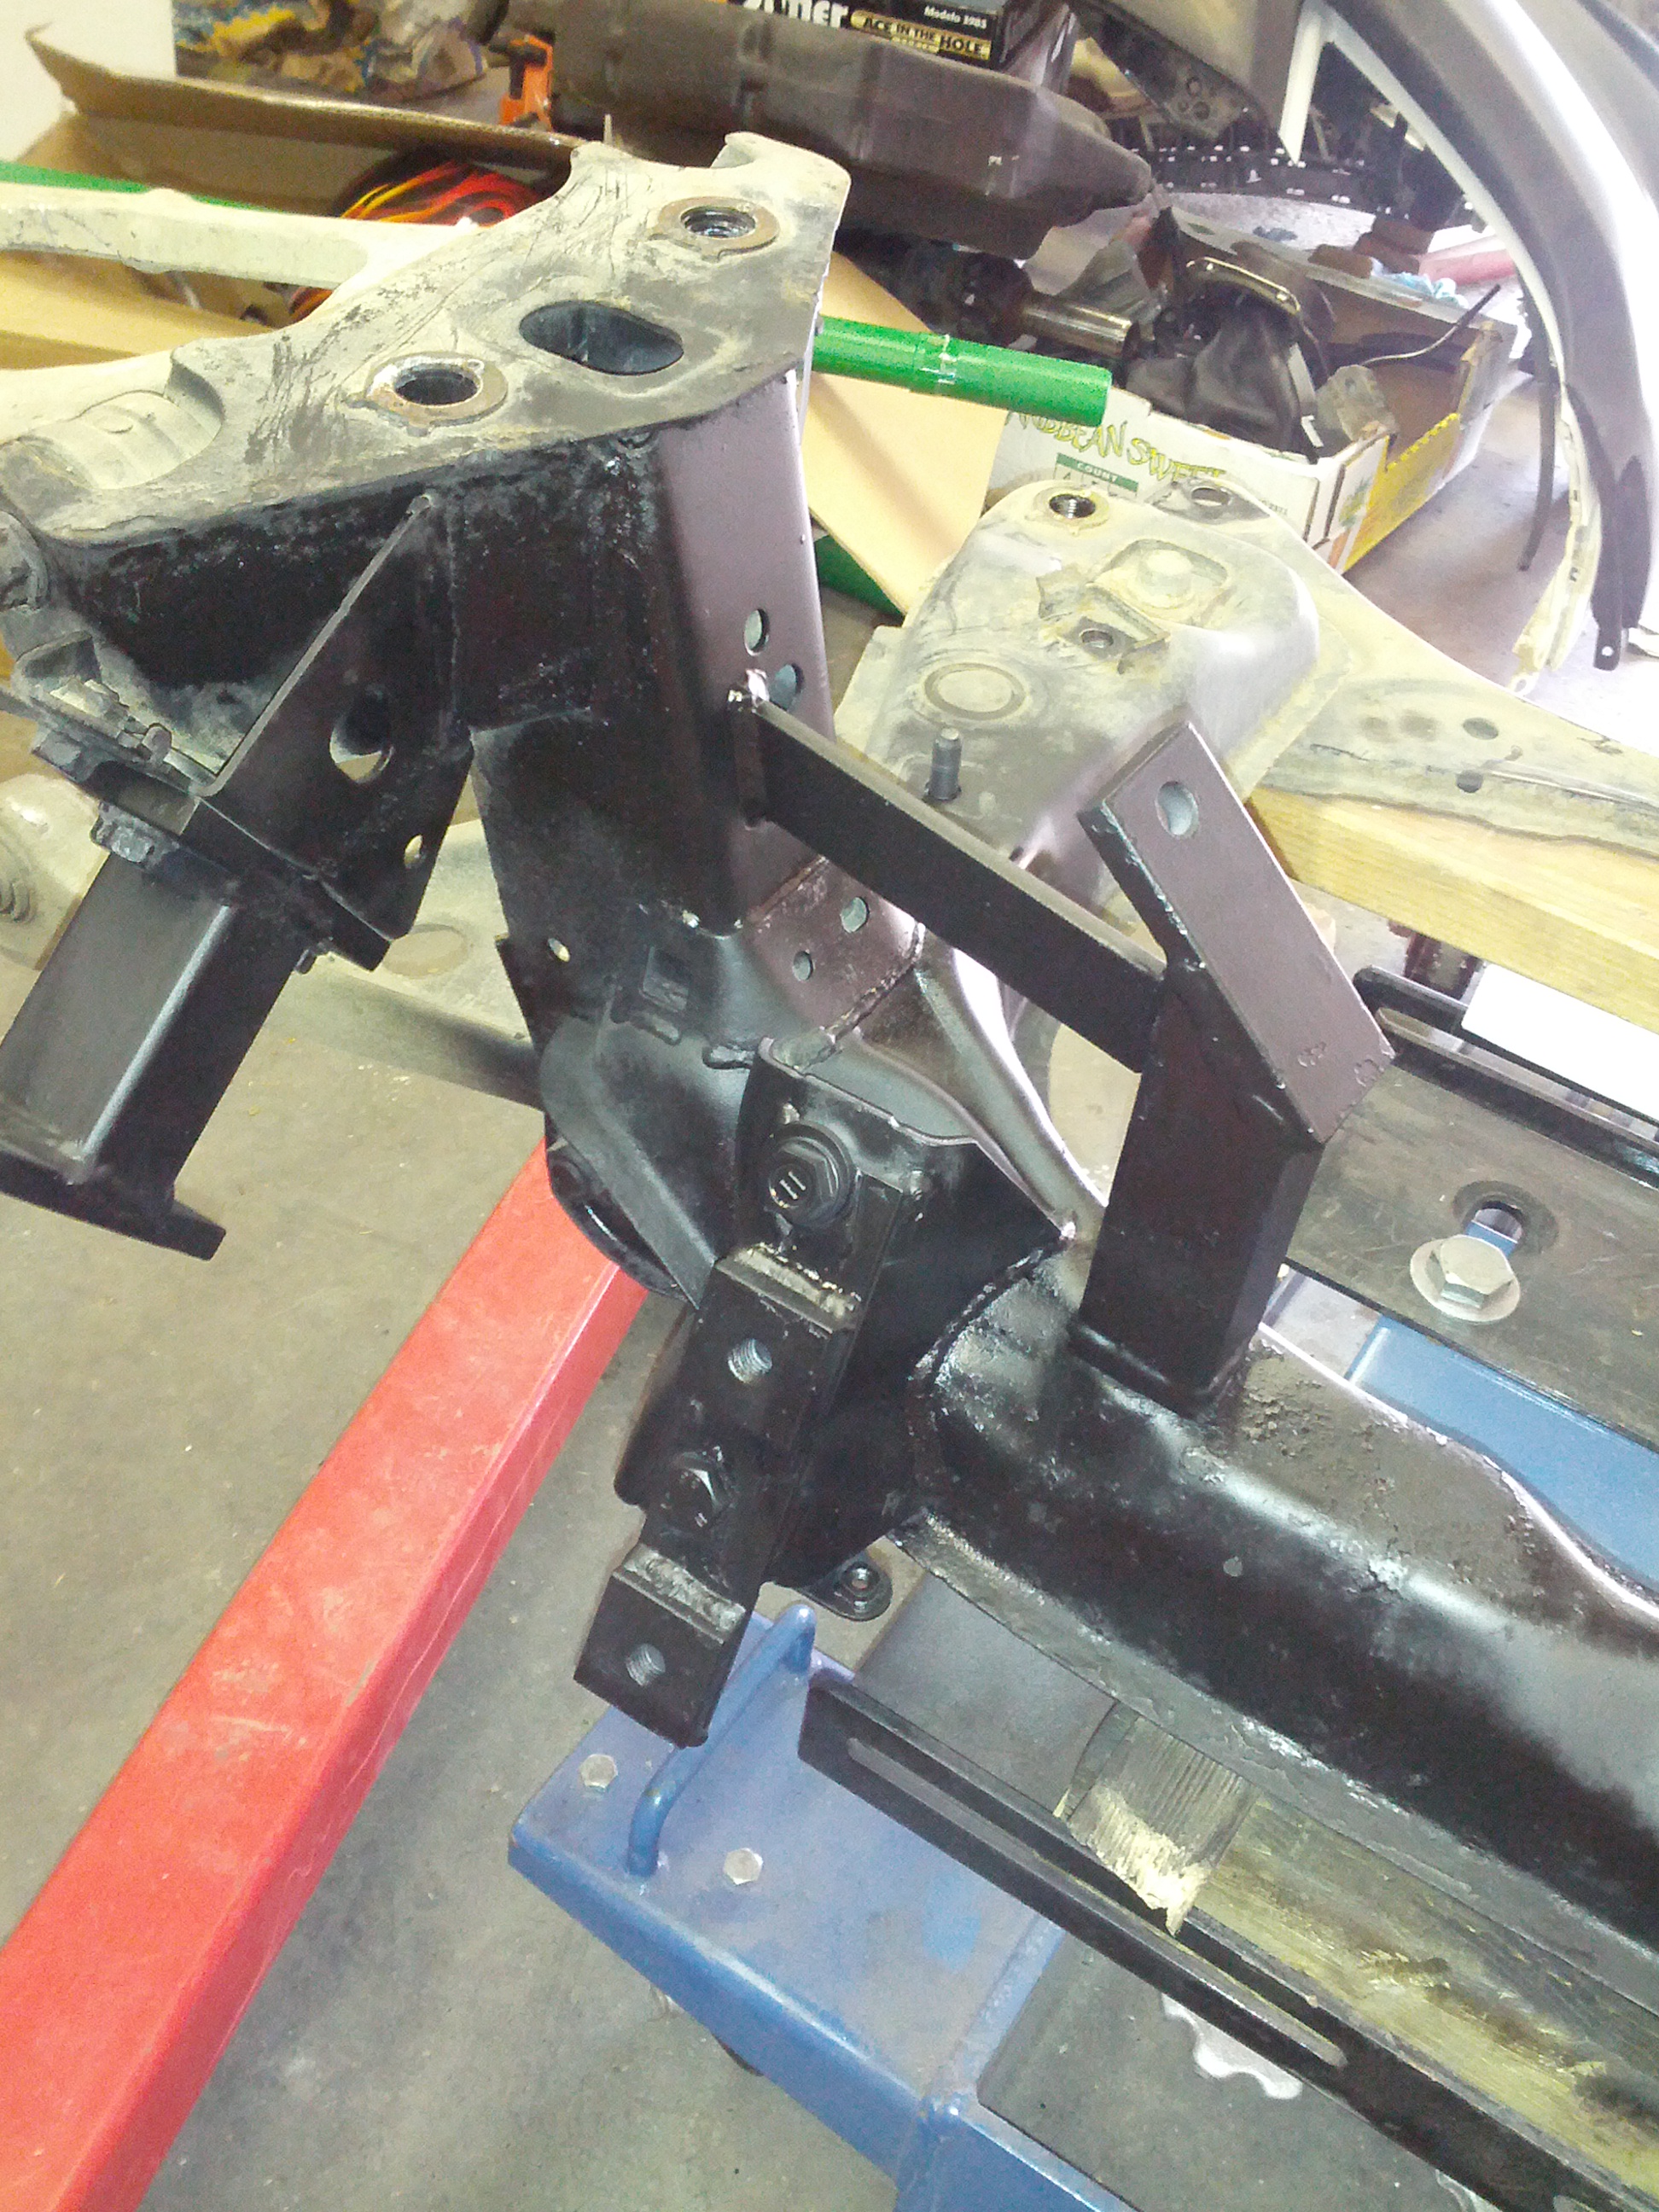
Using the pieces from LS1RX8 I modified the subframe without needing to test fit. The vertical pieces are part of the kit, the rest is welded up for reinforcement.

The rest of the mods are not well seen, include mounting points to drop the EPS rack and to relocate the front sway bar.
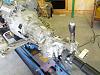
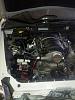
Engine mounted on the modified subframe:
Time for test fit and figuring out a transmission mount and shifter location...
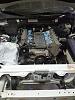
Pretty easy fit without accessories, cooling, exhaust, etc., etc.
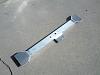
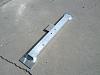
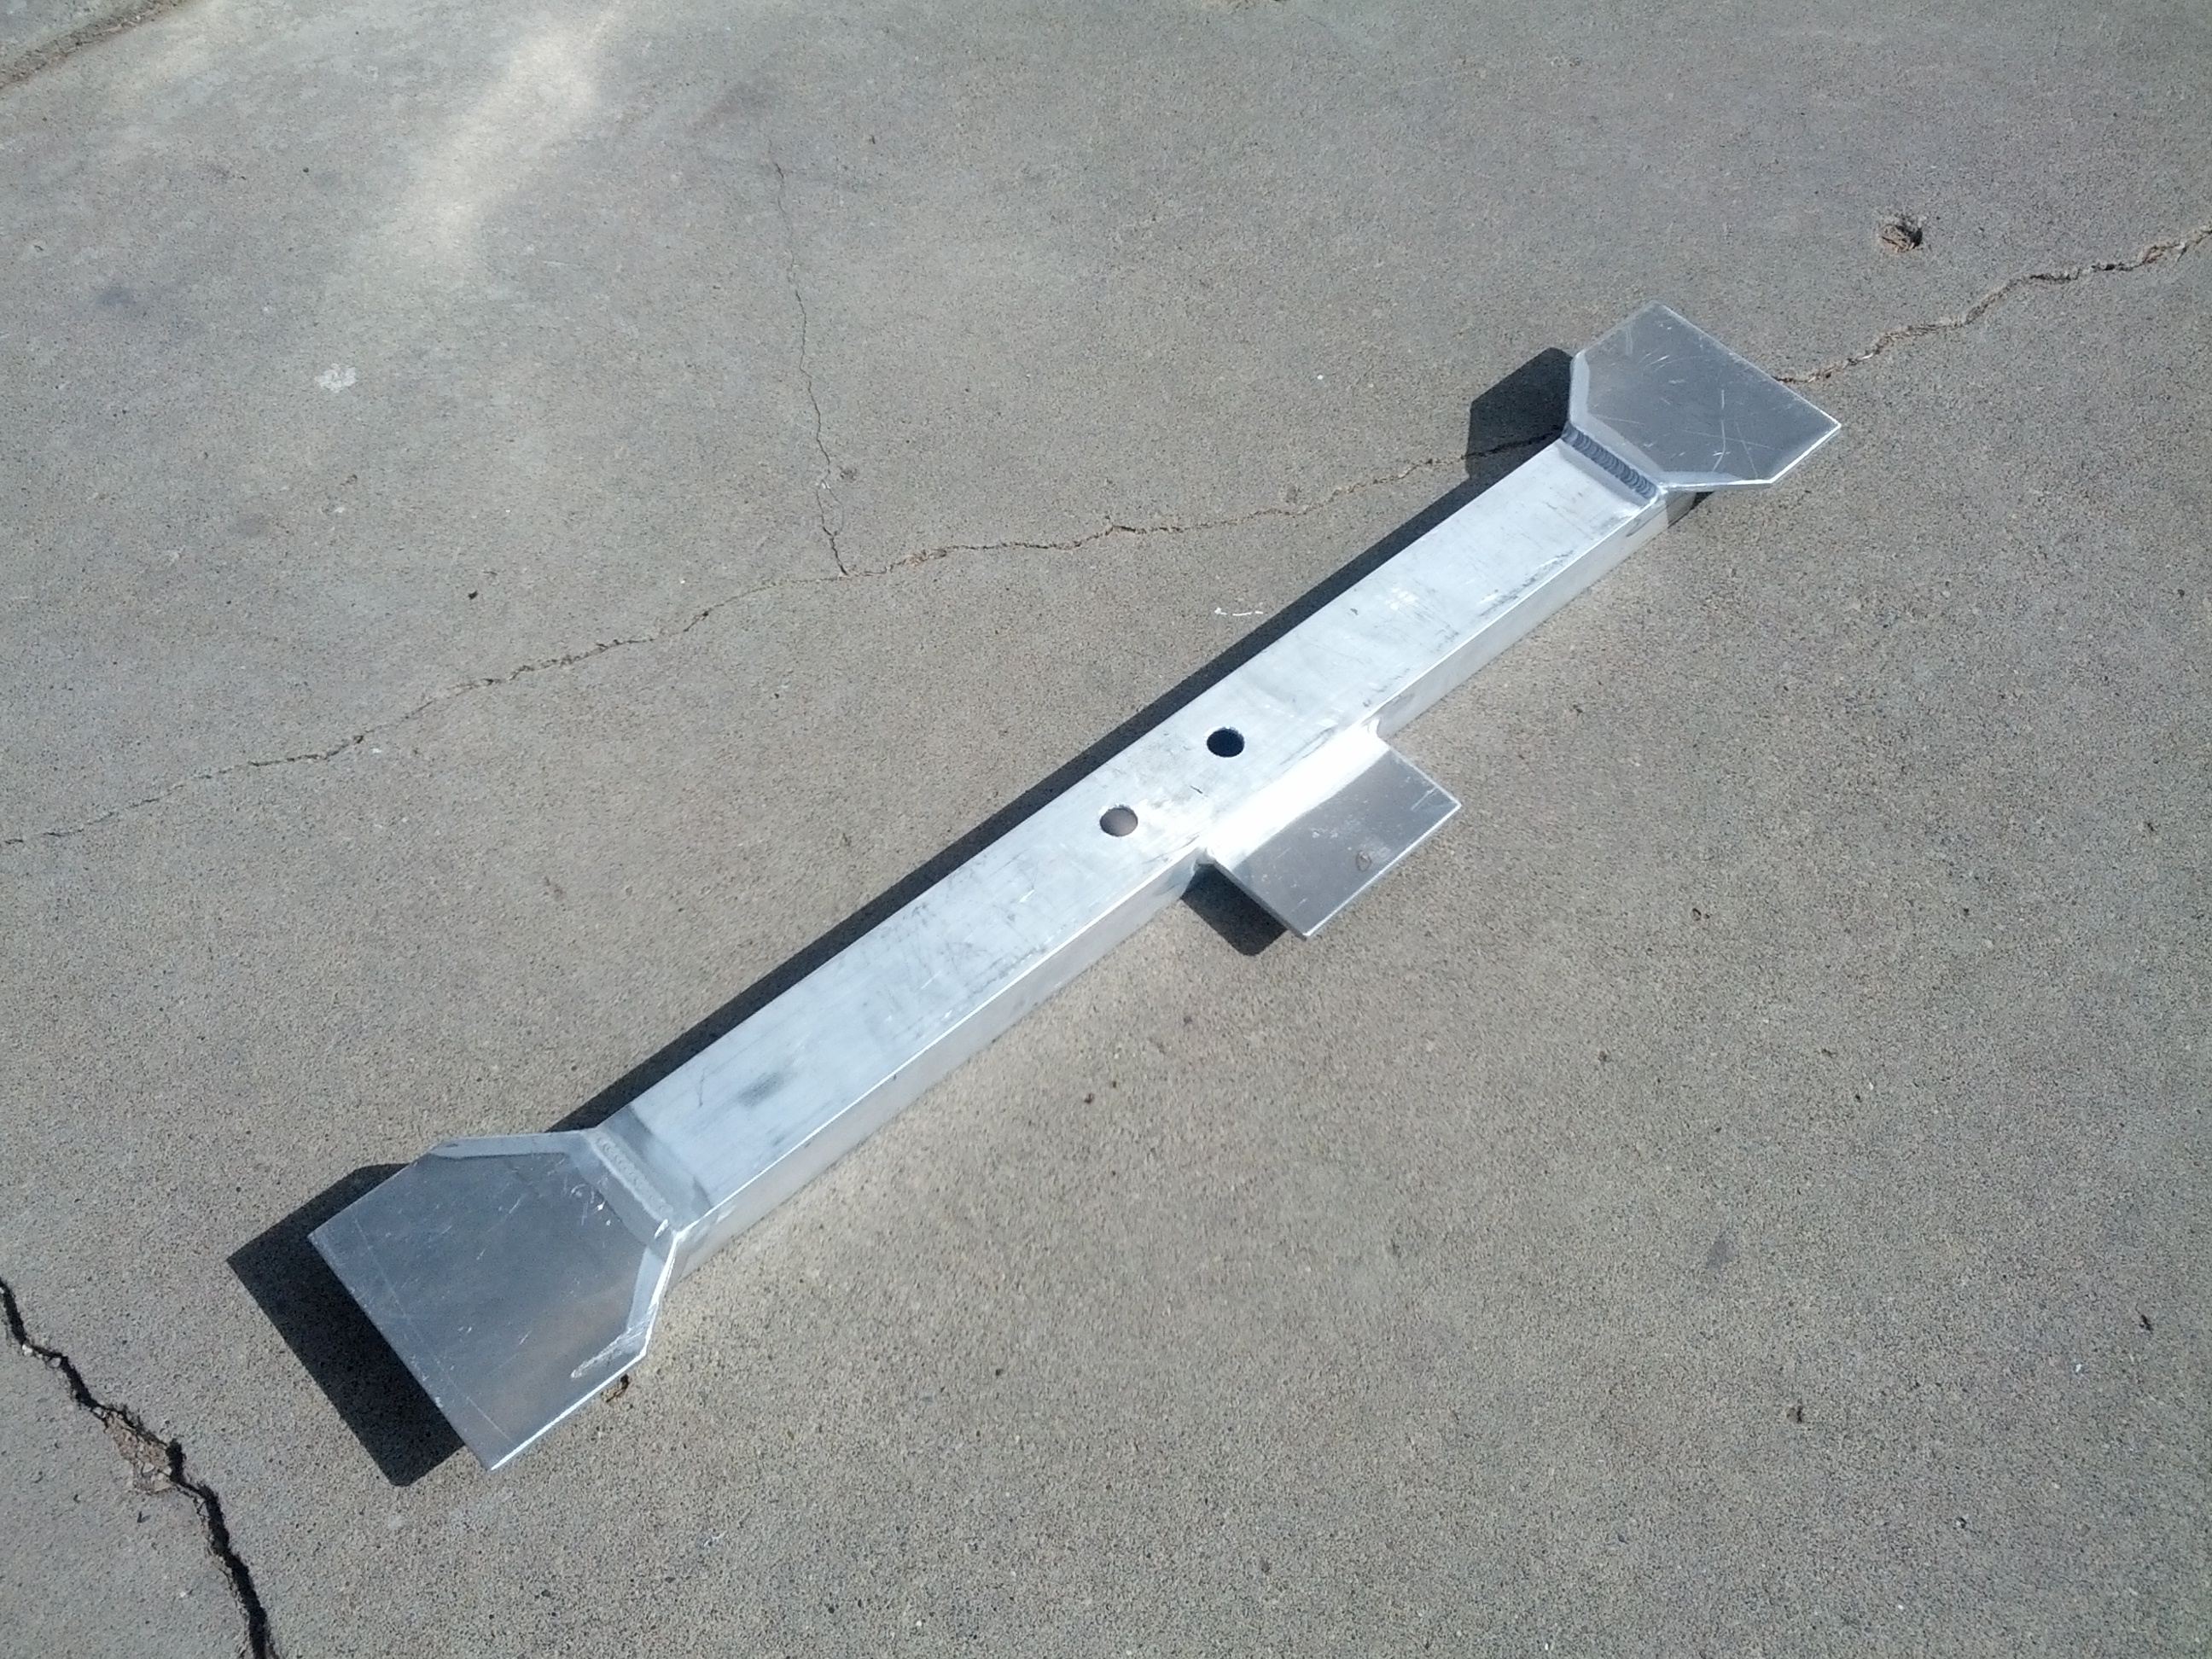
After some careful measurements and weighing out my options I have decided to make a lightweight, strong aluminum crossbar to span the frame rails and to mount the transmission onto. It also has a mounting point for the modified differential torque arm attachment.
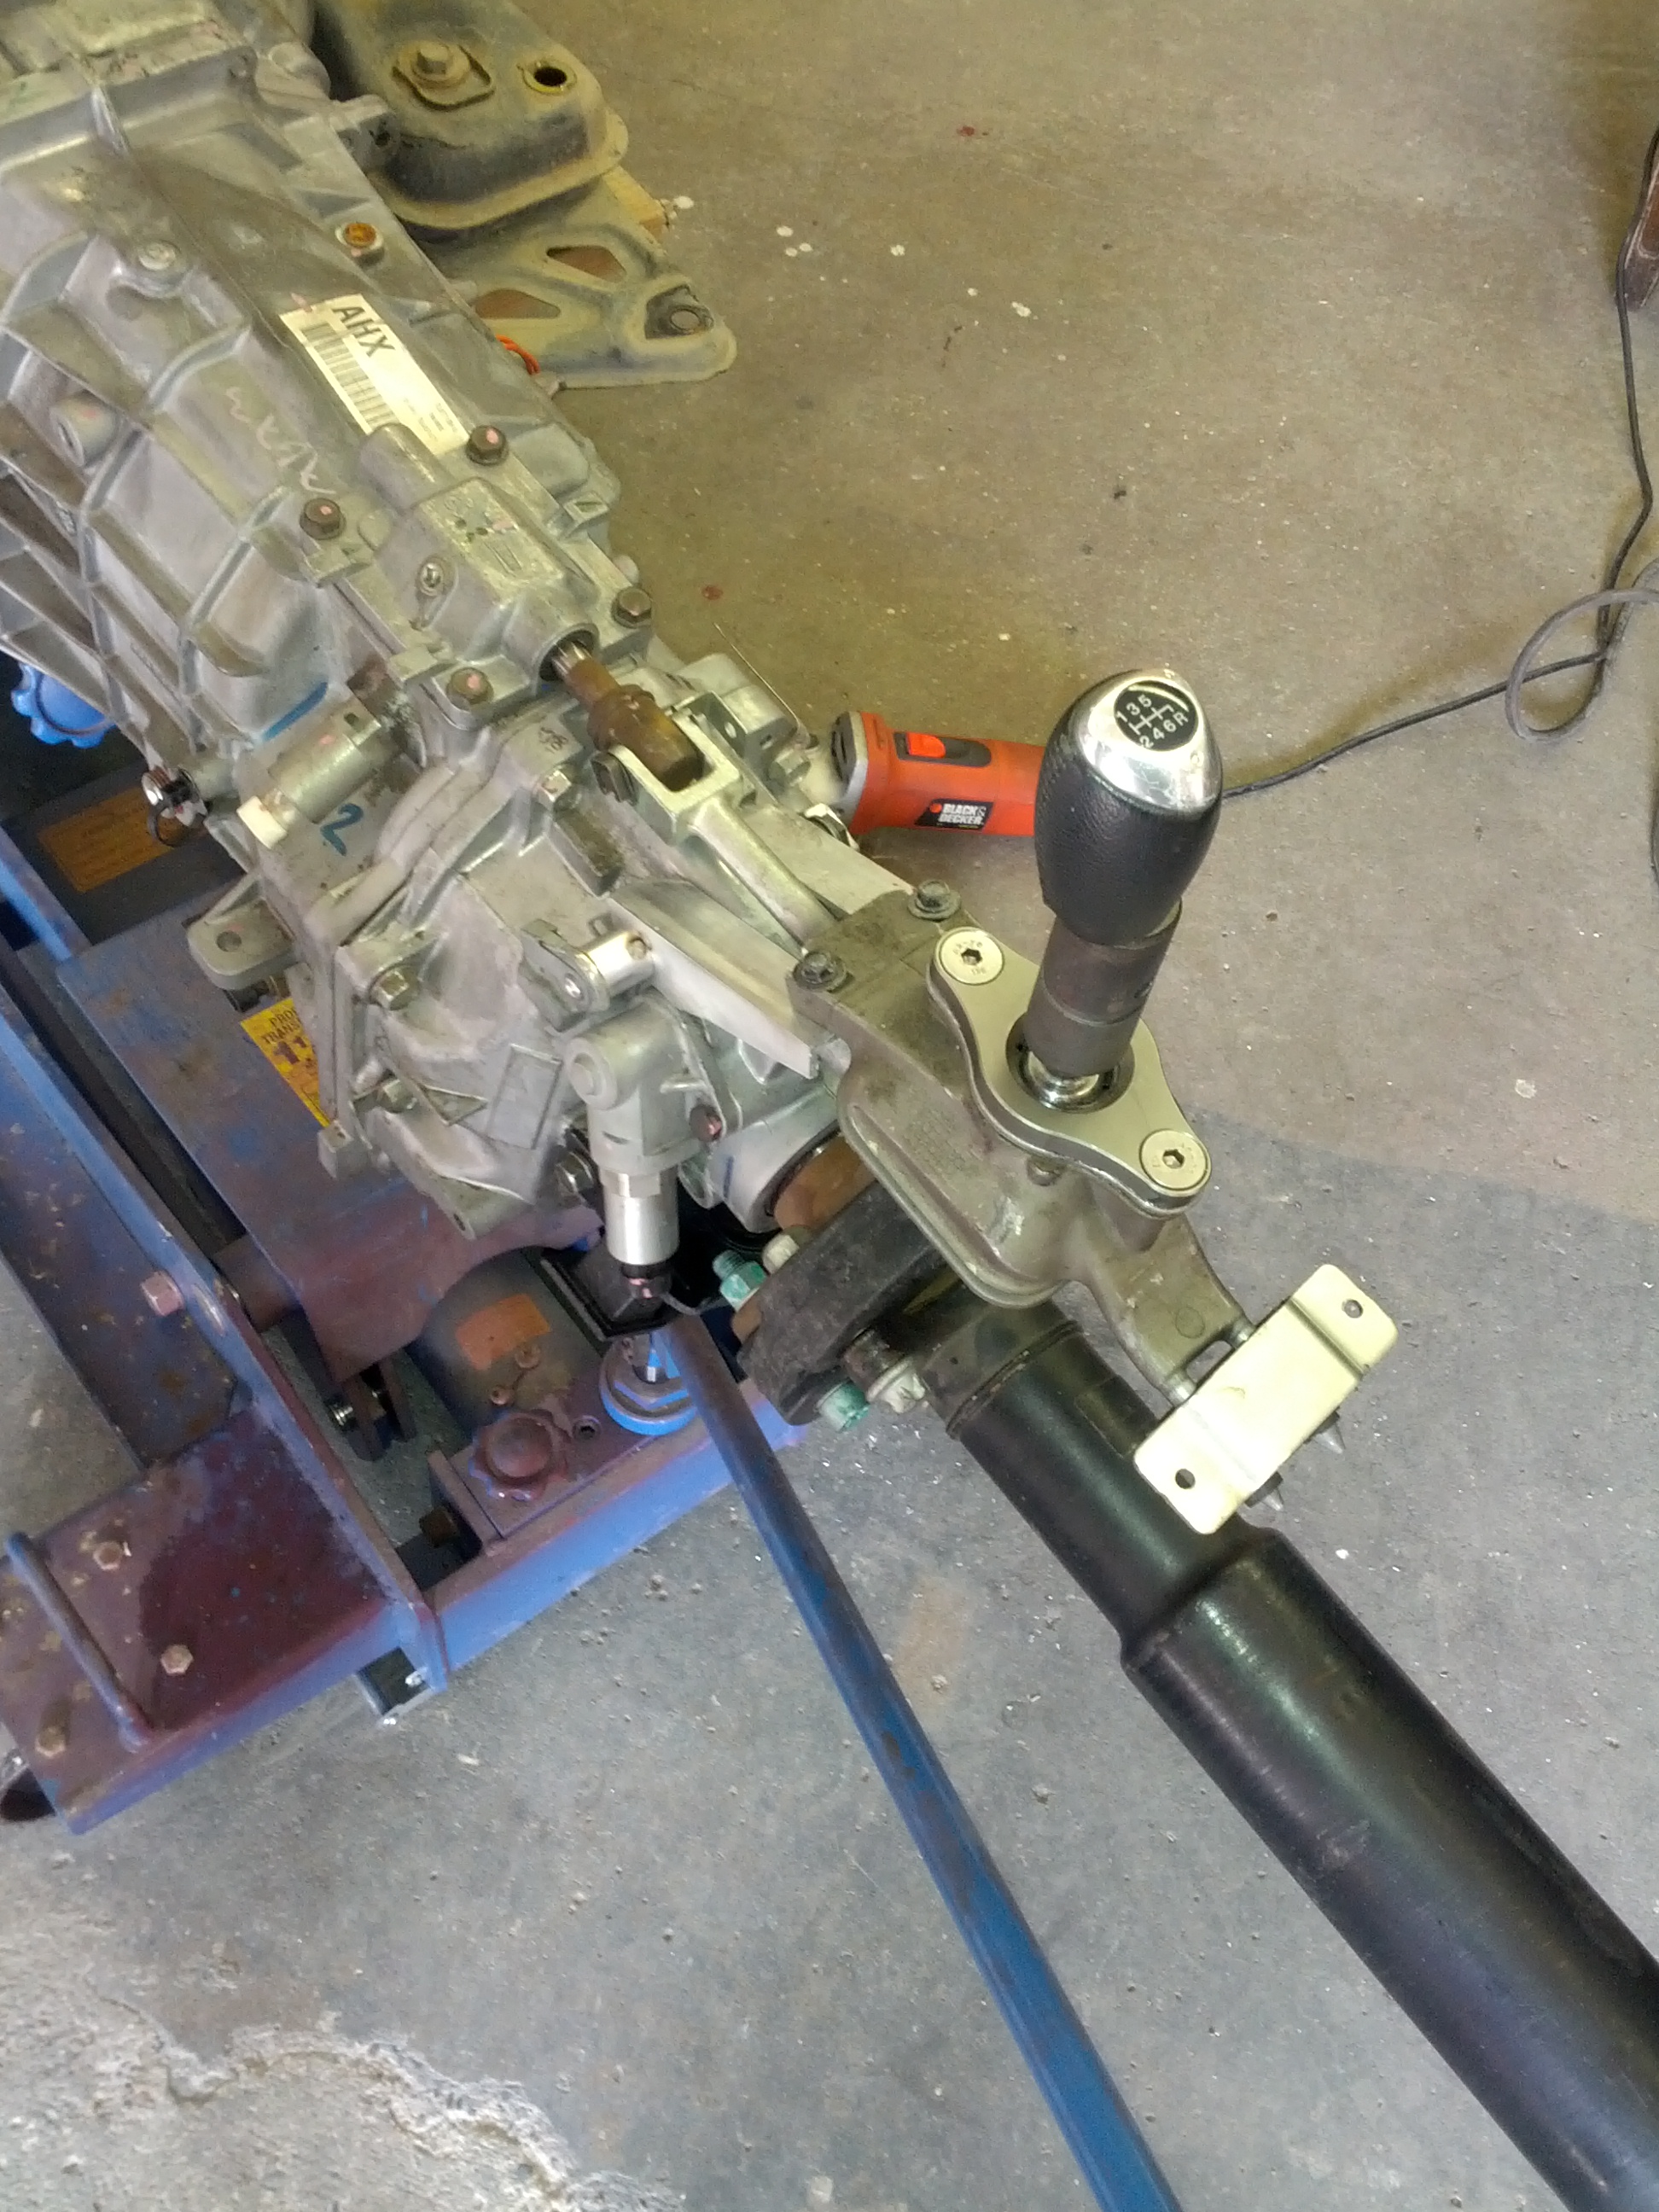
There is not too many advantages to going with the TR6060 over the T56, certainly there are a few drawbacks or challenges if you will.
There however is one advantage... the shifter linkage is external and by modifying the bracket and length of the actual linkage you have room to move your shifter location. This enabled me to have the shifter in the exact spot the stock RX8 transmission would be, and thus no need to modify the tranny tunnel. I kept the RX8 rotor themed shifter as well so that the interior remains seamless.
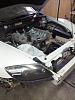
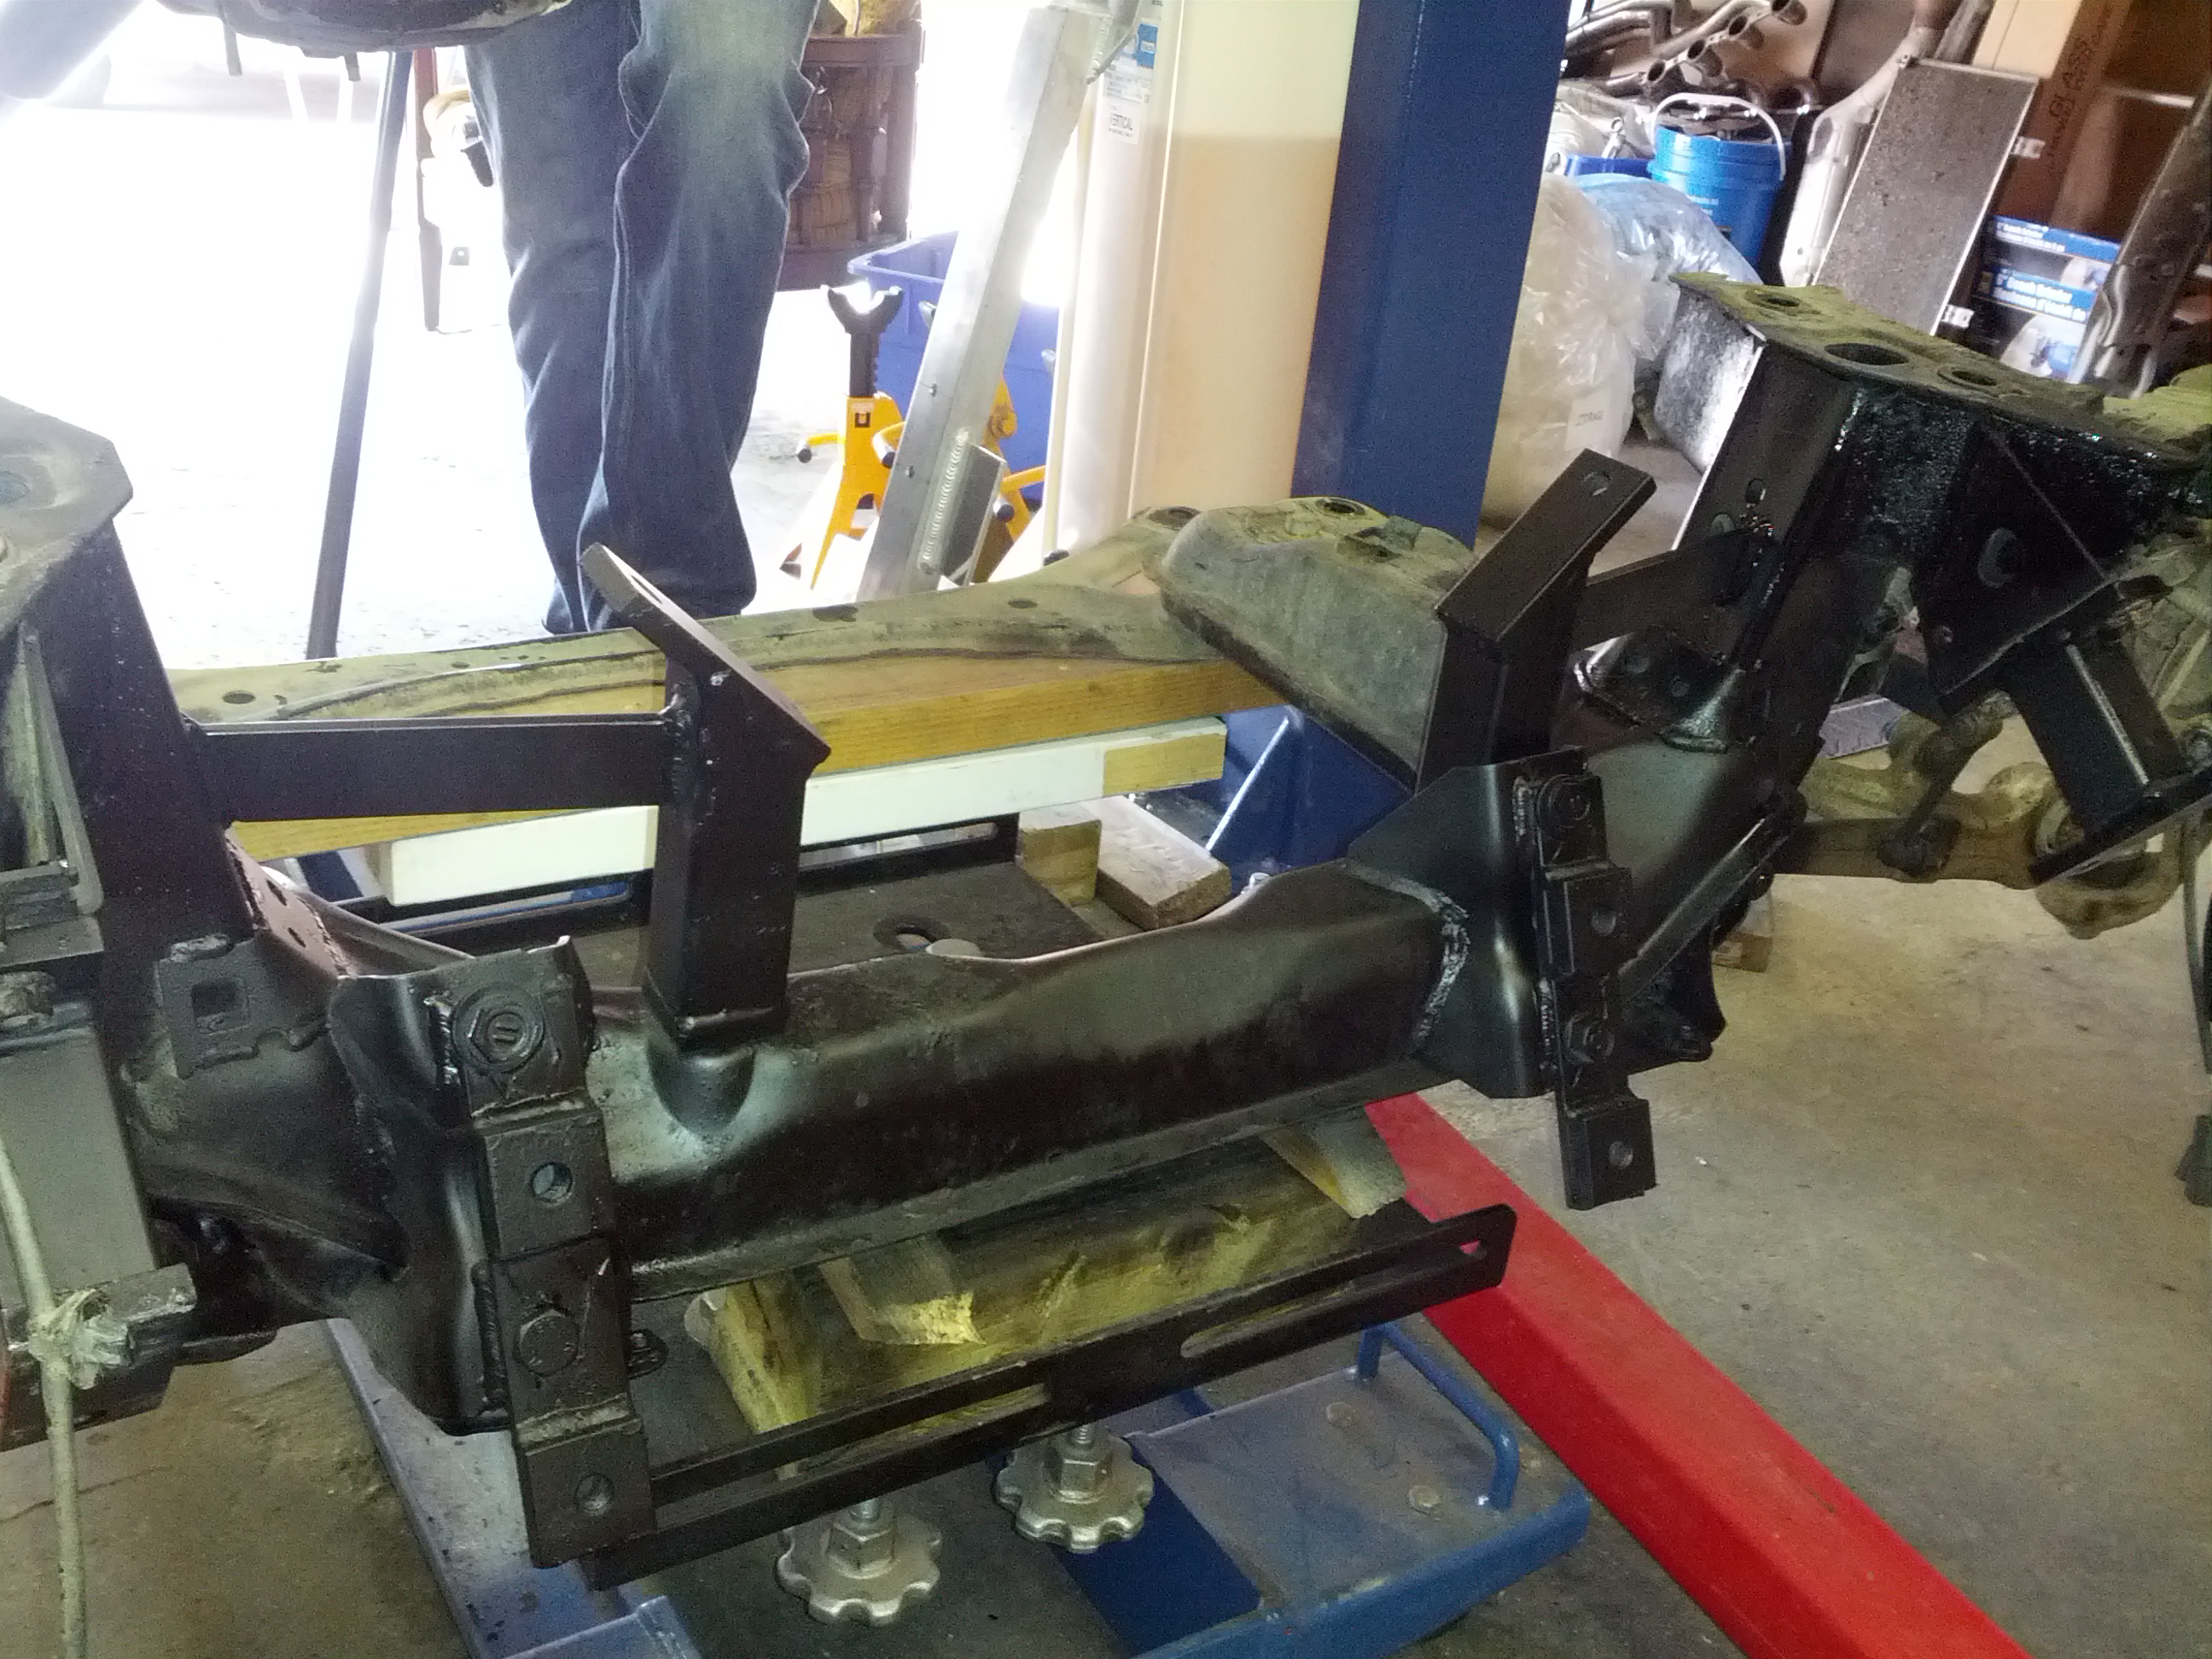
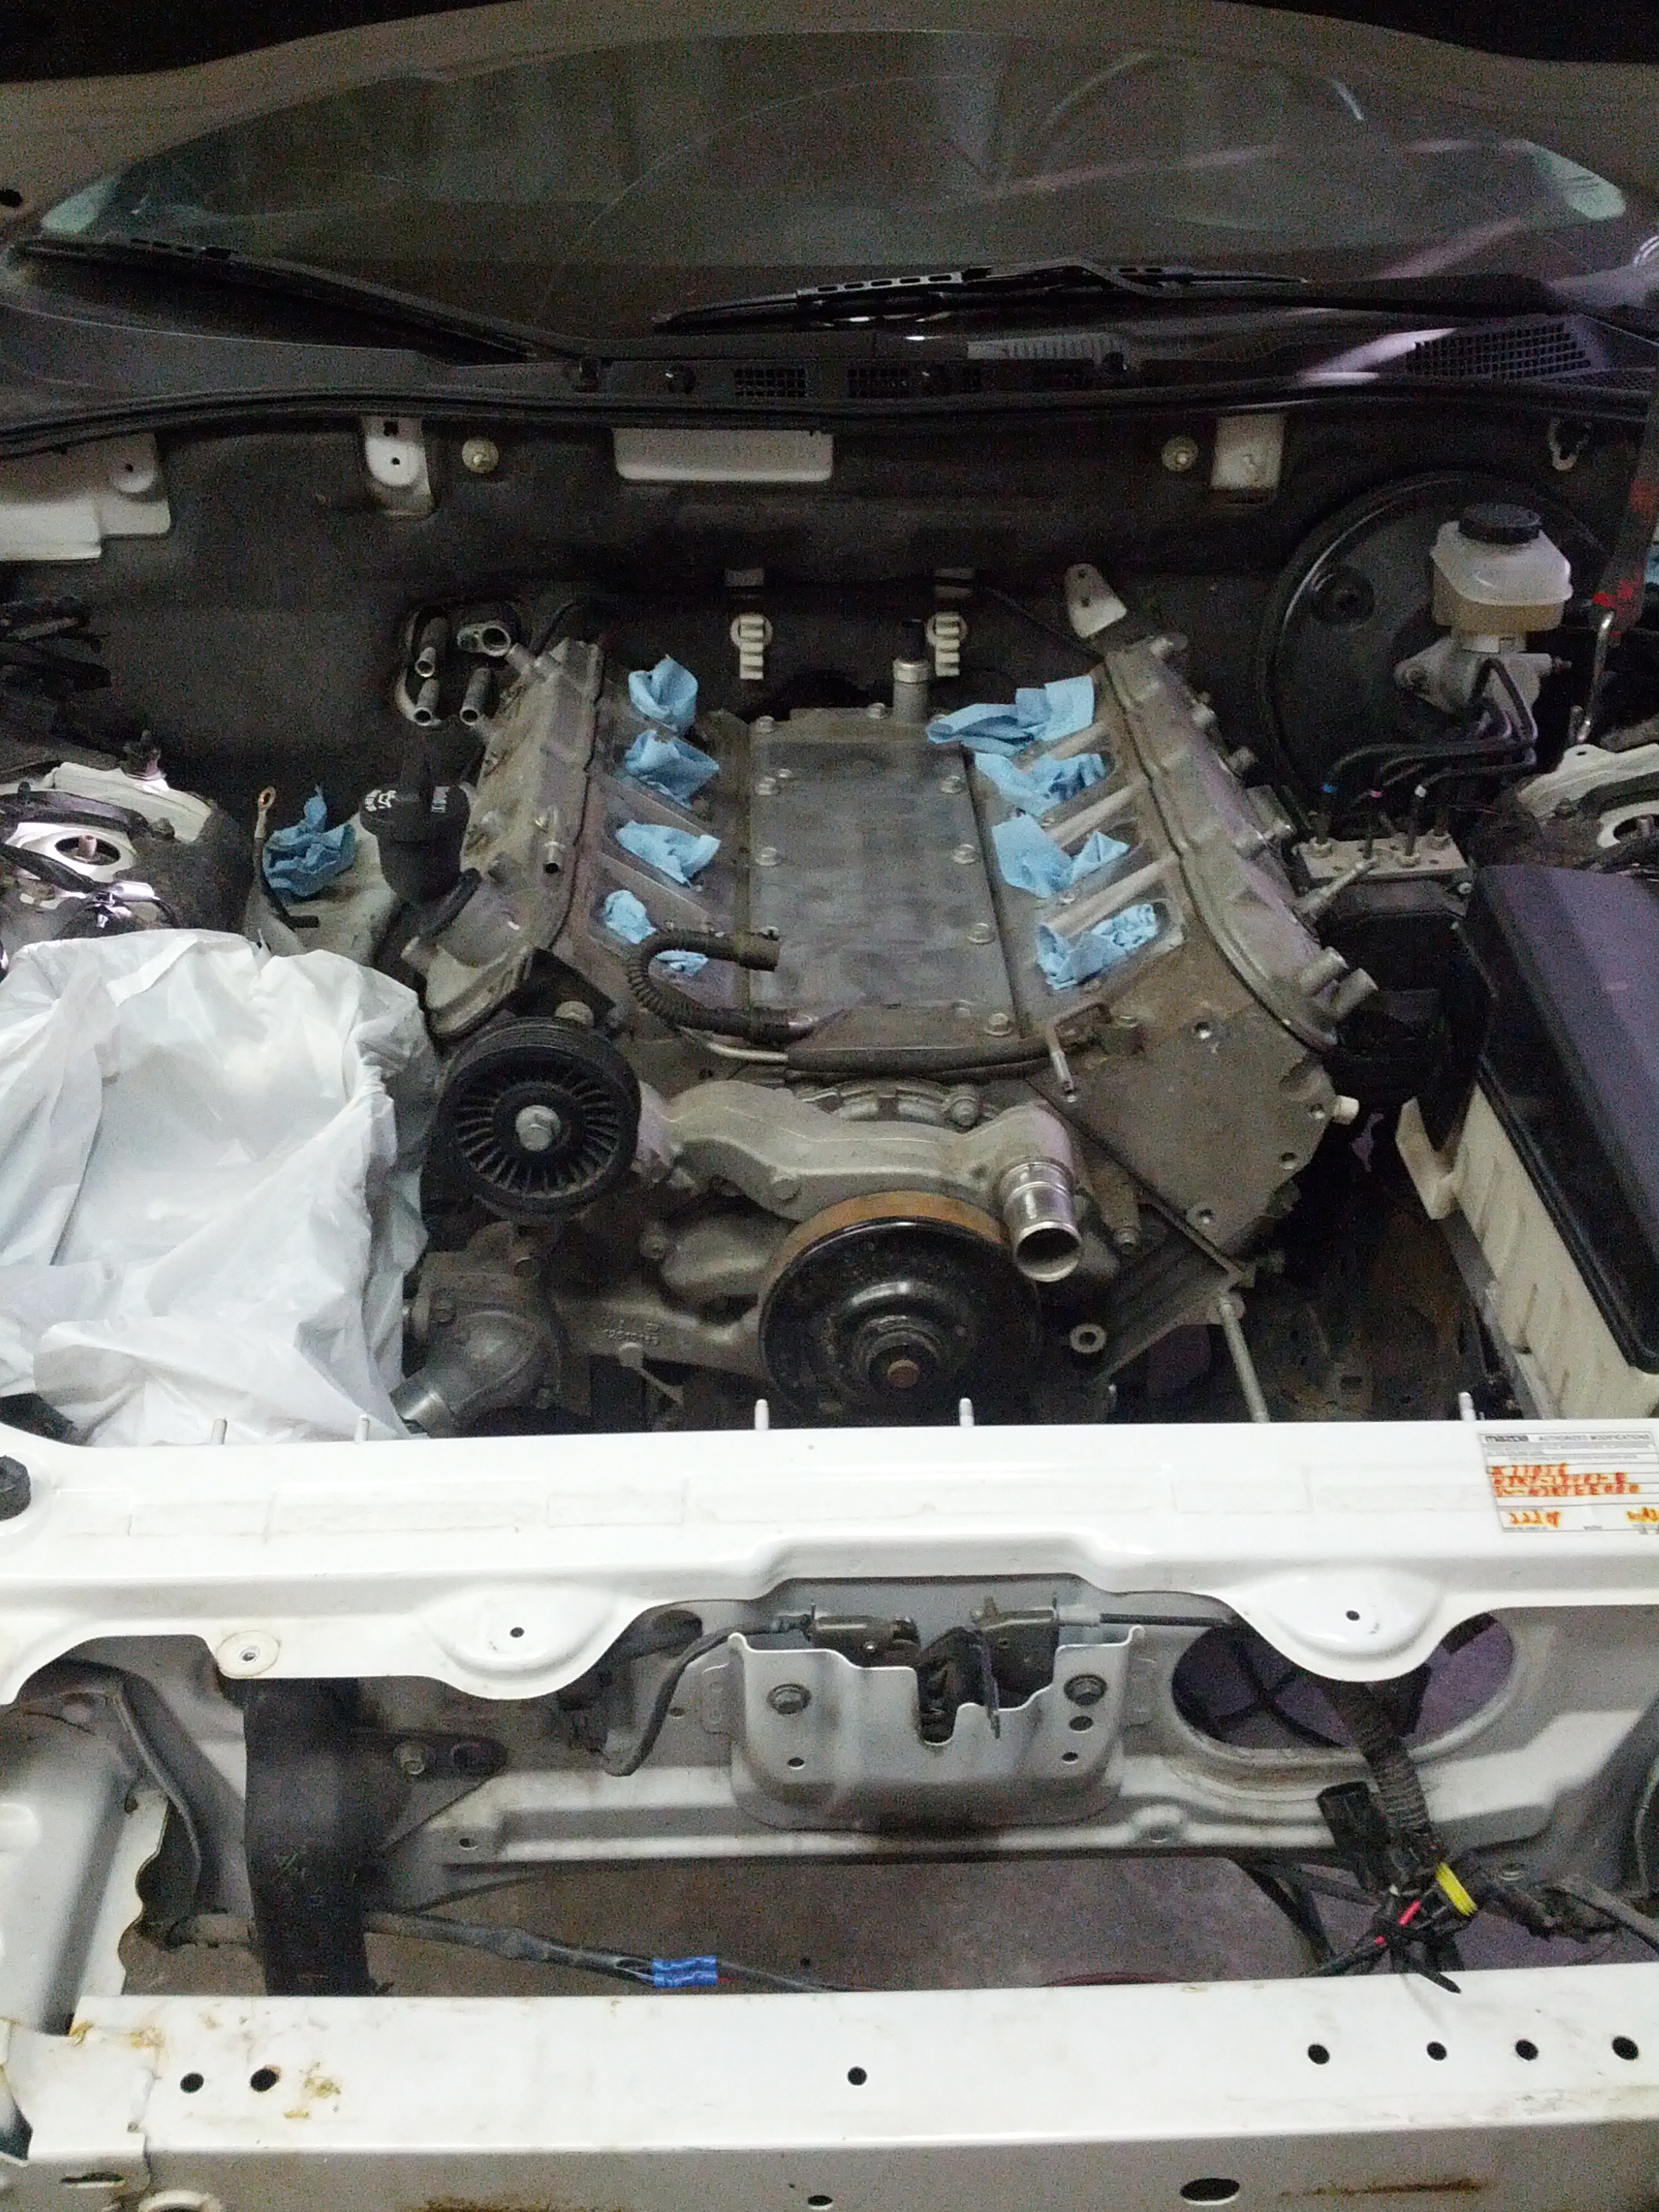
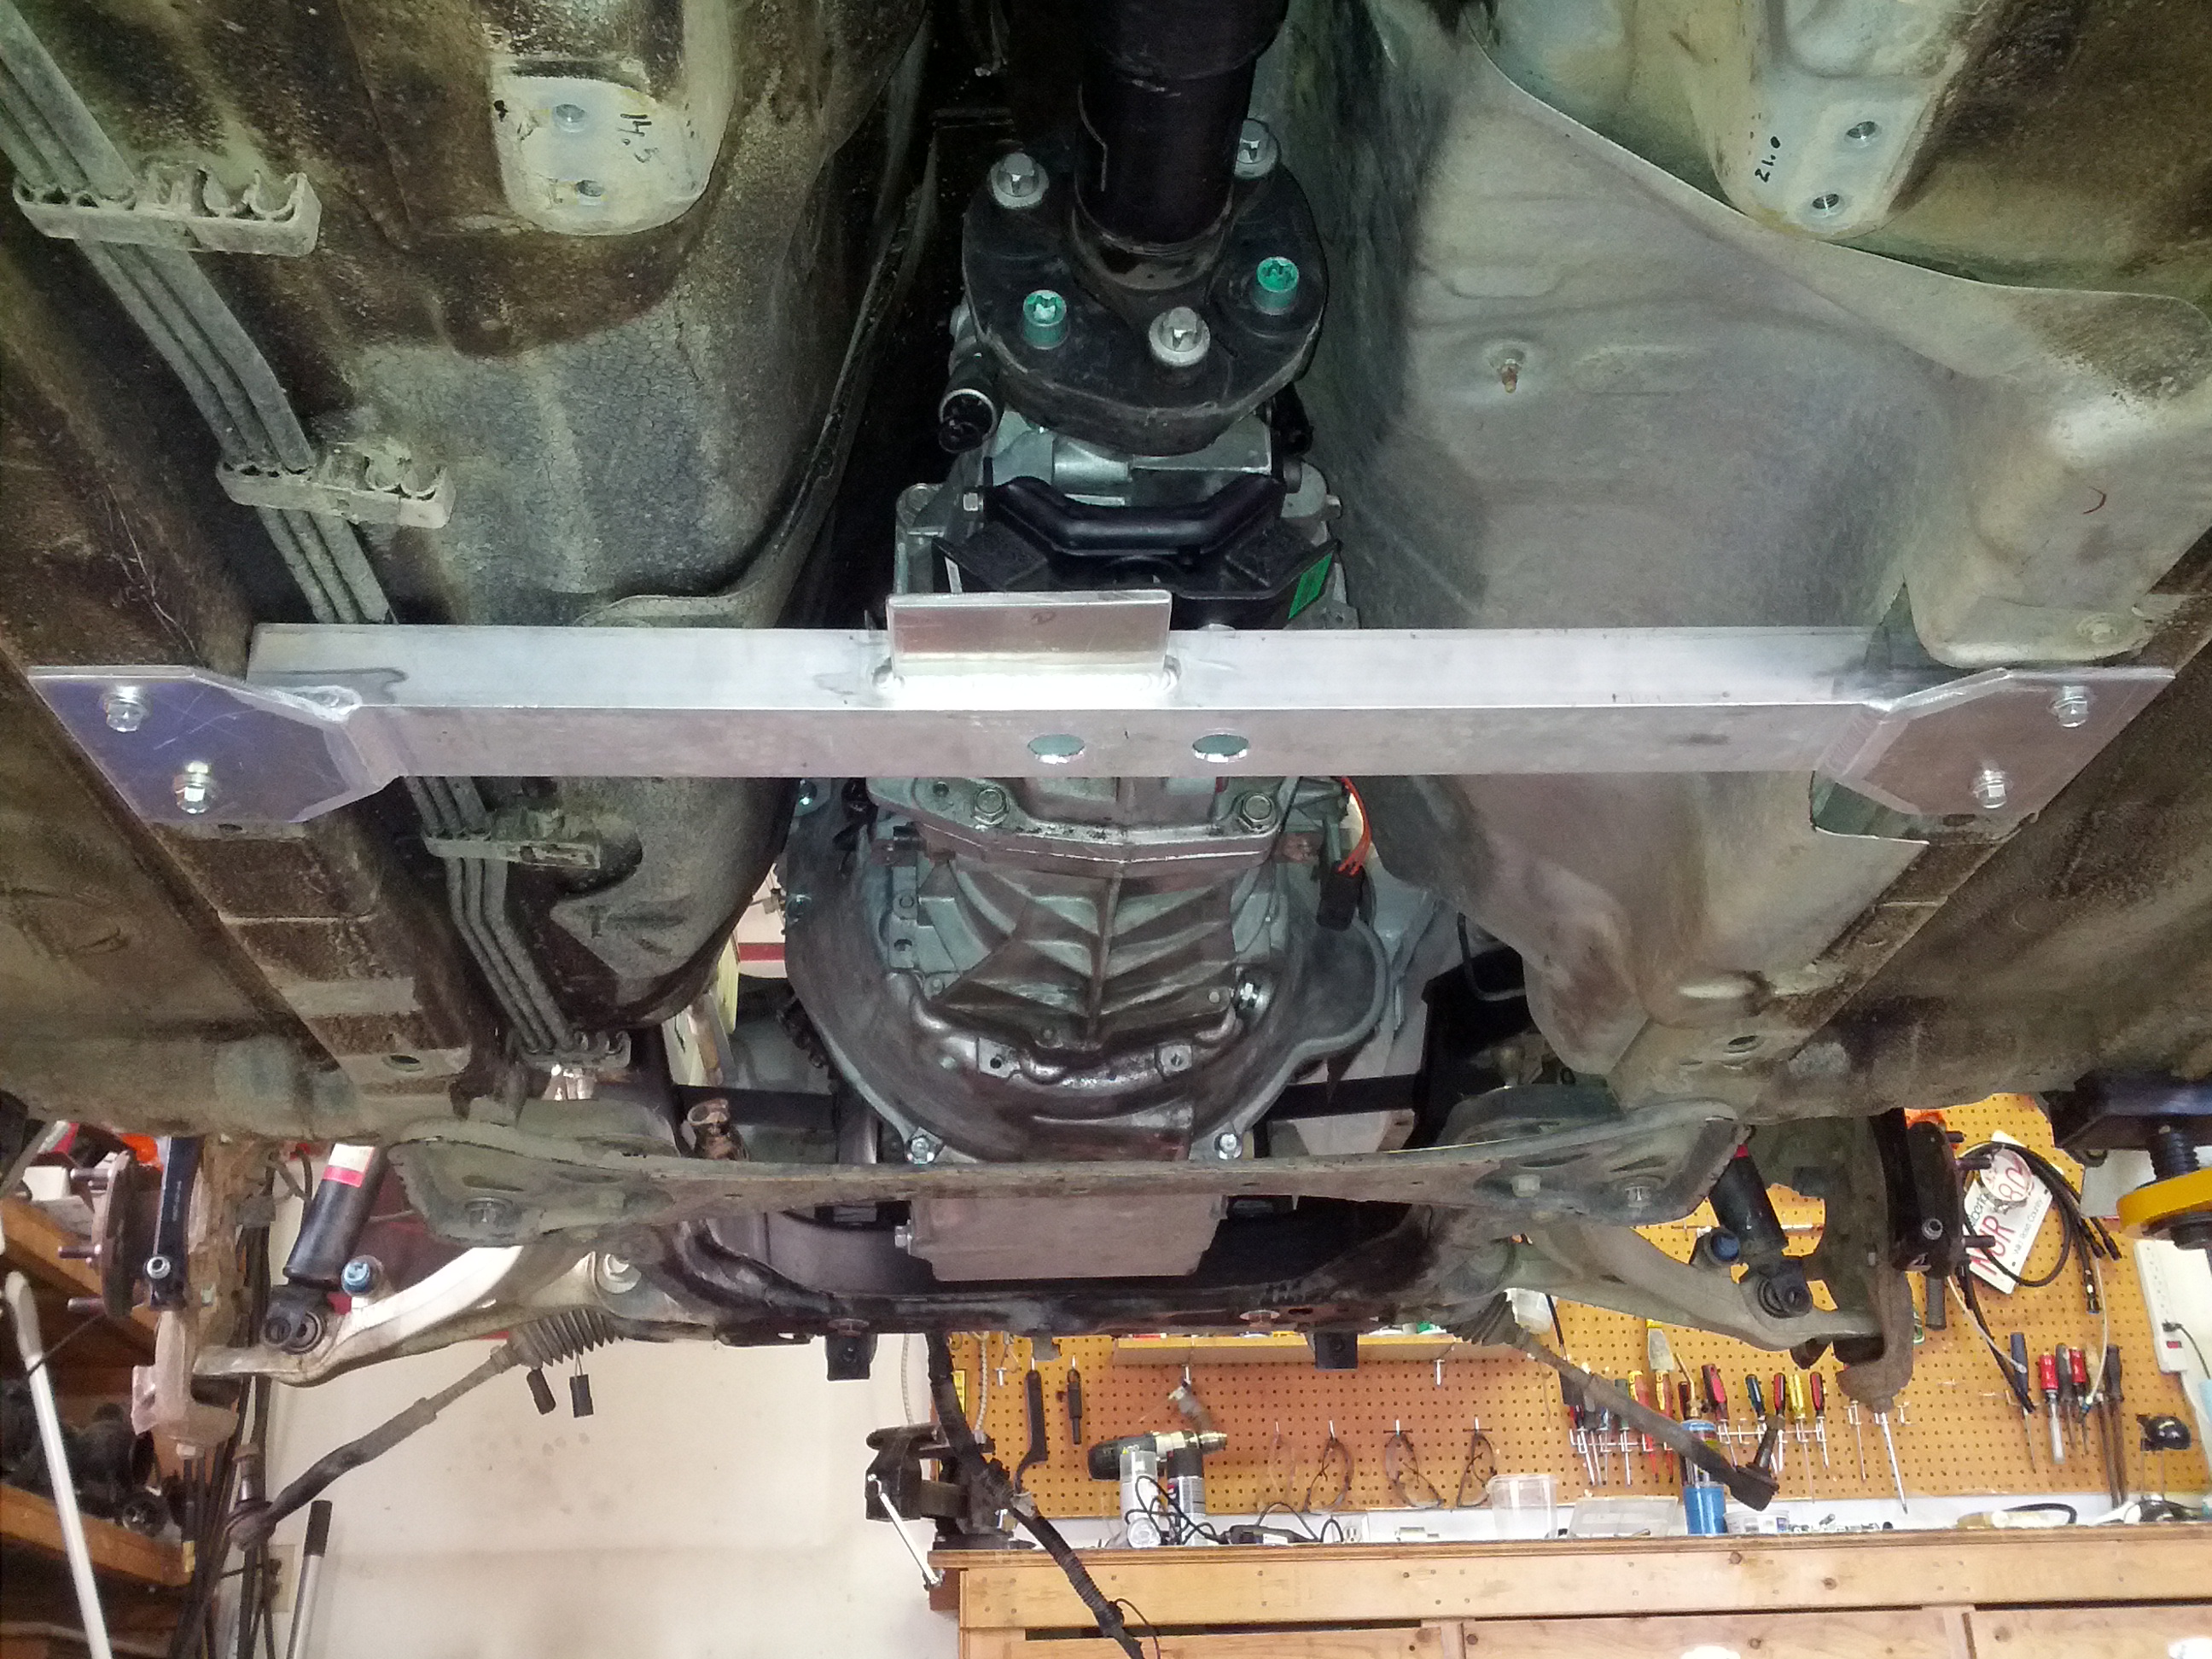
It is nice when things work out... this is what the crossmember looks like in place.
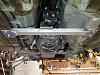
I was so proud of myself with the hardware in place, not fully realizing that the work is about to begin.

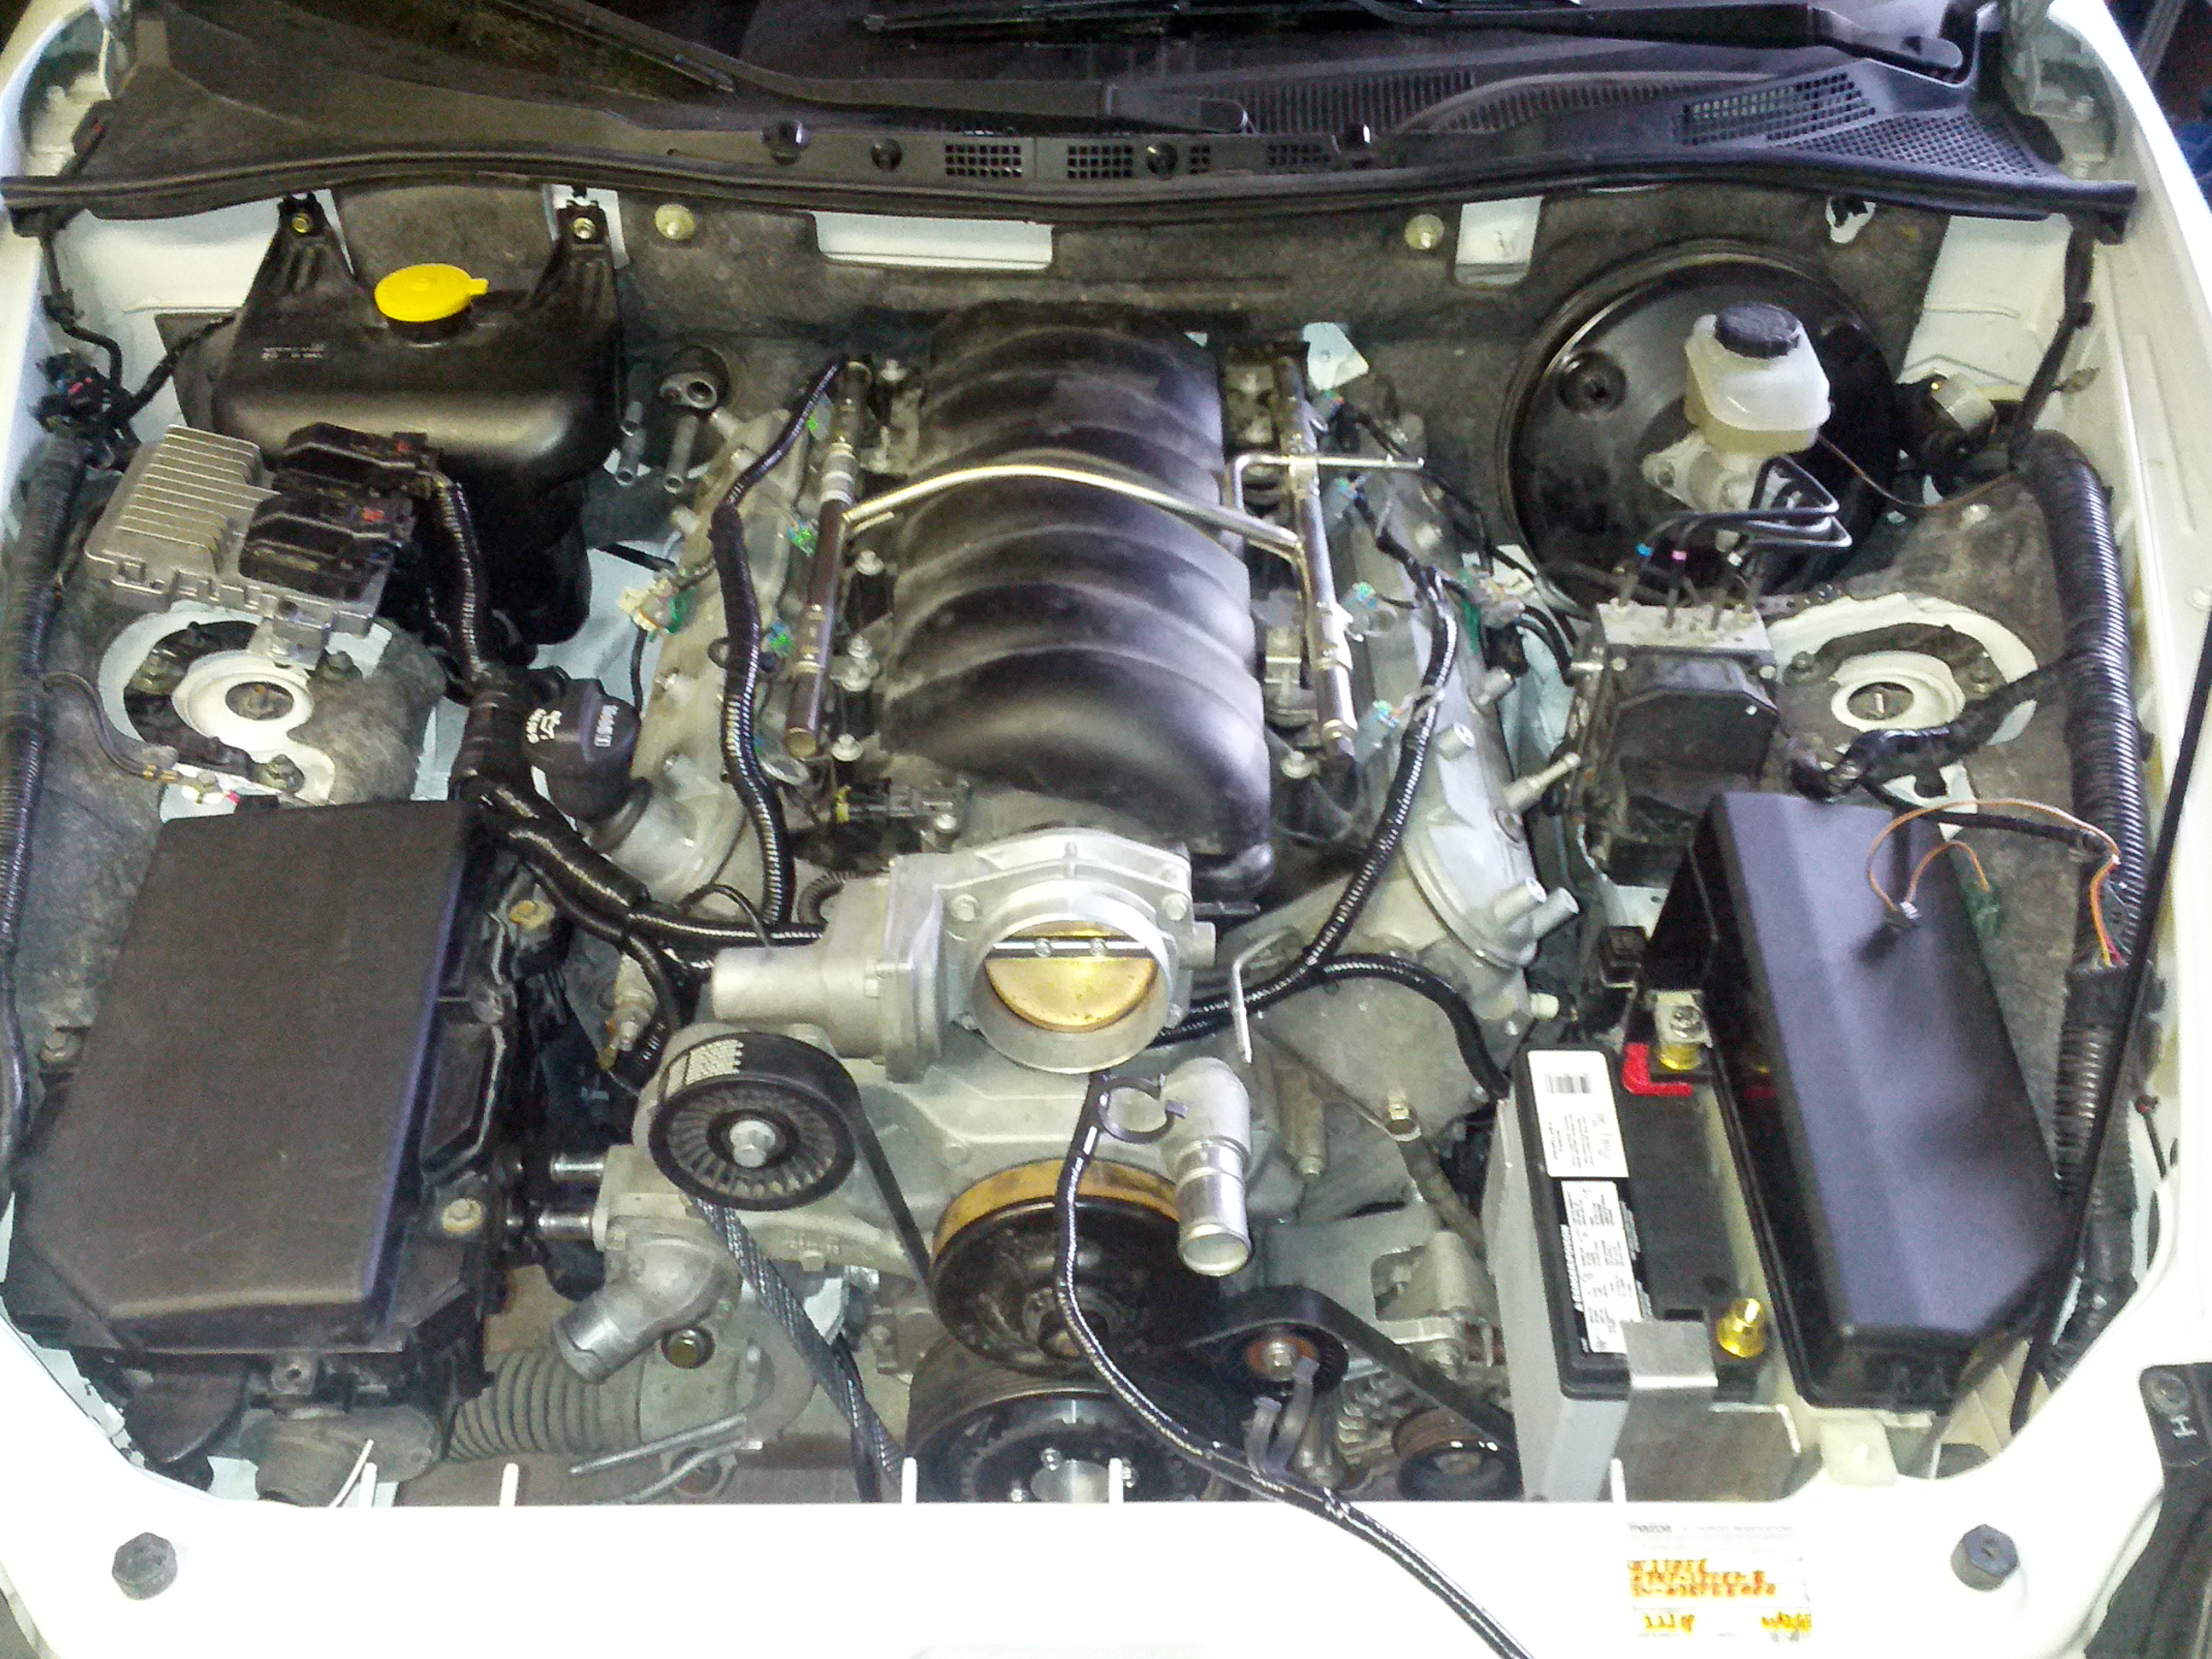
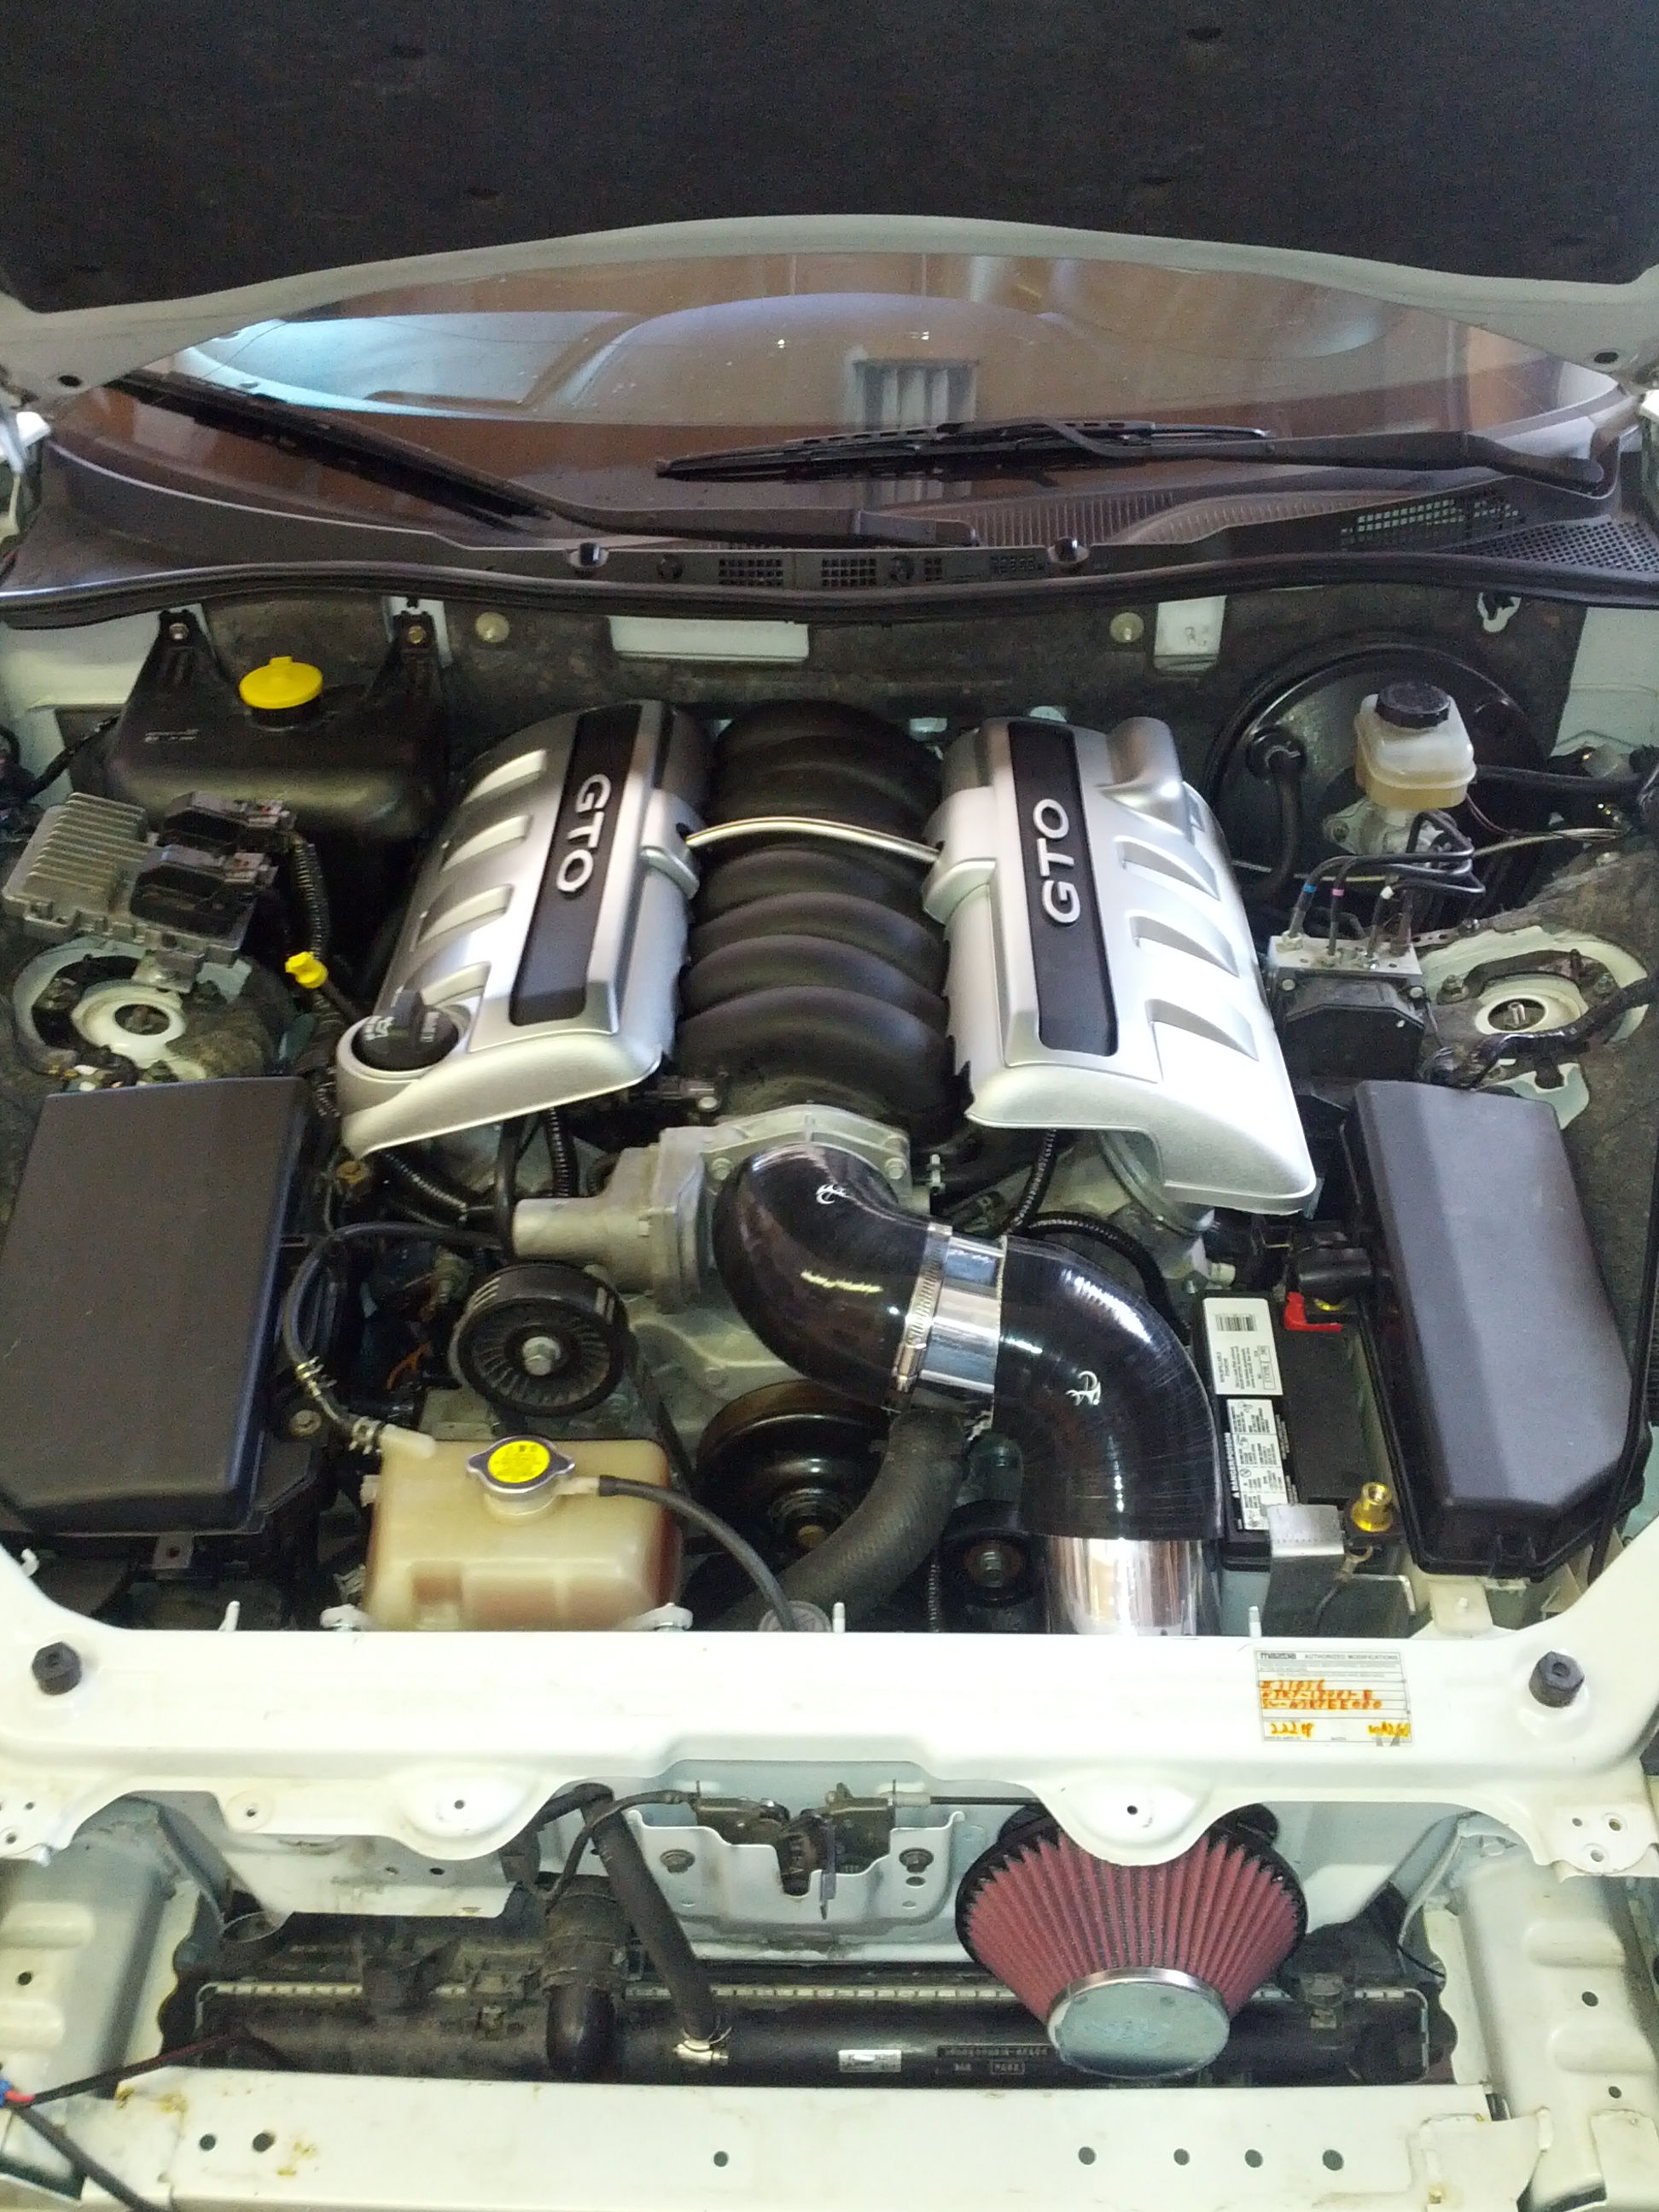
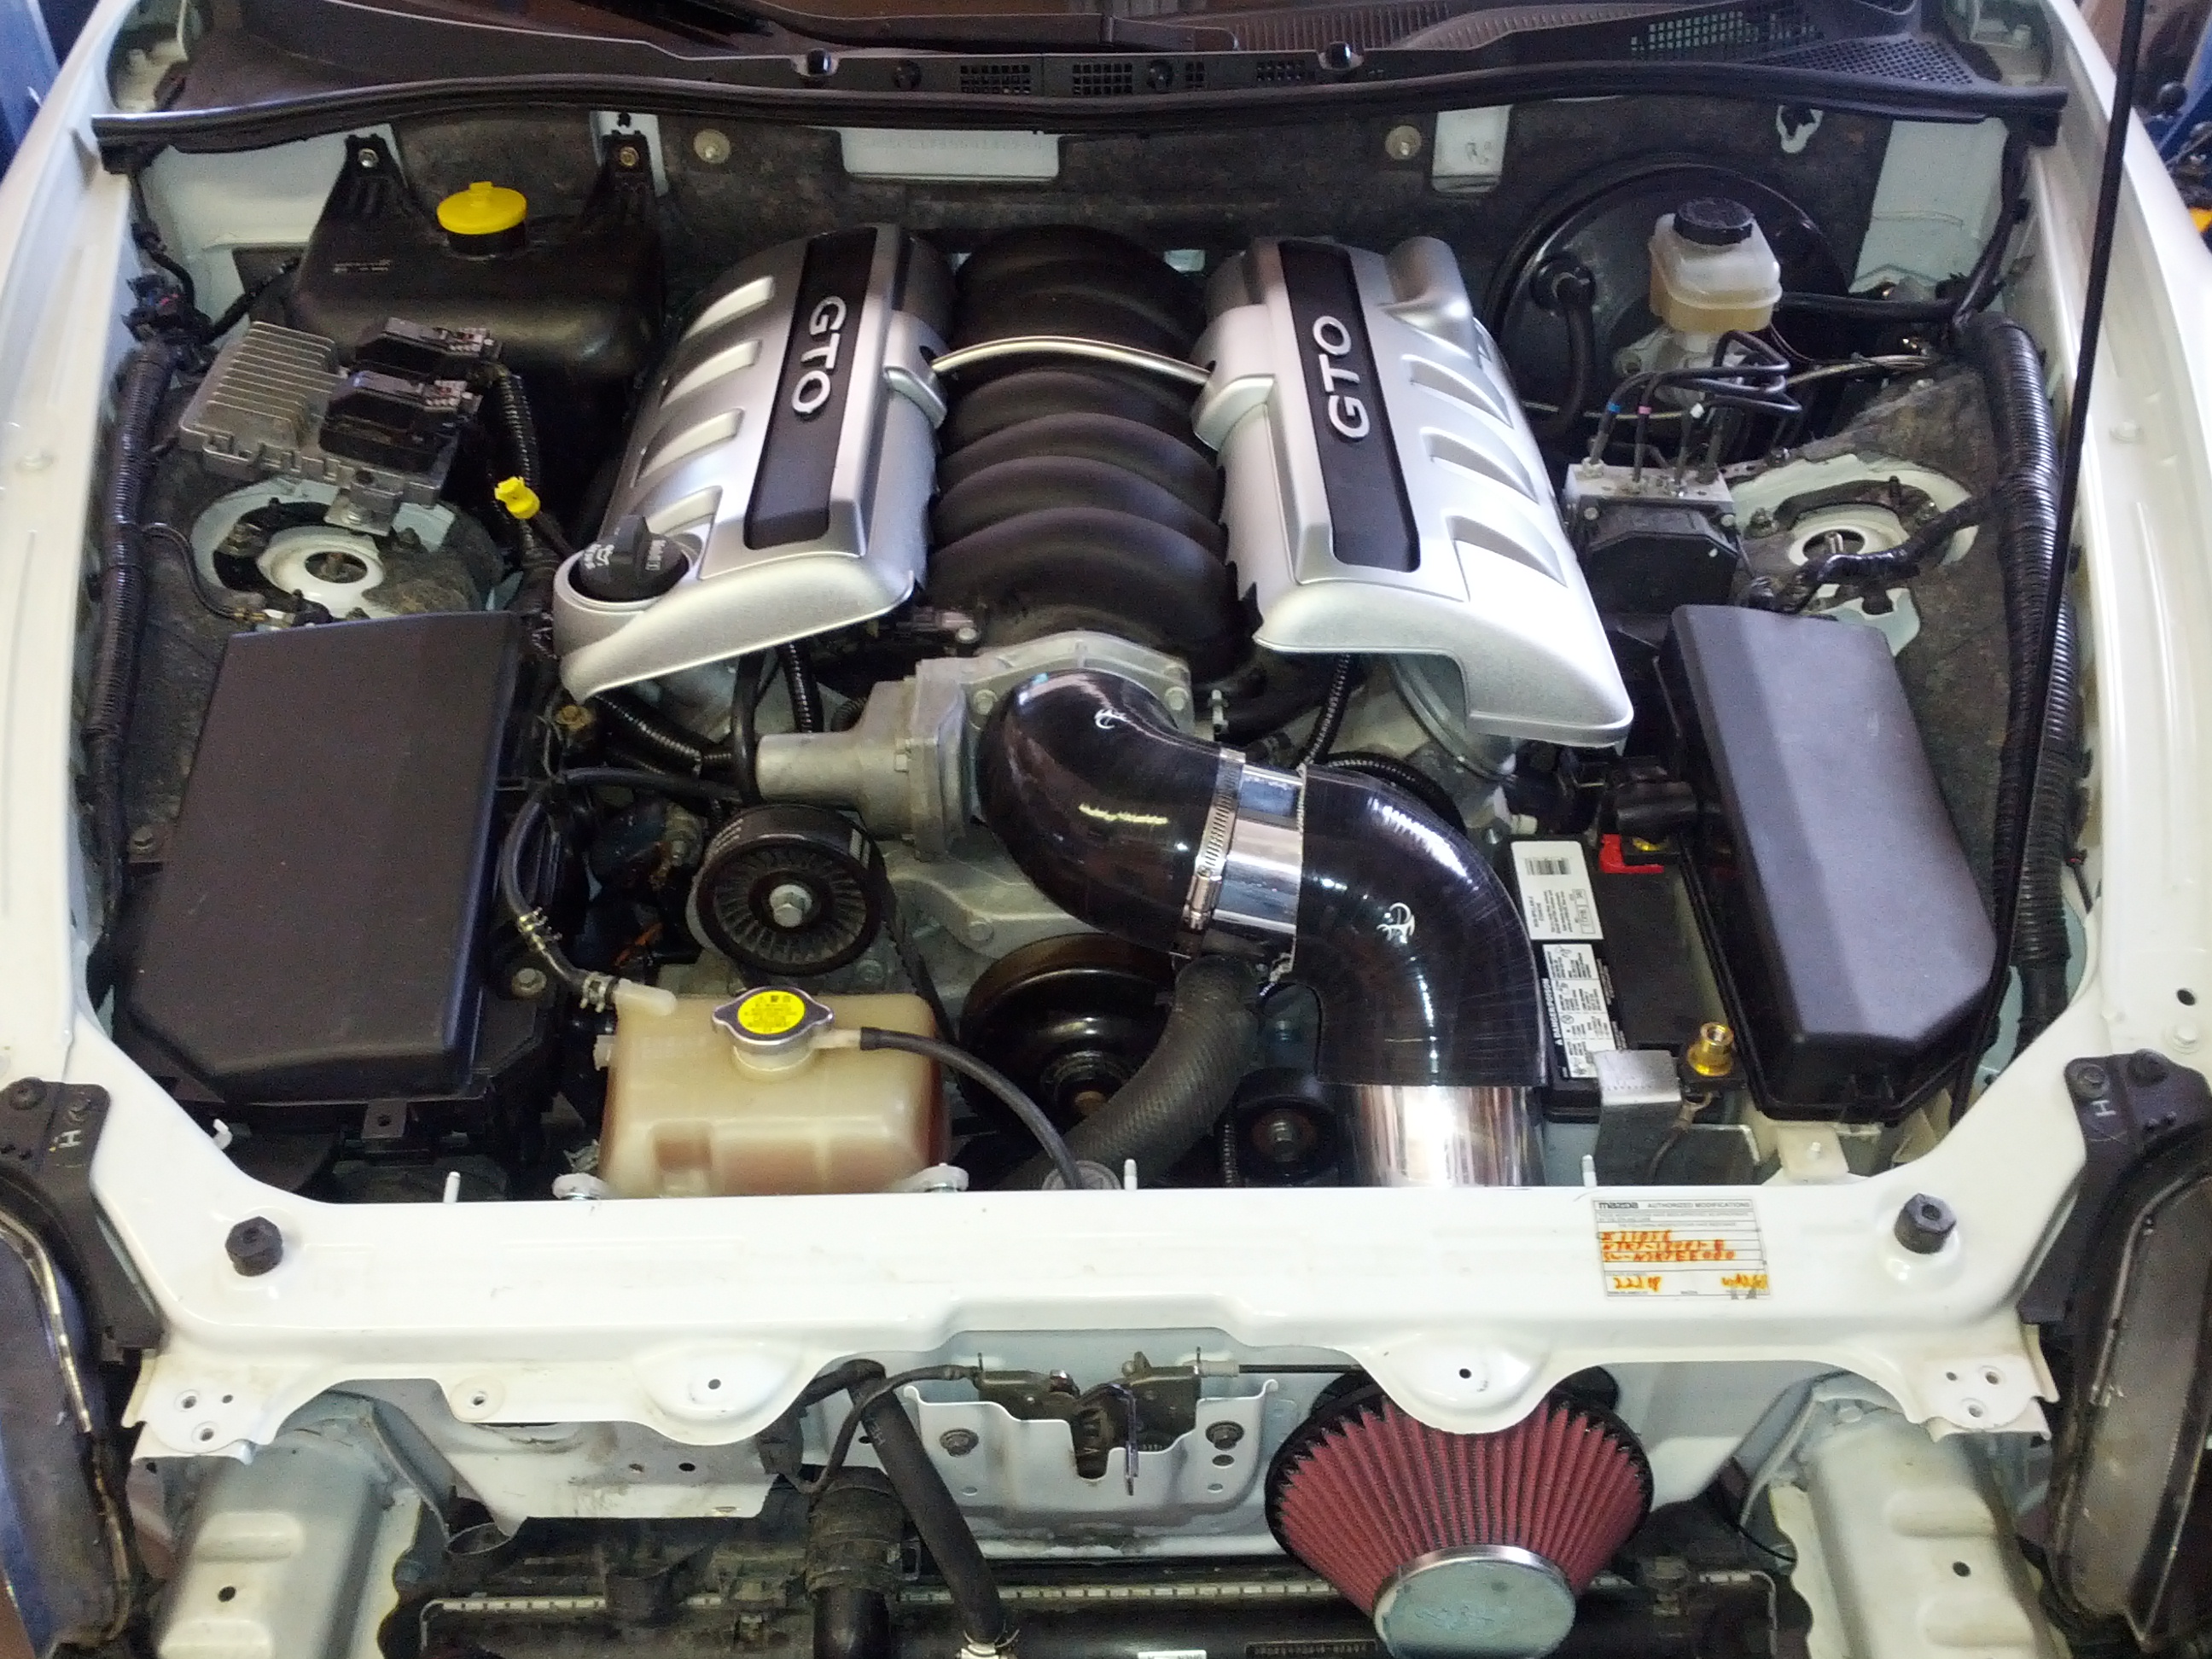
This is the front view, you can see the battery mount for a small Optima racing battery on driver's side, I made a decision to not relocate the battery to the trunk for few reasons.
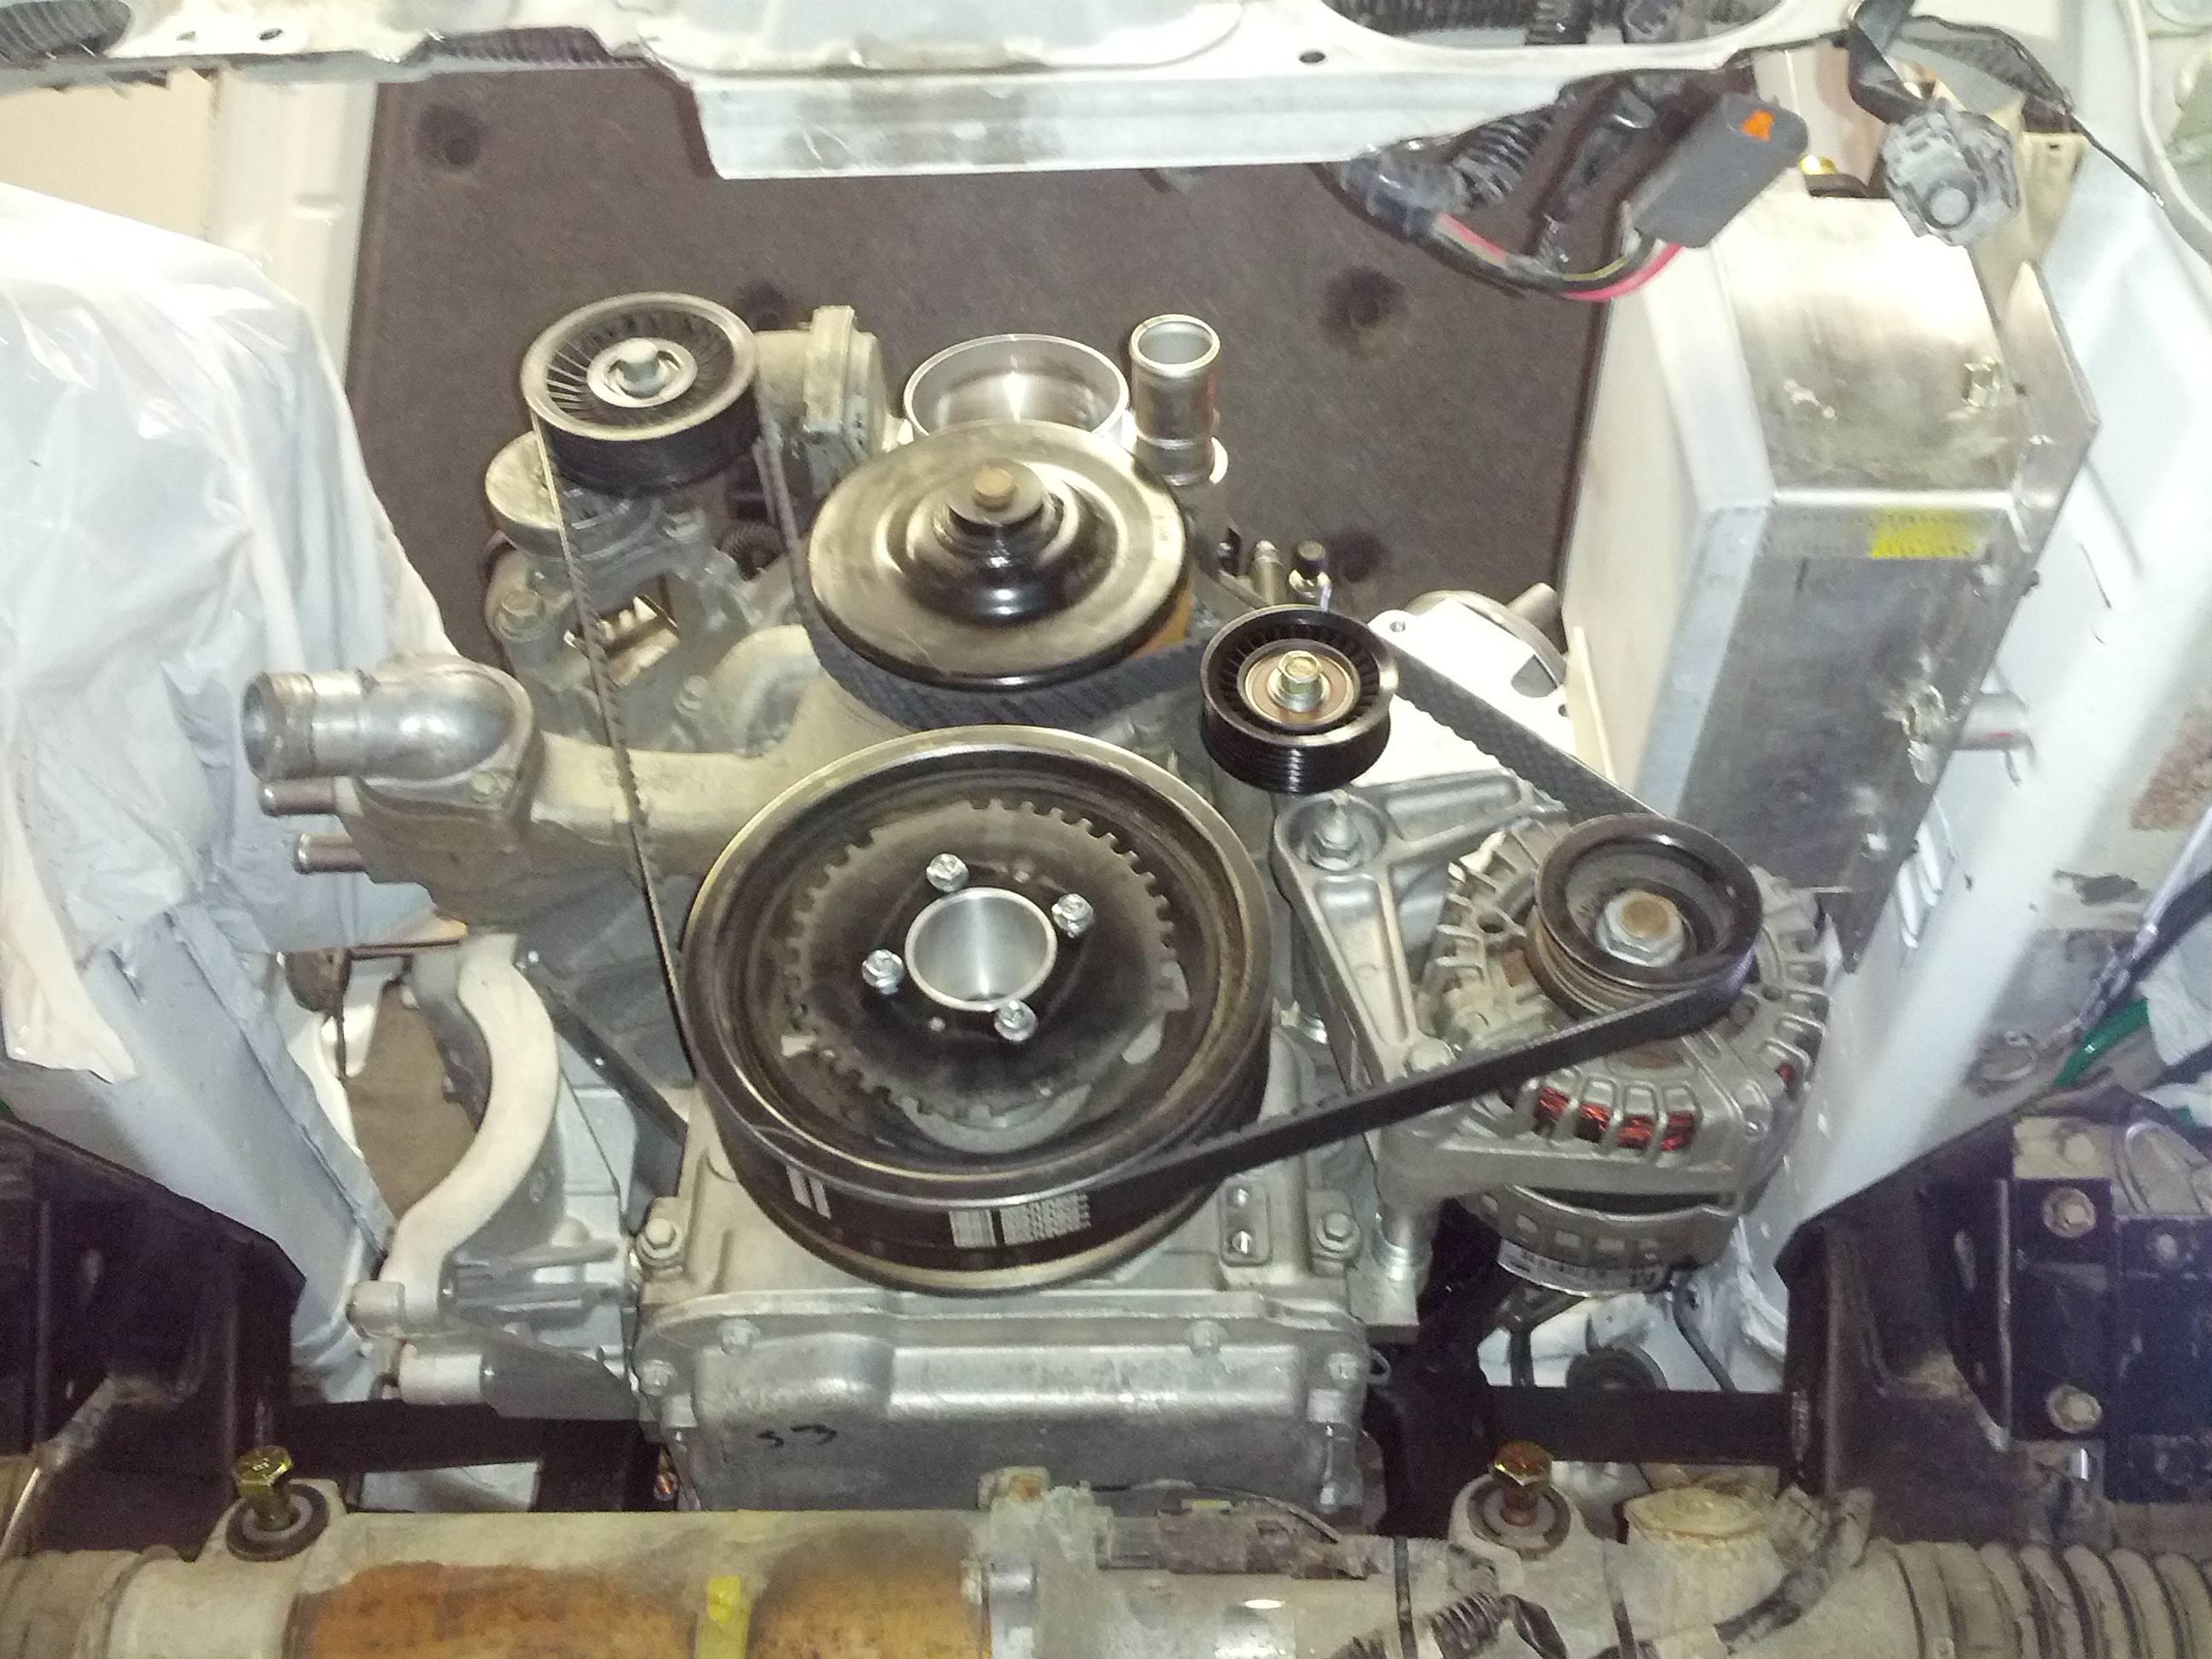
The crank pulley is using an adapter to house the trigger wheel off the Mazda eccentric shaft in order to keep gauges and EPS alive (more on this in the electrical section). This adapter was part of the kit I got from LS1RX8 and has worked well.
Next to come, accessories, steering, cooling...
Using the pieces from LS1RX8 I modified the subframe without needing to test fit. The vertical pieces are part of the kit, the rest is welded up for reinforcement.
The rest of the mods are not well seen, include mounting points to drop the EPS rack and to relocate the front sway bar.
Engine mounted on the modified subframe:

Time for test fit and figuring out a transmission mount and shifter location...
Pretty easy fit without accessories, cooling, exhaust, etc., etc.
After some careful measurements and weighing out my options I have decided to make a lightweight, strong aluminum crossbar to span the frame rails and to mount the transmission onto. It also has a mounting point for the modified differential torque arm attachment.

There is not too many advantages to going with the TR6060 over the T56, certainly there are a few drawbacks or challenges if you will.
There however is one advantage... the shifter linkage is external and by modifying the bracket and length of the actual linkage you have room to move your shifter location. This enabled me to have the shifter in the exact spot the stock RX8 transmission would be, and thus no need to modify the tranny tunnel. I kept the RX8 rotor themed shifter as well so that the interior remains seamless.
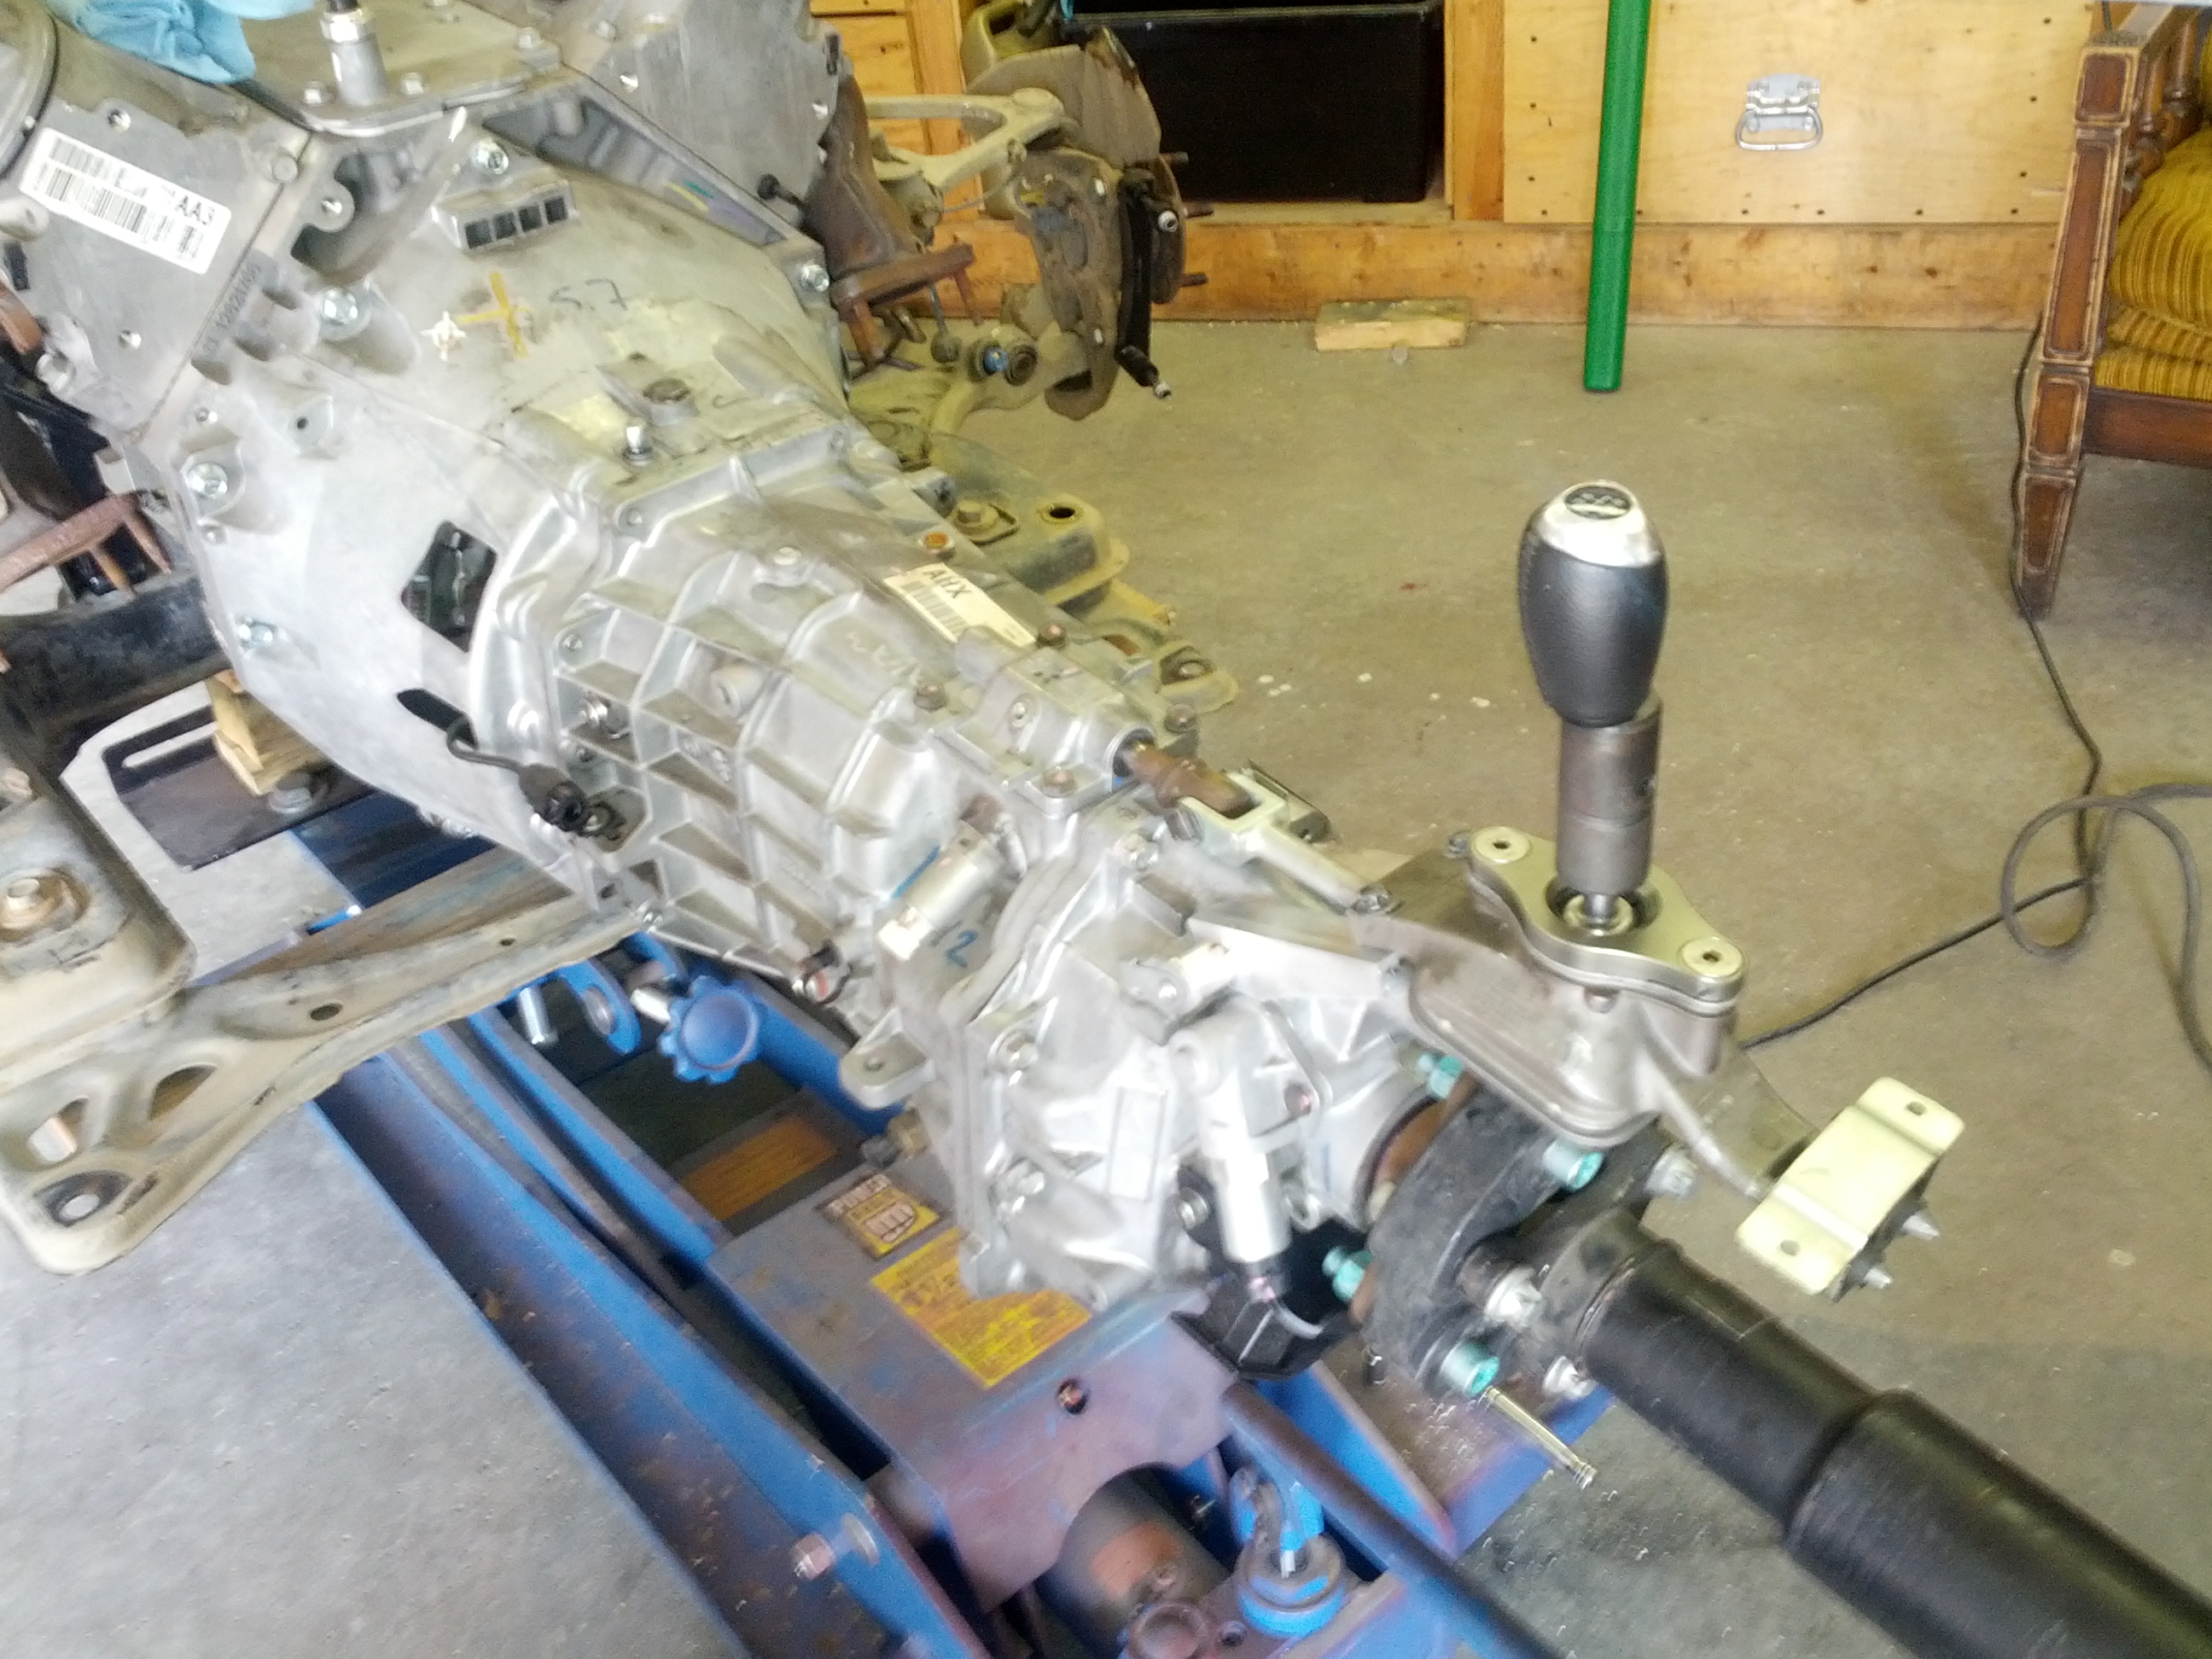
It is nice when things work out... this is what the crossmember looks like in place.
I was so proud of myself with the hardware in place, not fully realizing that the work is about to begin.
This is the front view, you can see the battery mount for a small Optima racing battery on driver's side, I made a decision to not relocate the battery to the trunk for few reasons.
The crank pulley is using an adapter to house the trigger wheel off the Mazda eccentric shaft in order to keep gauges and EPS alive (more on this in the electrical section). This adapter was part of the kit I got from LS1RX8 and has worked well.
Next to come, accessories, steering, cooling...
10-16-2015, 07:01 AM
#6
What am I doing here?
Join Date: Mar 2006
Location: 2017 Miata RF Launch Edition
Posts: 3,606
Received 649 Likes
on
510 Posts
I am afraid that my solution won't be as impressive to share, however is fine for local law enforcement and road worthiness. And most importantly it is simple and cheap. Let me just throw few more pics out there and once I get to the electrical I will elaborate.
FYI, my cruise control and traction control do not work, and I am not sure whether the effort is worth it.
FYI, my cruise control and traction control do not work, and I am not sure whether the effort is worth it.
10-17-2015, 11:01 AM
#8
Registered
Thread Starter
PART III: steering, accessories, etc.
There's a lot be done in this section, but not surprisingly I failed to take pictures of most steps.
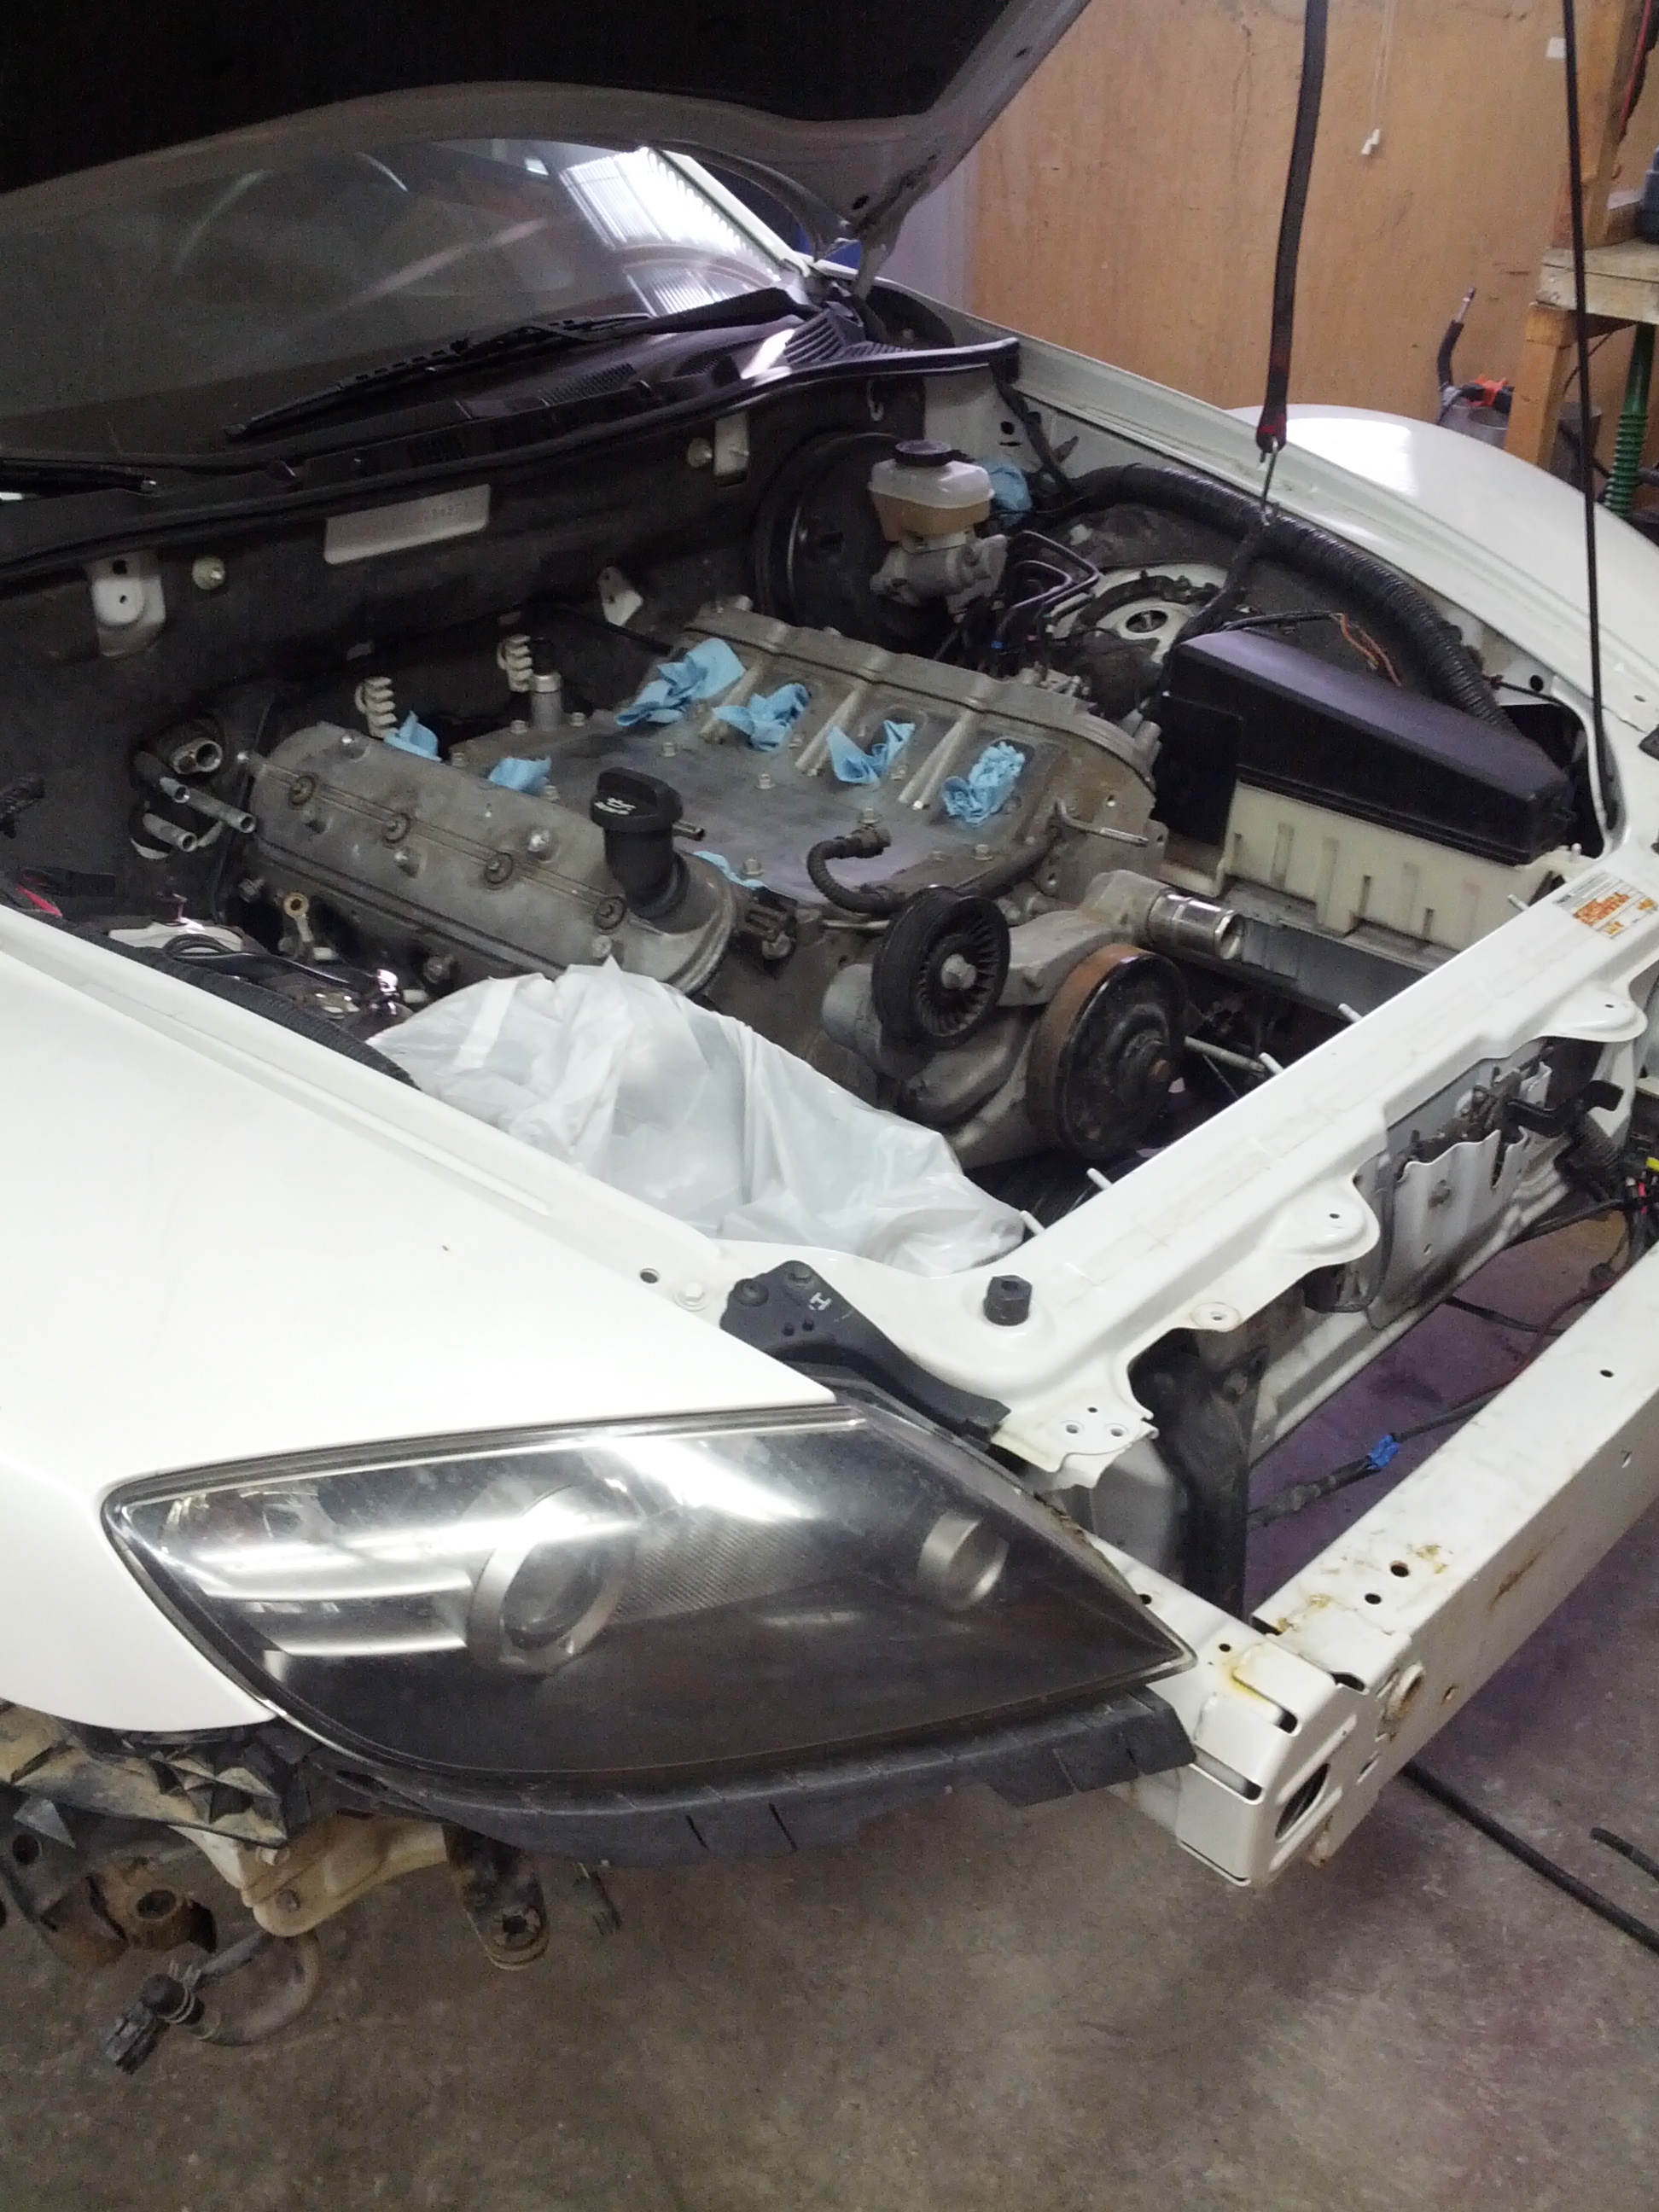
Had I done my research, I would have known that the belt driven LS3 accessories sit about 2" further forward compared to the LS1 and LS2. This does not sound like much, but when space is limited it makes a difference, particularly once it comes to finding a place for the radiator.
The location of the alternator on the Camaro is too low to clear the relocated steering rack. I ended up using an LS1 alternator bracket and modifying it to accept the LS3 unit. As I recall, there was a lot of swearing involved... No pictures
Eliminating a power steering pump and relocating the alternator left me with needing to route an off length serpentine belt in an alternative way - see picture above.
In case I forgot to mention... an F-body oil pan or similar low profile, rear sump alternative is a must.
The steering is its own topic altogether. As brought up over and over in the forum discussions, the geometry will be bastardized to a certain degree no matter which approach you take here. Most likely you will be reduced to using Heim joint linkages instead of proper tie rod ends, and utilizing a bump steer of some sort.
Even the kits marketed now, which feature a full custom subframe are not immune to this problem. There simply is not enough room to retain exact OEM steering location and put a V8 on top of it.
I decided to keep my bulky EPS rack, partially as it was the cheapest option, but also I did not wanna deal with more hydraulic fluids / lines / cooler / etc. I must say, I might revisit this in the near future and go with a much lighter hydraulic rack off of an older Miata or an RX7, Mustang rack seems to work well for others too. The feel of a hydraulic steering is much nicer IMO and the location of a smaller rack is more favourable in terms of the swap. I really have to dig up some pictures here...
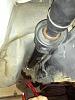
Lastly, using the OEM rack means you need to extend the steering shaft by about 1.5". I have seen guys use all sorts things to do this, but I was not gonna mess around. I pulled the shaft right out, machined a beefy sleeve, and welded the crap out of it. Really, did not want a high speed steering failure.
Cooling next...
There's a lot be done in this section, but not surprisingly I failed to take pictures of most steps.
Had I done my research, I would have known that the belt driven LS3 accessories sit about 2" further forward compared to the LS1 and LS2. This does not sound like much, but when space is limited it makes a difference, particularly once it comes to finding a place for the radiator.
The location of the alternator on the Camaro is too low to clear the relocated steering rack. I ended up using an LS1 alternator bracket and modifying it to accept the LS3 unit. As I recall, there was a lot of swearing involved... No pictures
Eliminating a power steering pump and relocating the alternator left me with needing to route an off length serpentine belt in an alternative way - see picture above.
In case I forgot to mention... an F-body oil pan or similar low profile, rear sump alternative is a must.
The steering is its own topic altogether. As brought up over and over in the forum discussions, the geometry will be bastardized to a certain degree no matter which approach you take here. Most likely you will be reduced to using Heim joint linkages instead of proper tie rod ends, and utilizing a bump steer of some sort.
Even the kits marketed now, which feature a full custom subframe are not immune to this problem. There simply is not enough room to retain exact OEM steering location and put a V8 on top of it.
I decided to keep my bulky EPS rack, partially as it was the cheapest option, but also I did not wanna deal with more hydraulic fluids / lines / cooler / etc. I must say, I might revisit this in the near future and go with a much lighter hydraulic rack off of an older Miata or an RX7, Mustang rack seems to work well for others too. The feel of a hydraulic steering is much nicer IMO and the location of a smaller rack is more favourable in terms of the swap. I really have to dig up some pictures here...
Lastly, using the OEM rack means you need to extend the steering shaft by about 1.5". I have seen guys use all sorts things to do this, but I was not gonna mess around. I pulled the shaft right out, machined a beefy sleeve, and welded the crap out of it. Really, did not want a high speed steering failure.
Cooling next...
10-27-2015, 08:37 PM
#9
Registered
Thread Starter
PART IV: Cooling:
This is another section, where I decided to save few bucks and keep most stock RX8 parts.
I kept the stock radiator and condenser, mounted under a slanted angle much like the stock car. The catch is that I had to move the assembly forward about 4" and create custom mounting points. The top sits right against the frame crossmember, with little L-shaped anchor points, I welded up custom brackets to accept the bottom rubber grommets.
I will have to go back and take some pictures as a part of a planned winter overhaul. The lack of my documenting really is abysmal.
I kept the stock coolant tank in its original location and ran a small line to the LS head steamer port. In order to prevent air trapping, a high point needs to be maintained, so I created a secondary non pressurized overflow, which I mounted to the front of the left head, where the power steering pump used to sit. I used a small Suzuki Samurai overflow for $10 shipped from India.
I was also able to reuse most OEM hoses, somehow this worked out, although I can't recall what goes where.
I created a T-piece adapter to splice into the bottom rad hose and connect this to the bottom of the pressurized RX8 coolant reservoir. This adapter also enabled me to account for the difference in size between the top and bottom coolant hose on the LS block. "Jagsthatrun.com" makes great T-adapters like this for very reasonable price.
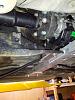
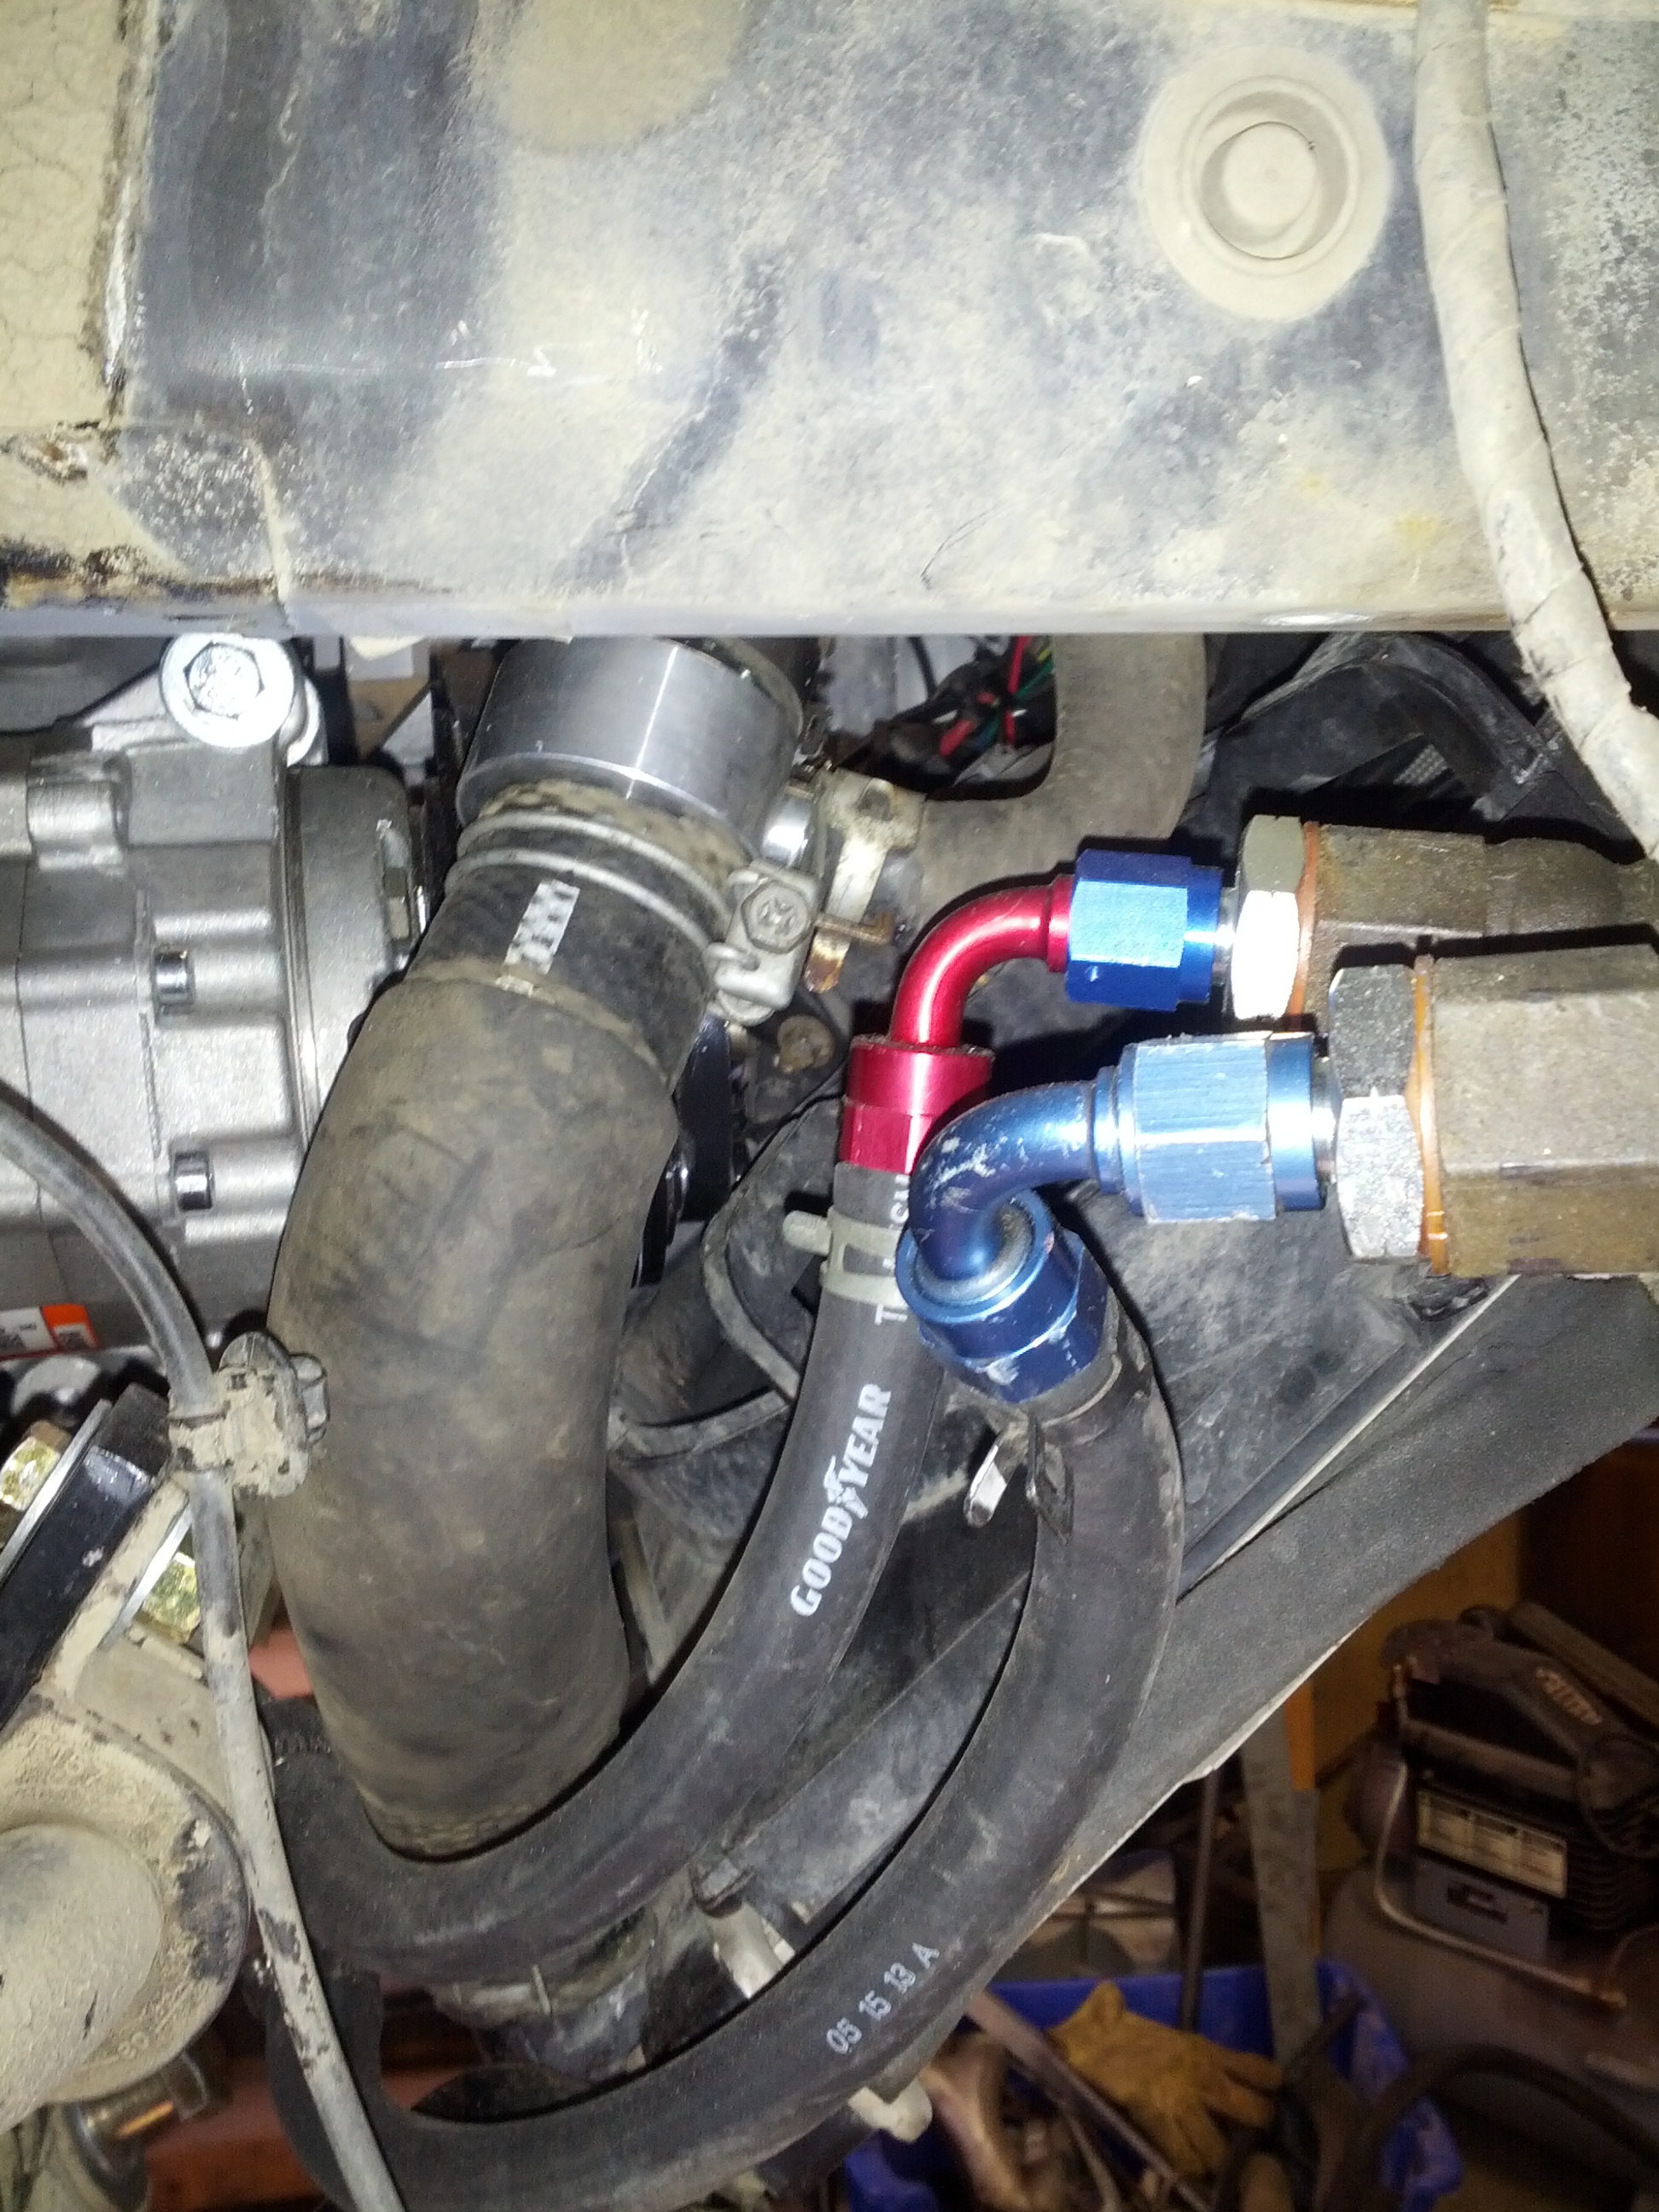
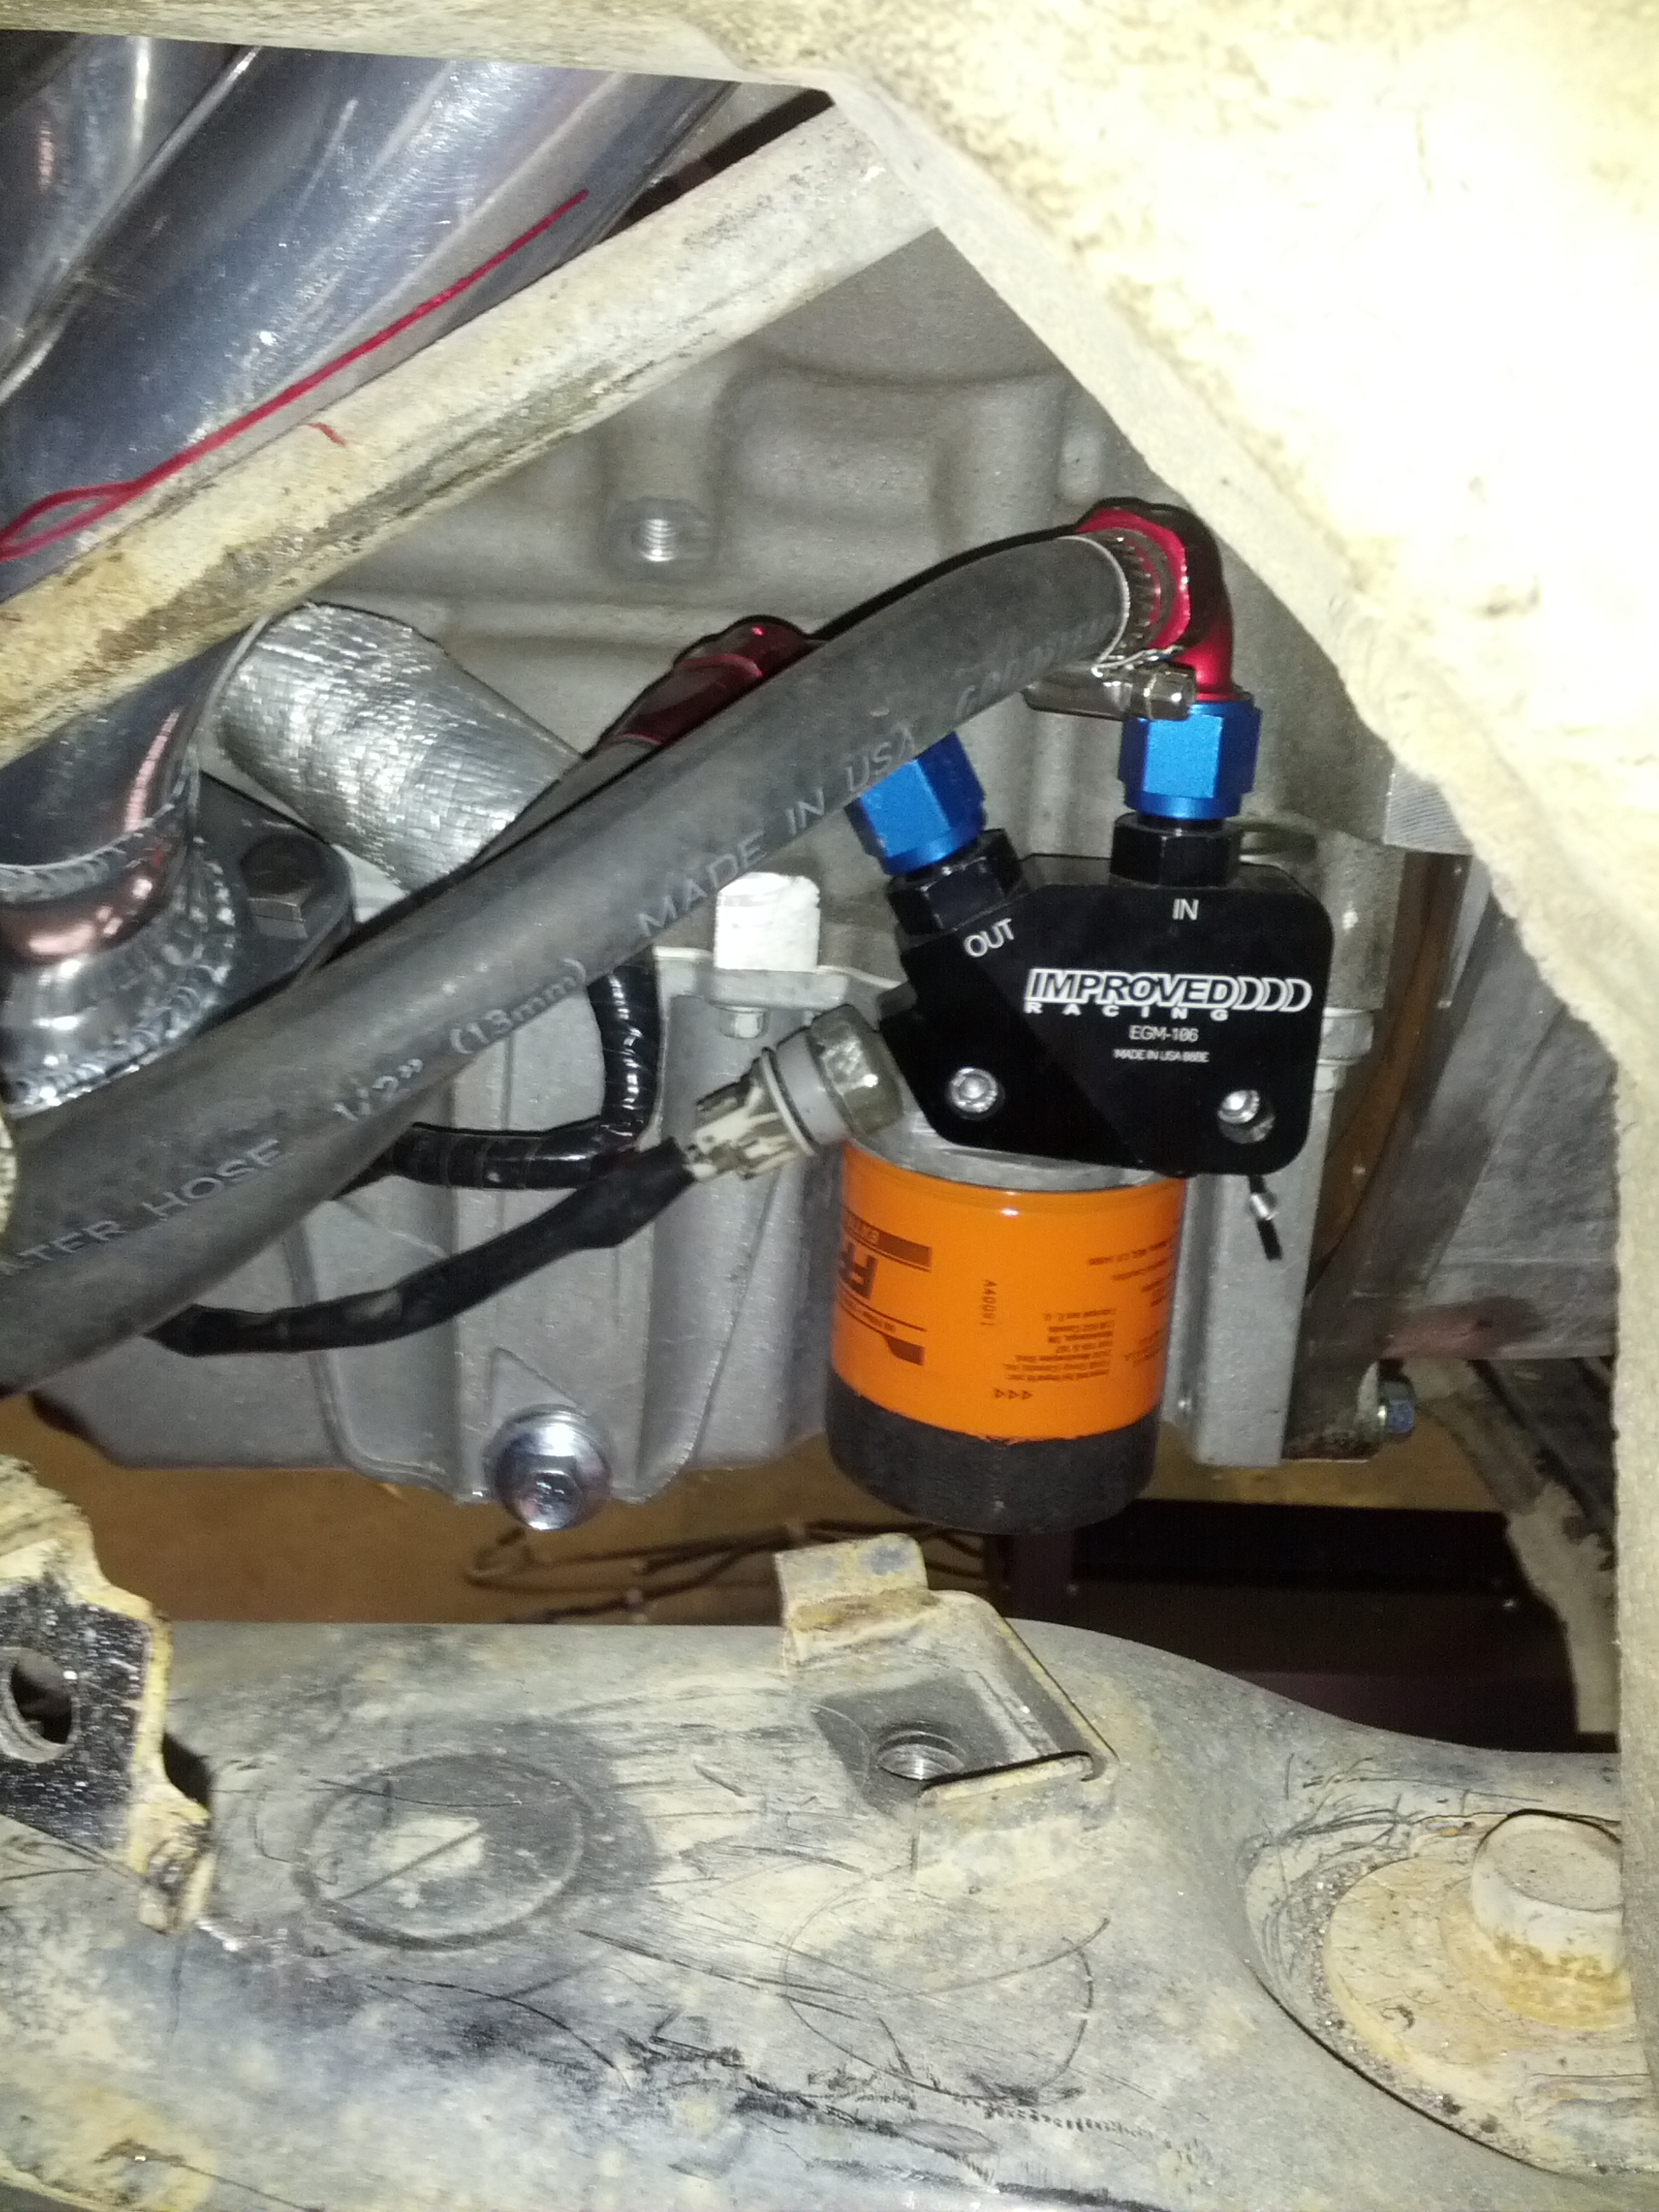
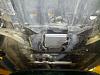
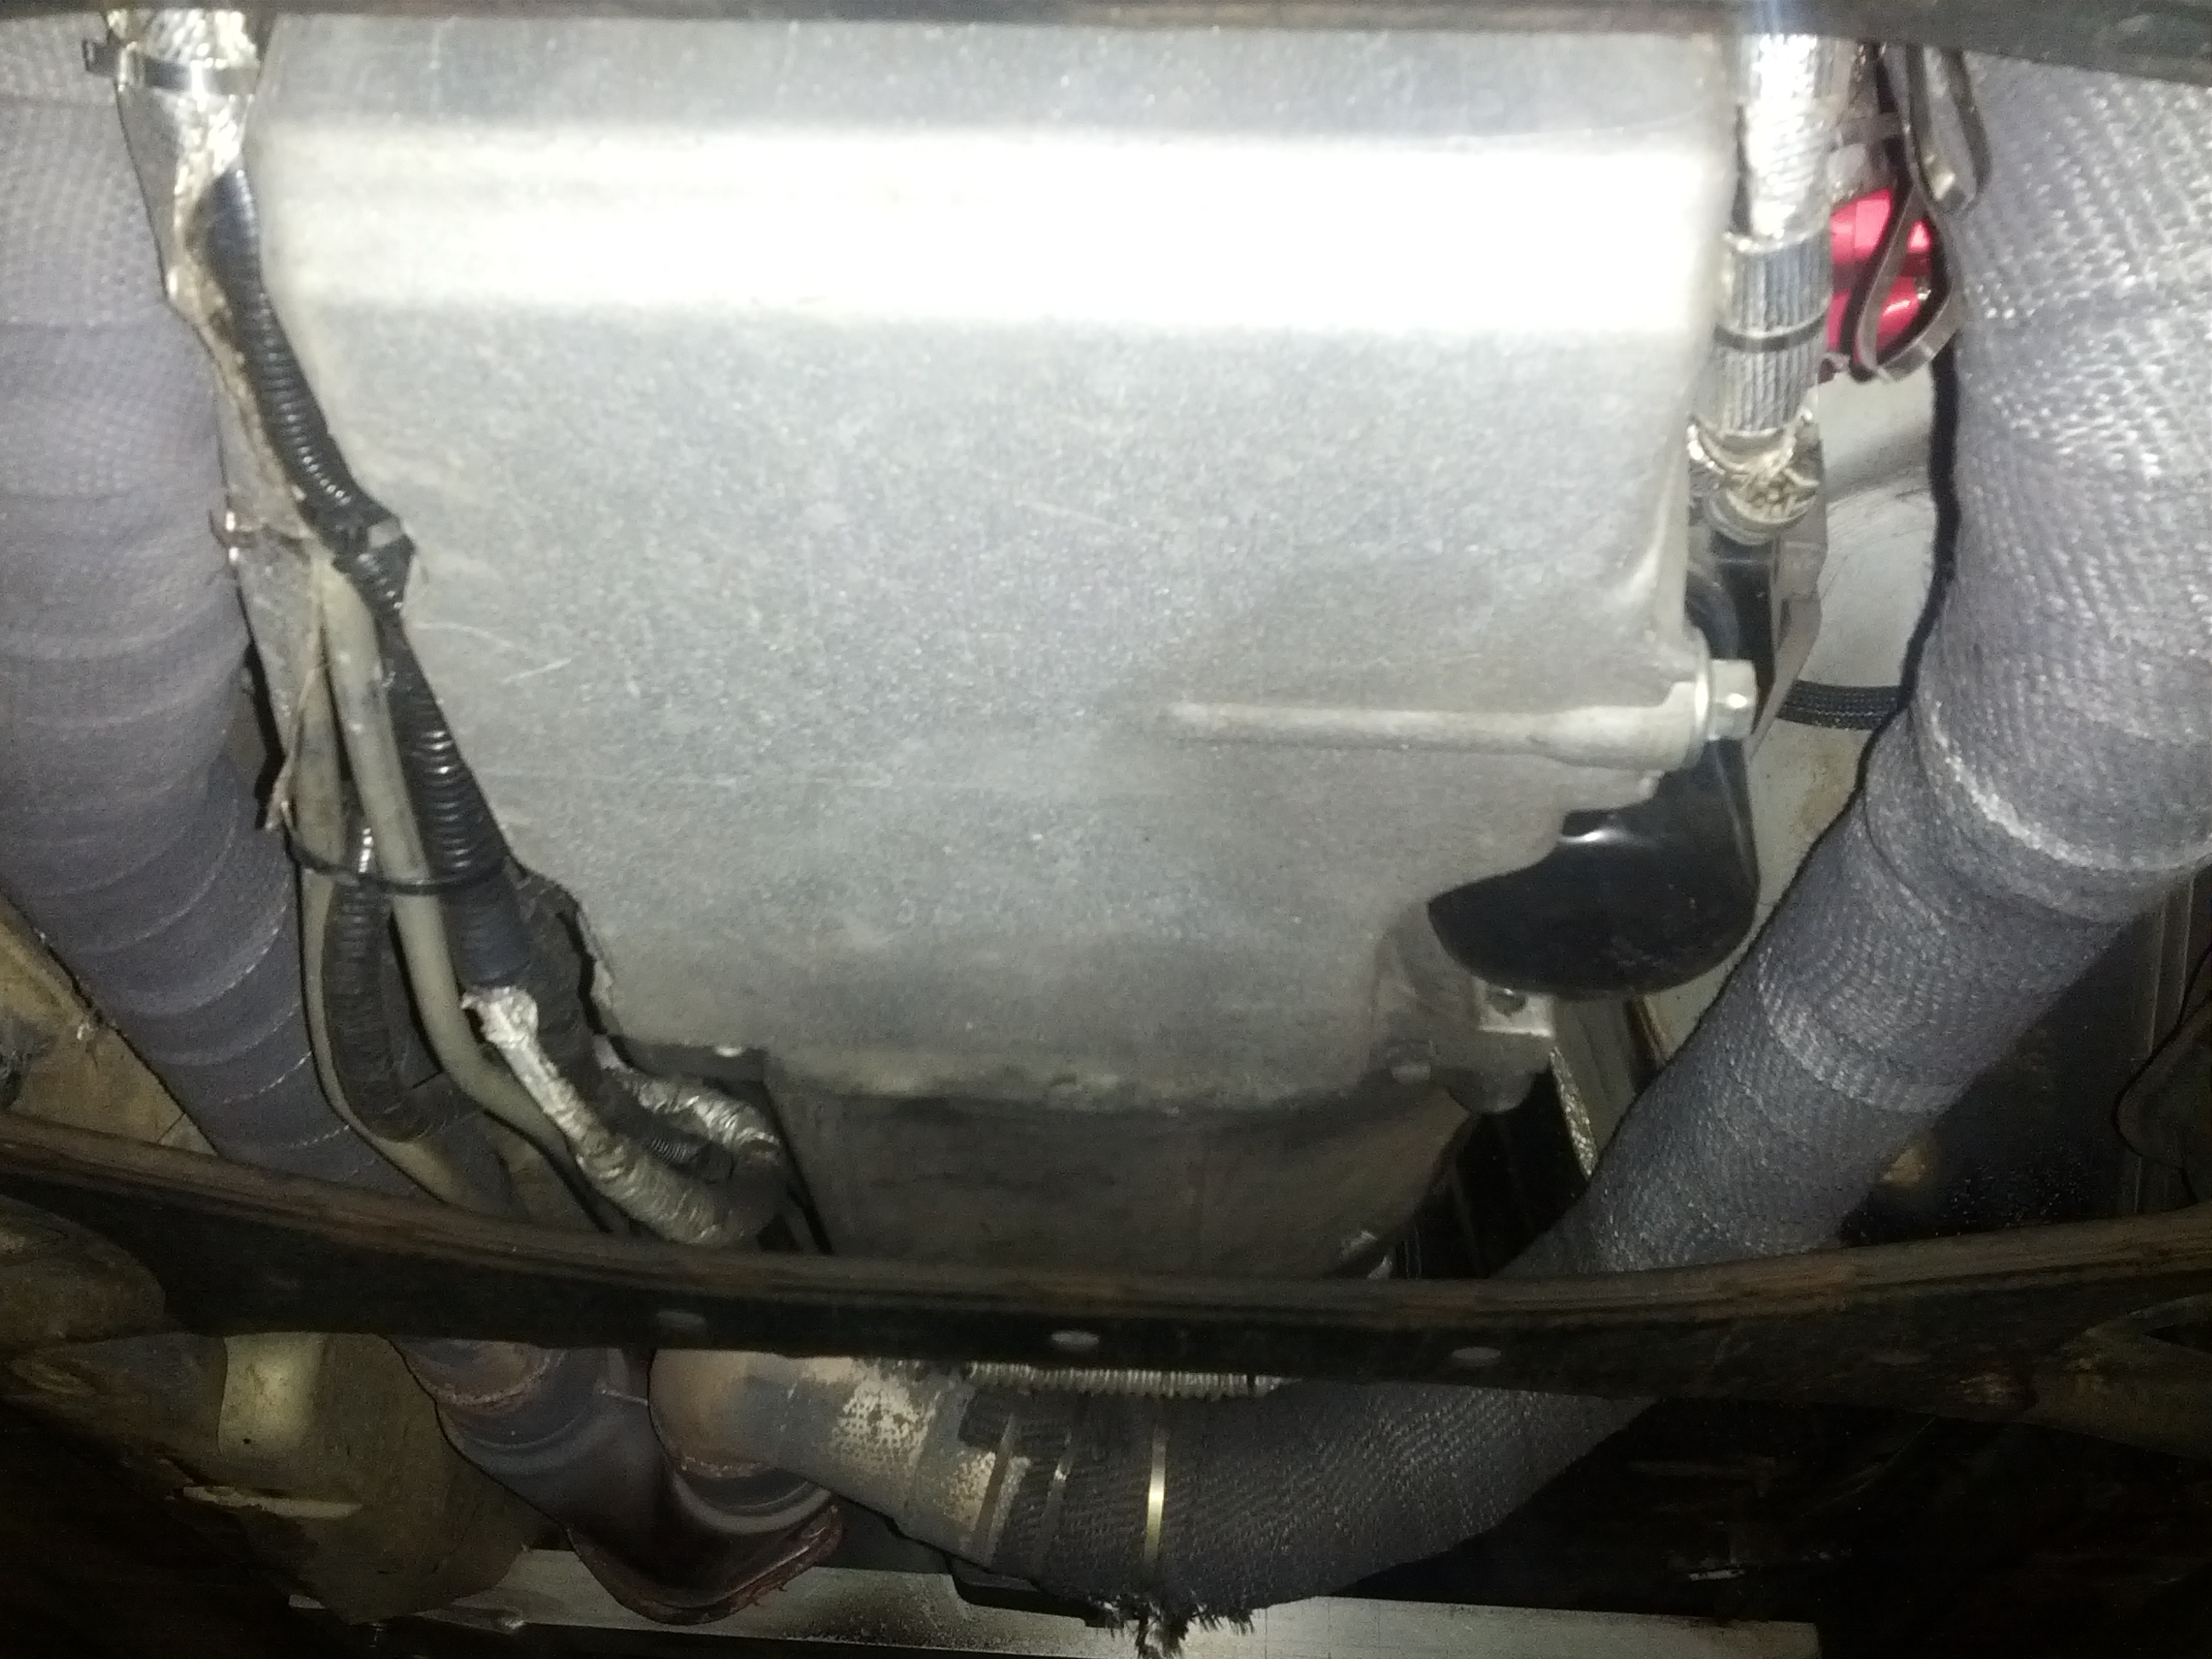
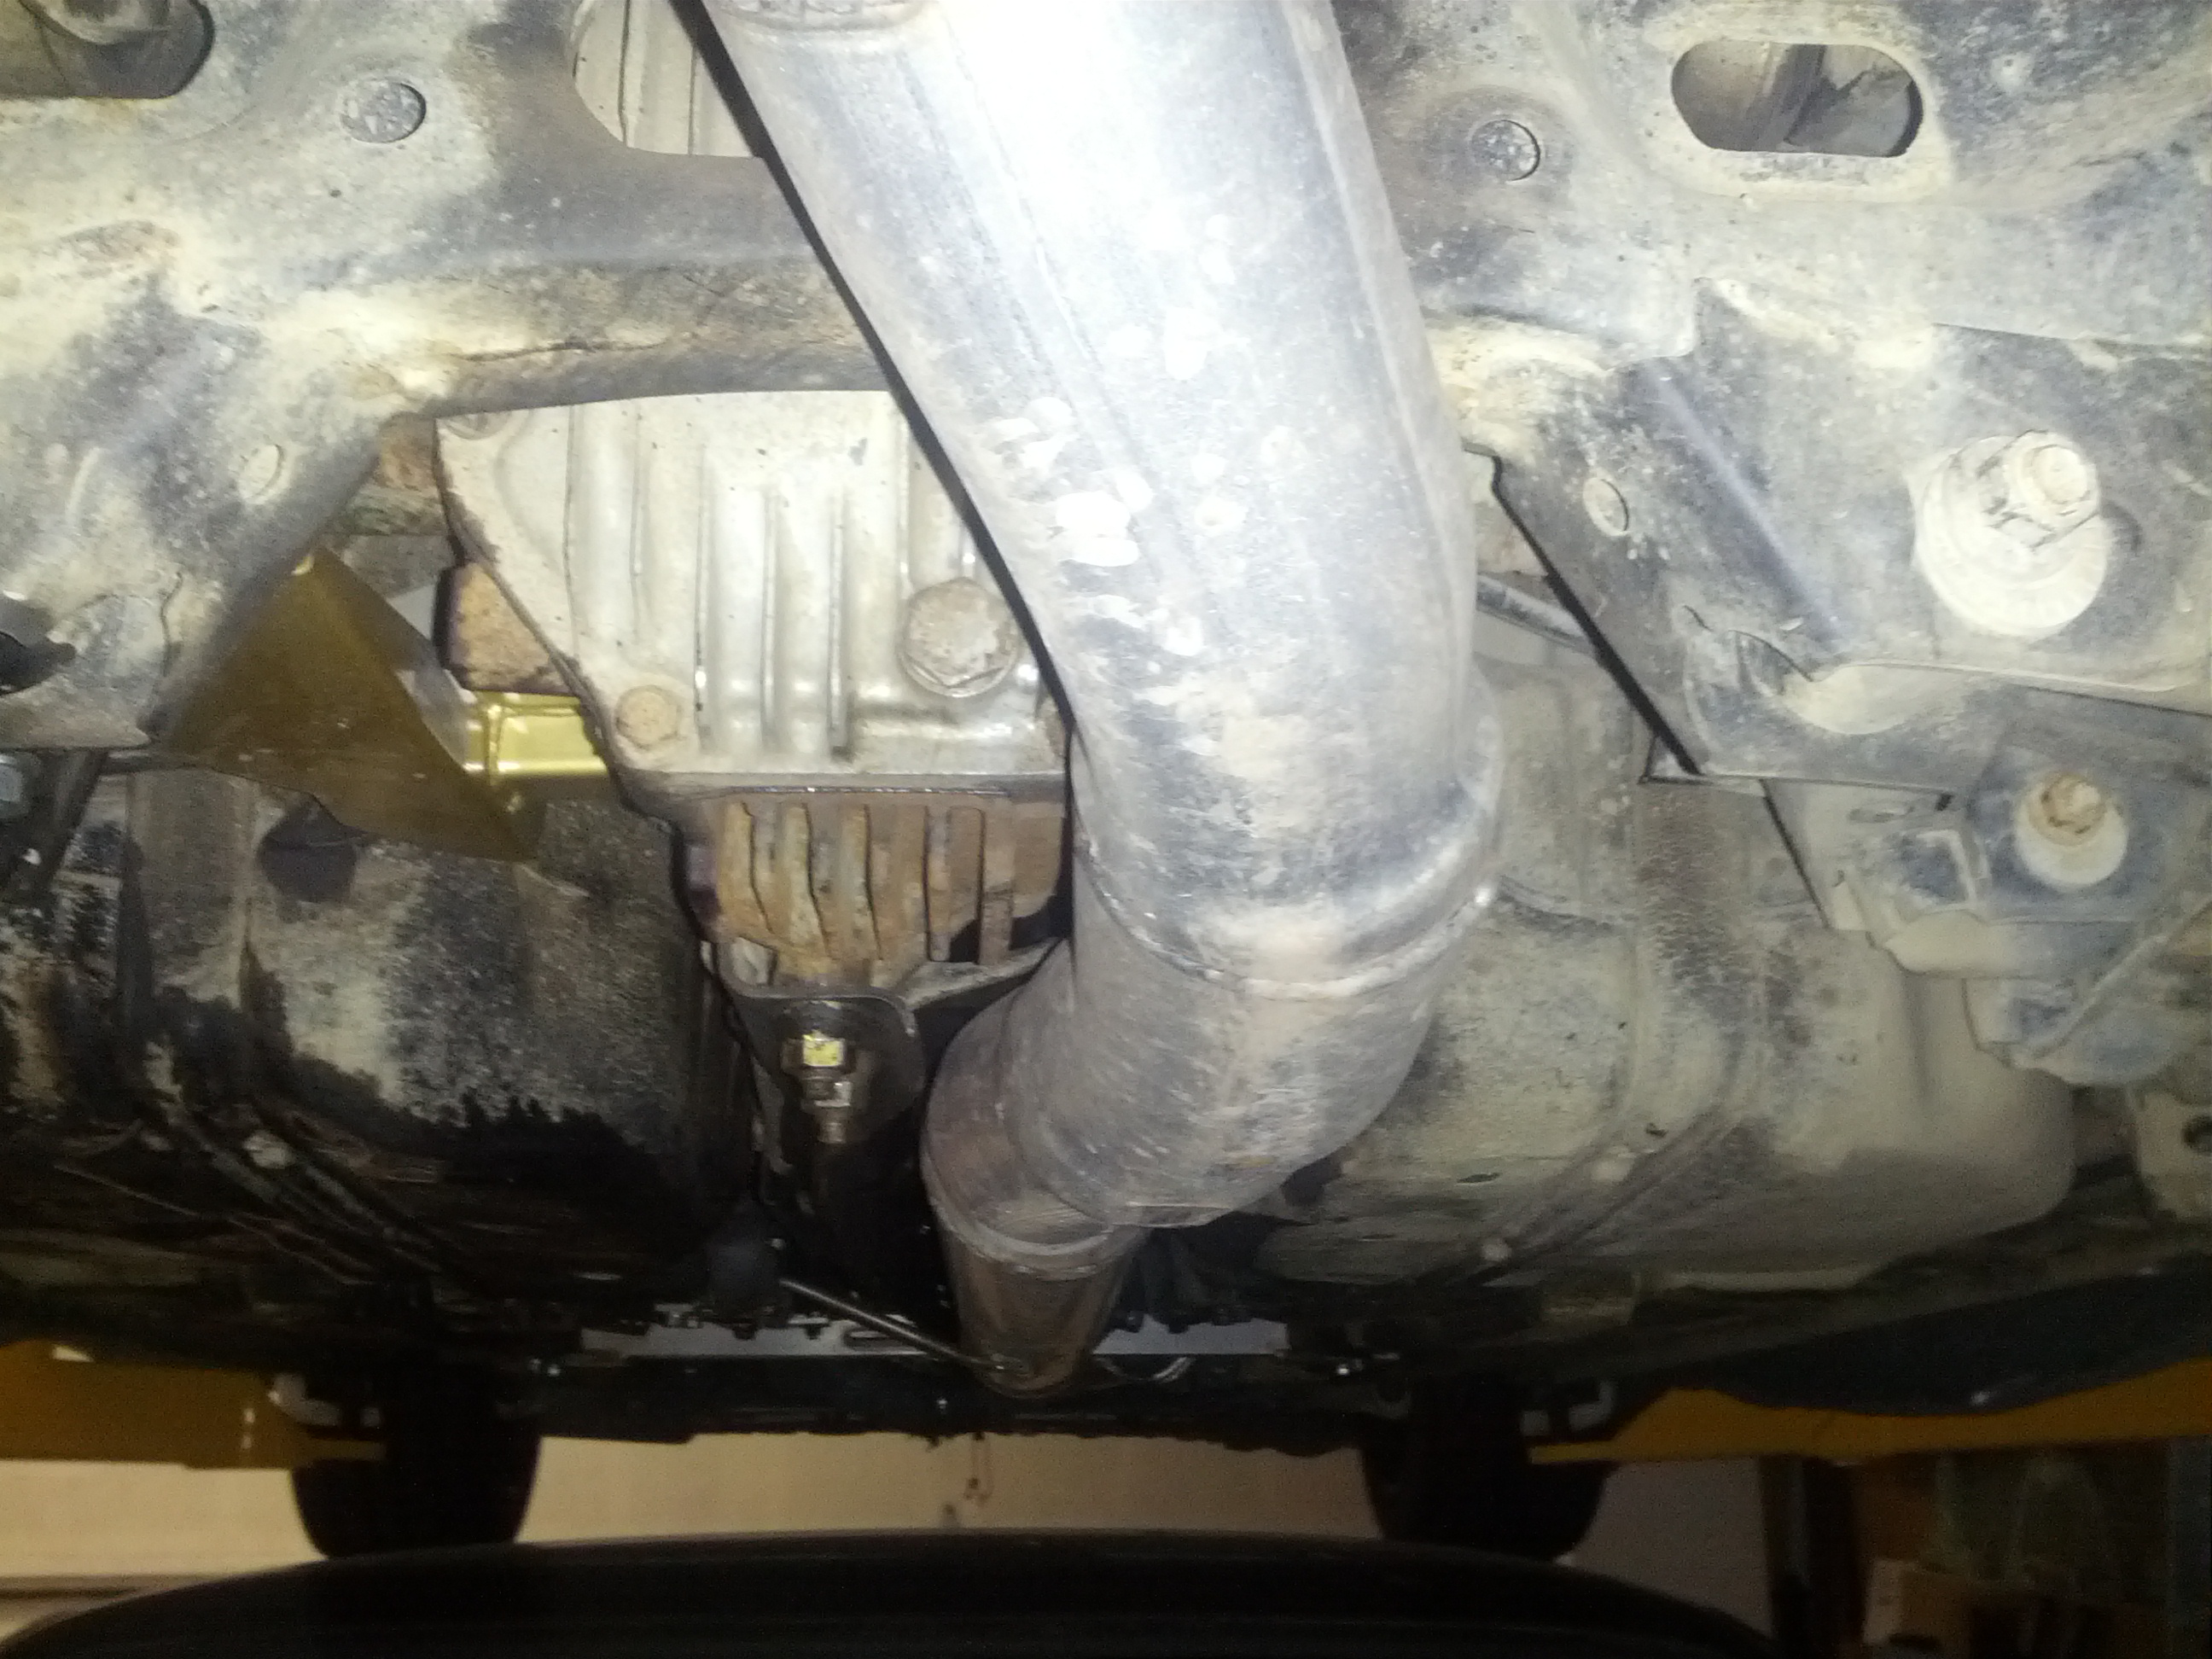
Finally a picture of something... (adapter and tranny cooler lines)

I used both of the RX8's oil coolers since they were already there.
Passenger side for transmission, driver side for engine oil.

Note that the oil cooler side has a "Improved Racing" unit with coupling attachments and couple of 1/8 NPT ports to mount oil pressure and/or temperature gauge sensors. This allowed me to use the RX8 sensor as well as the LS sensor on top of the block.
BTW - those are wrong lines for high pressure oil, it was a test fit, only to realize that there is no room between exhaust, steering, and subframe. I ended up routing the actual SS braided lines a pretty crafty way through the driver side wheel well. (pictures coming, sorry).
I don't have a lot to say about air conditioning... in a nutshell:
RX condenser, LS compressor, RX ECU controlling the compressor clutch and climate overall.
I outsourced the lines at a local shop. The guy quoted me around $300, although I warned him the fitment is tight. I got a call at 10:30PM when he finished, the price was closer to $900.
Lastly, heater hoses were a breeze, I fabricated a heat insulating tunnel from scrap aluminum, to run them close to the passenger side strut tower and keep them away from the exhaust.
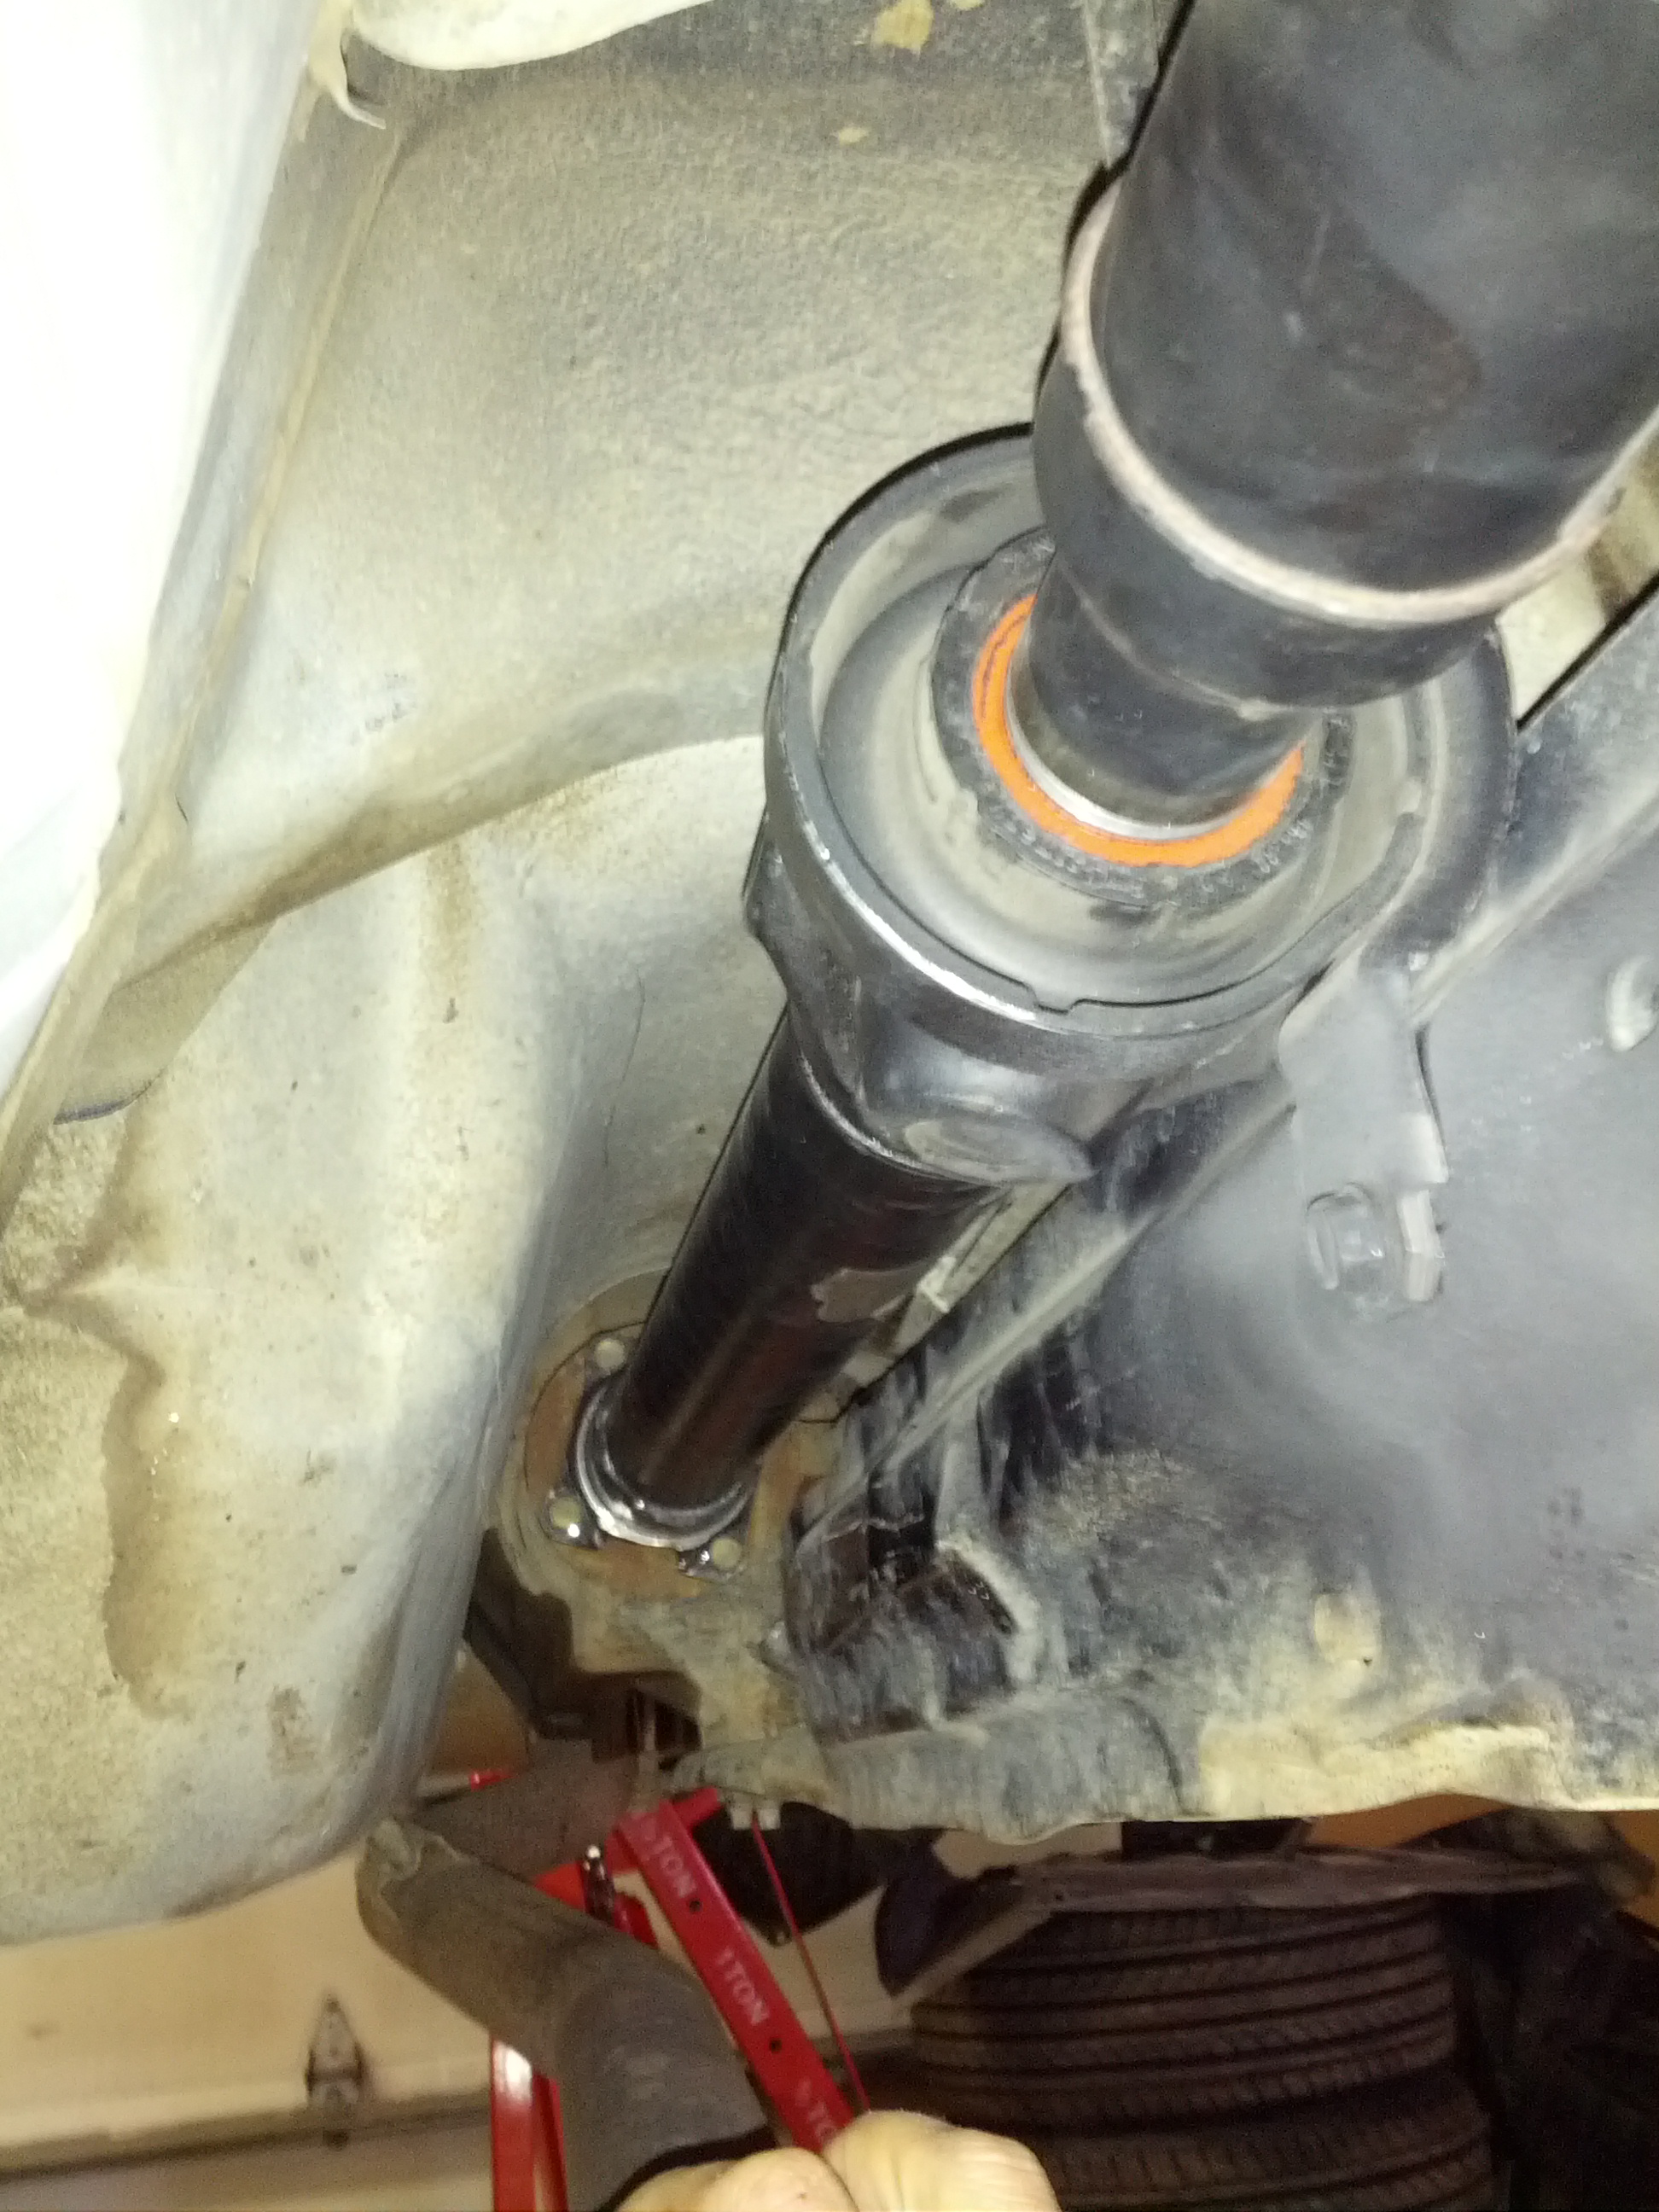
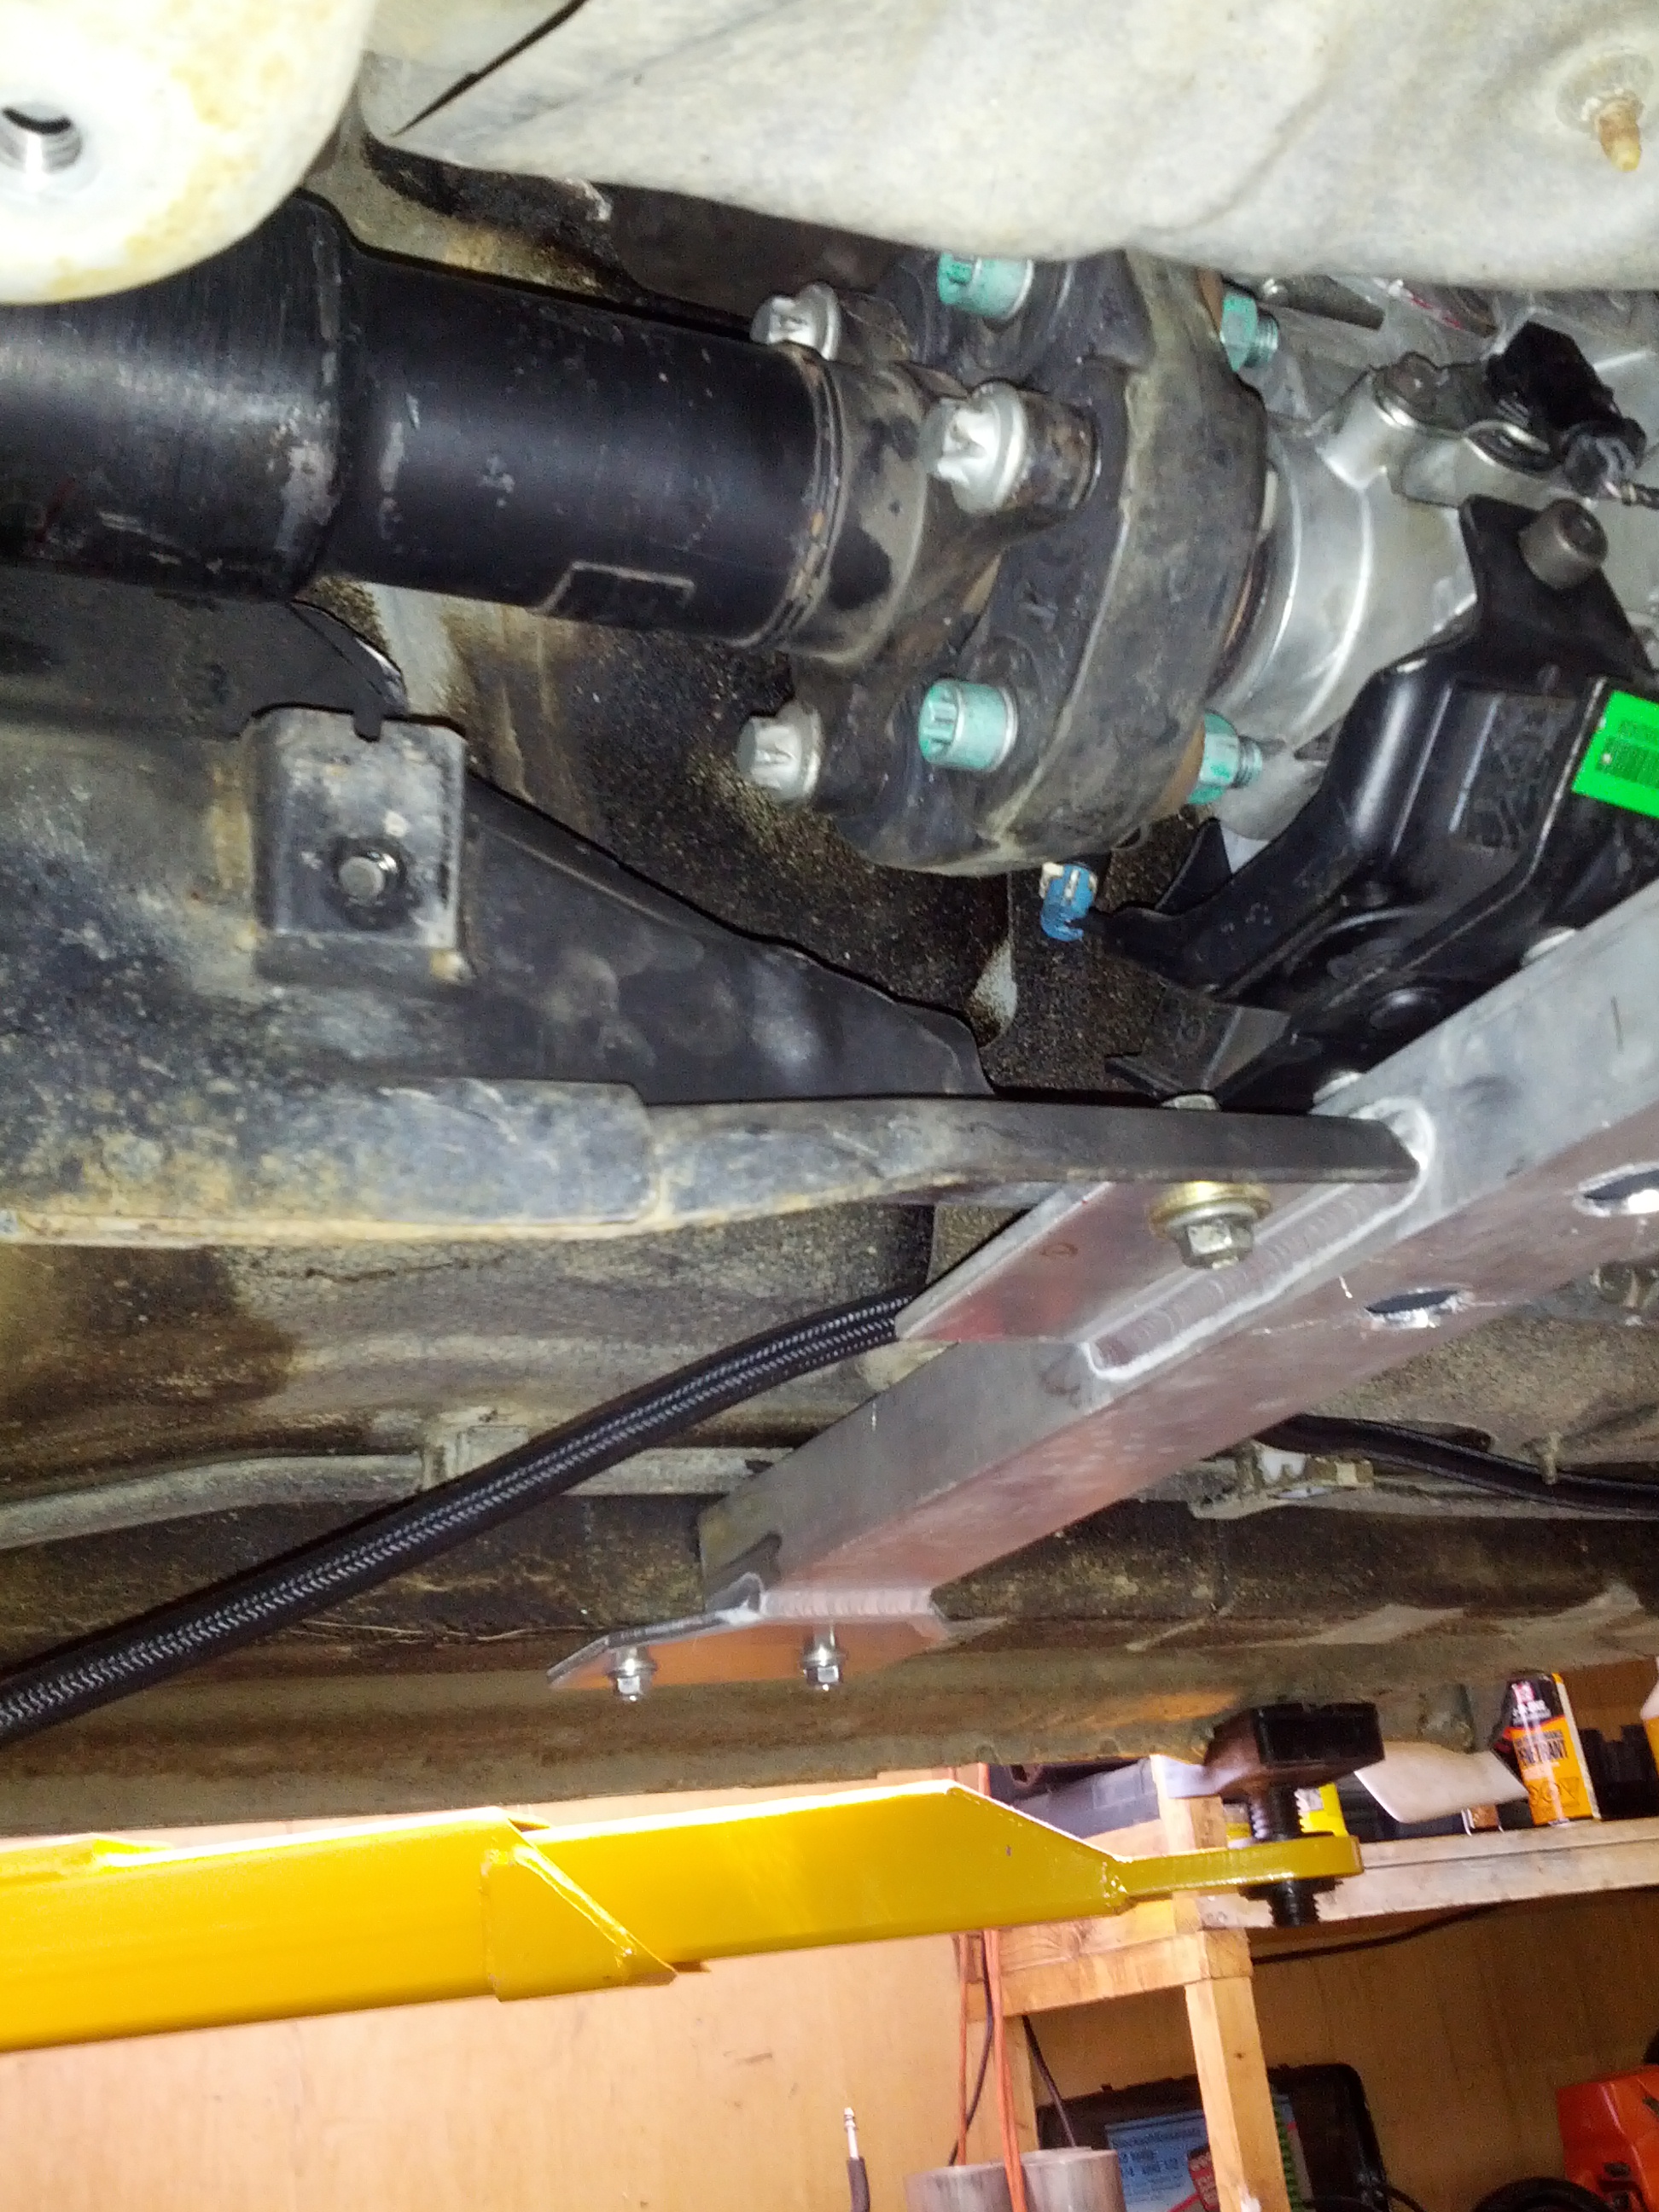
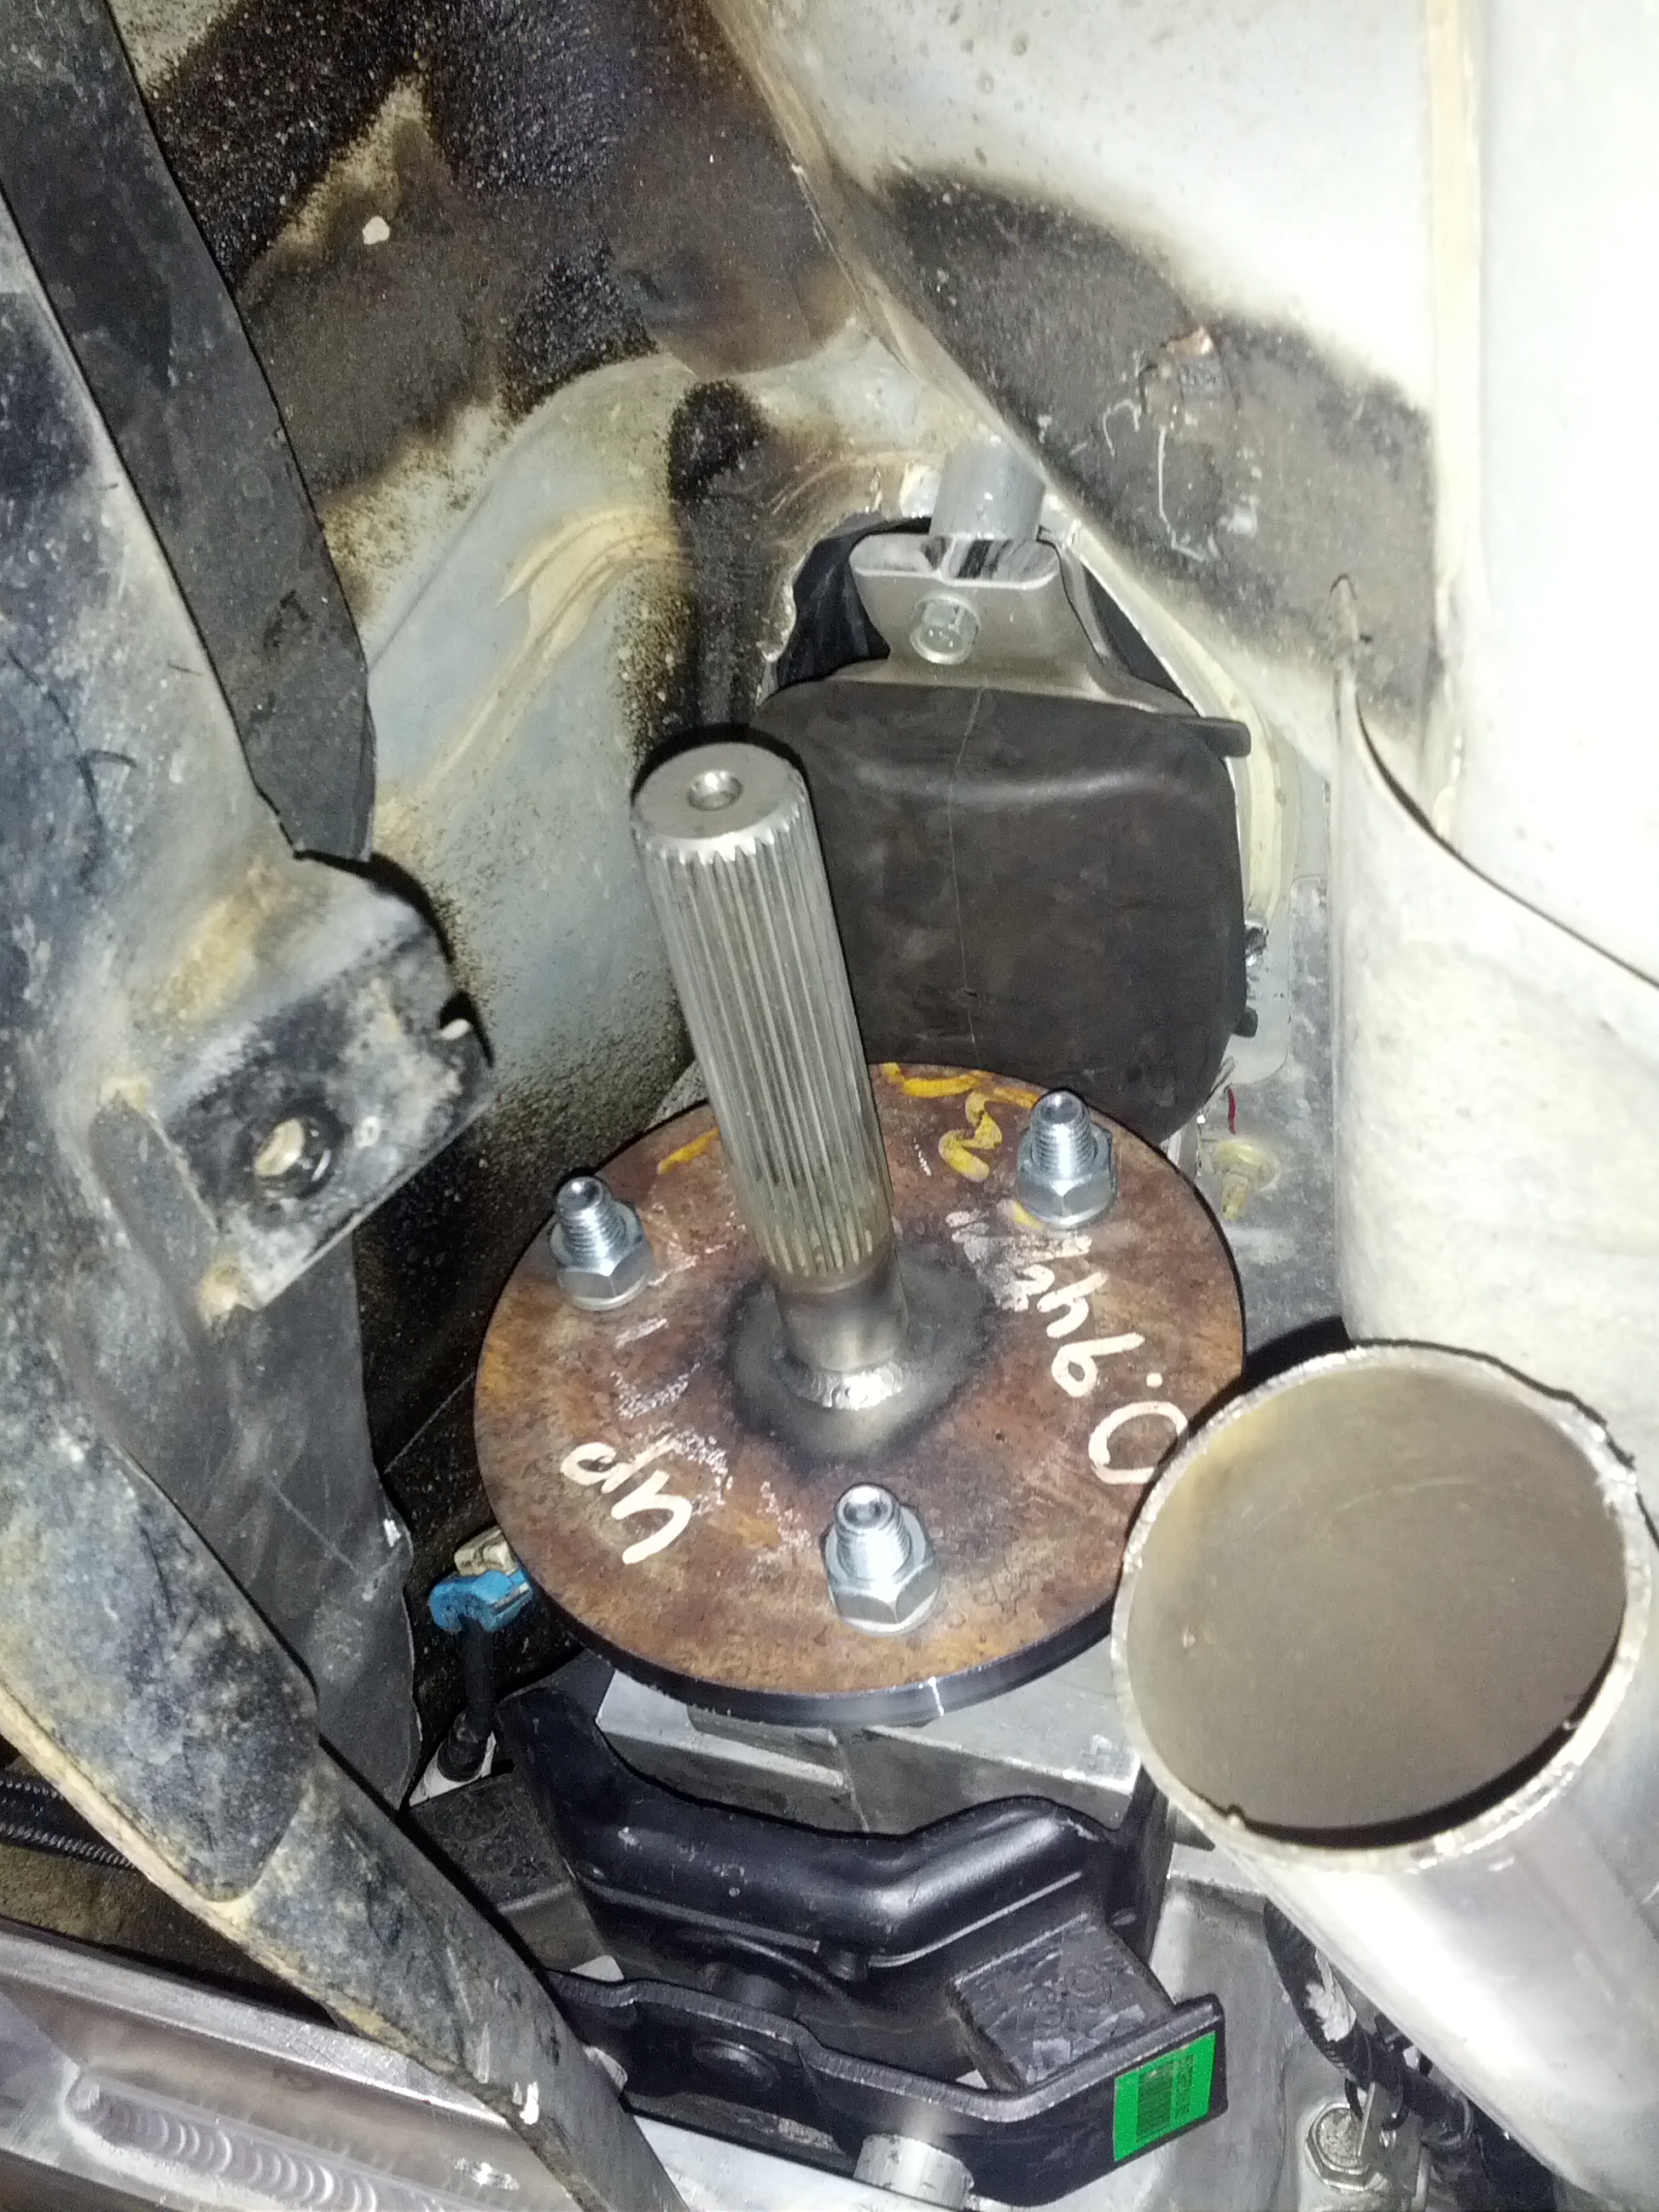
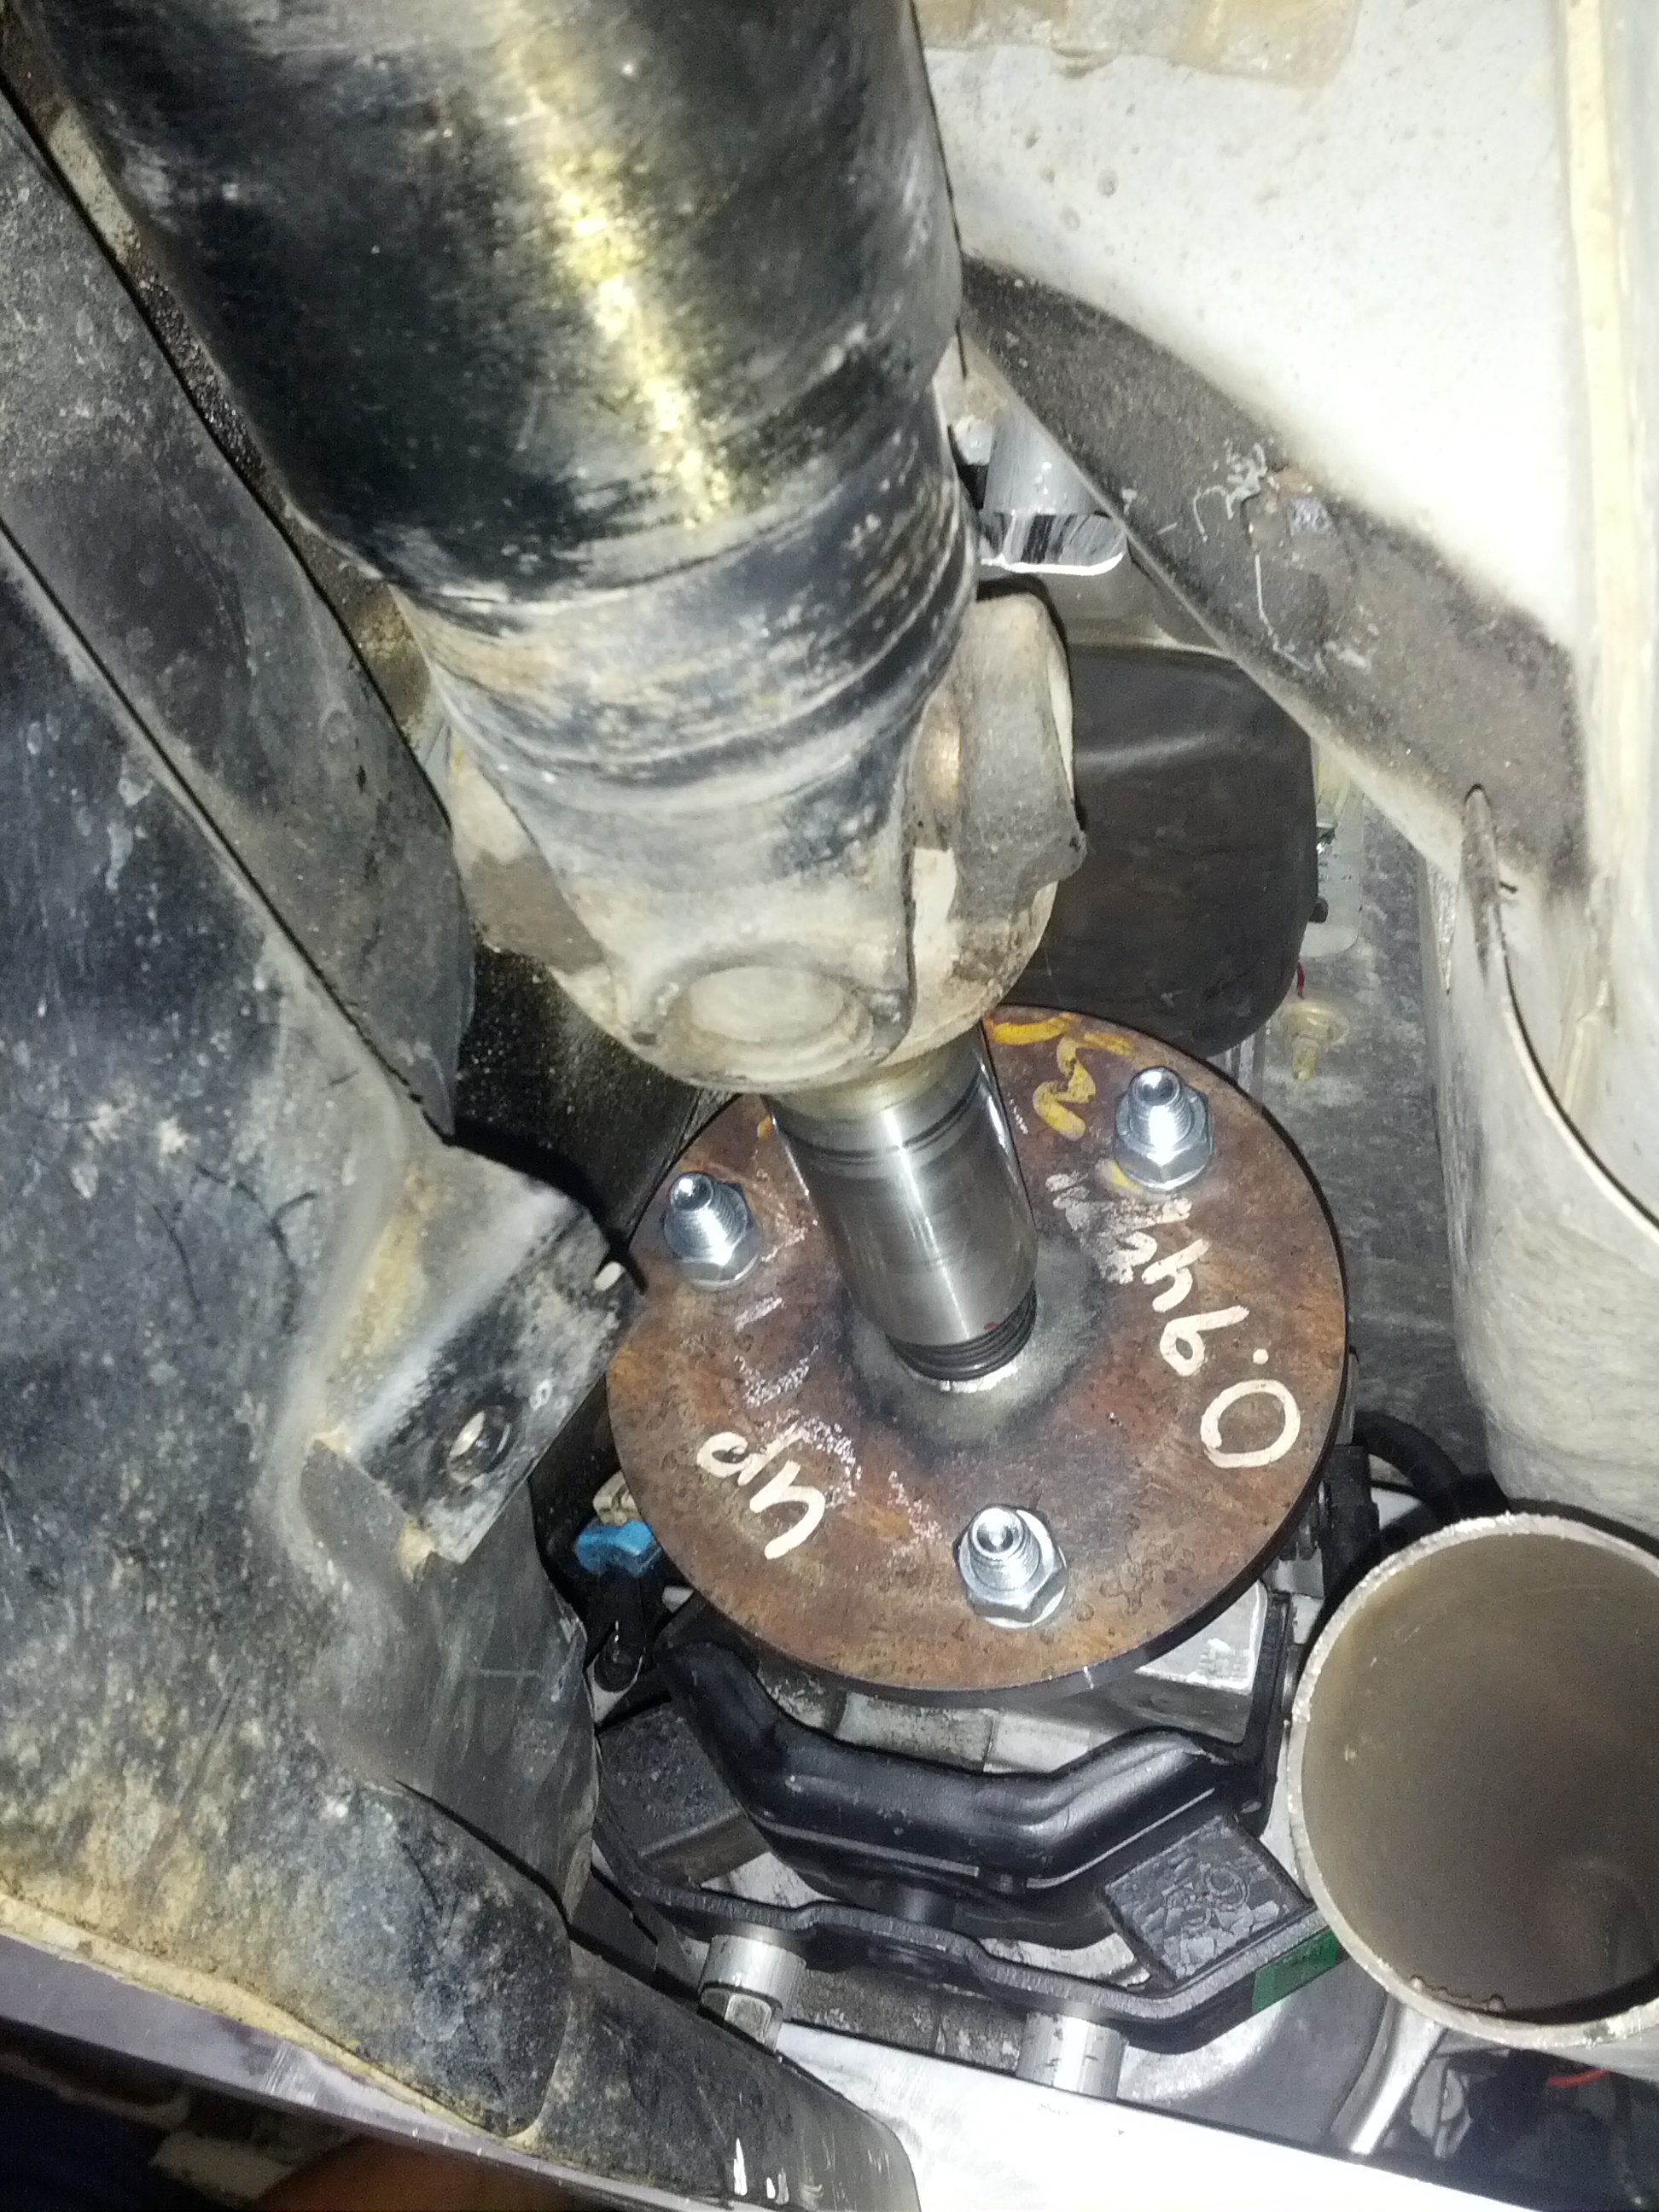
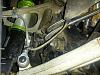
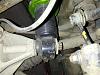
PART V: Driveshaft and rear end:
OK, I have some pictures here...
The challenge I encountered is that the TR6060 uses a rubber flex coupling rather than the old school flange / yoke setup found of the T56 and Mazda transmission alike.
This means coming up with some kind of a hybrid shaft which will couple to the regular square differential flange on the back and the triangular flange in the front. Plus there needs to be a slip yoke of some kind...
I went to every driveshaft shop in town and was laughed out the door, as this apparently "Can't be done!". All these geniuses have ever seen is a pickup truck driveshaft design from the 60's with one-piece stick and 2 U-joints, one on each end. Now, it is worth mentioning that Edmonton is a city of roughly 1 million, based almost solely on heavy machining / welding industry supplying the oil field operations north of us. You'd think someone competent would be around... It turns out that when it comes to custom car building this place is redneck Deliverance country! (no offense to those of you from wherever Deliverance was filmed).
Anyway, long story short, I was on my own (and I don't really know what I am doing, as will become apparent).
Trial one was an outright fail; I tried to use most of the Camaro's 2-piece shaft to utilize the slip yoke in the middle and modify rear portion to accept the Mazda rear U-joint. I was not able to balance/center the thing at all. Vibration was bad even at regular speeds.
Trial two was much better; I used on output shaft out of an RX7 transmission, cut it off at an opportune length then machined and adapter to weld it onto. I carefully centred this thing and cleaned it up in a lathe. It was surprisingly true... The big advantage was the ability to easily use the OEM RX driveshaft and the output shaft acted as a slip yoke.
This thing took me through the first year, and survived few track days under heavy abuse. The vibration only came at around 130 kph (80 mph).


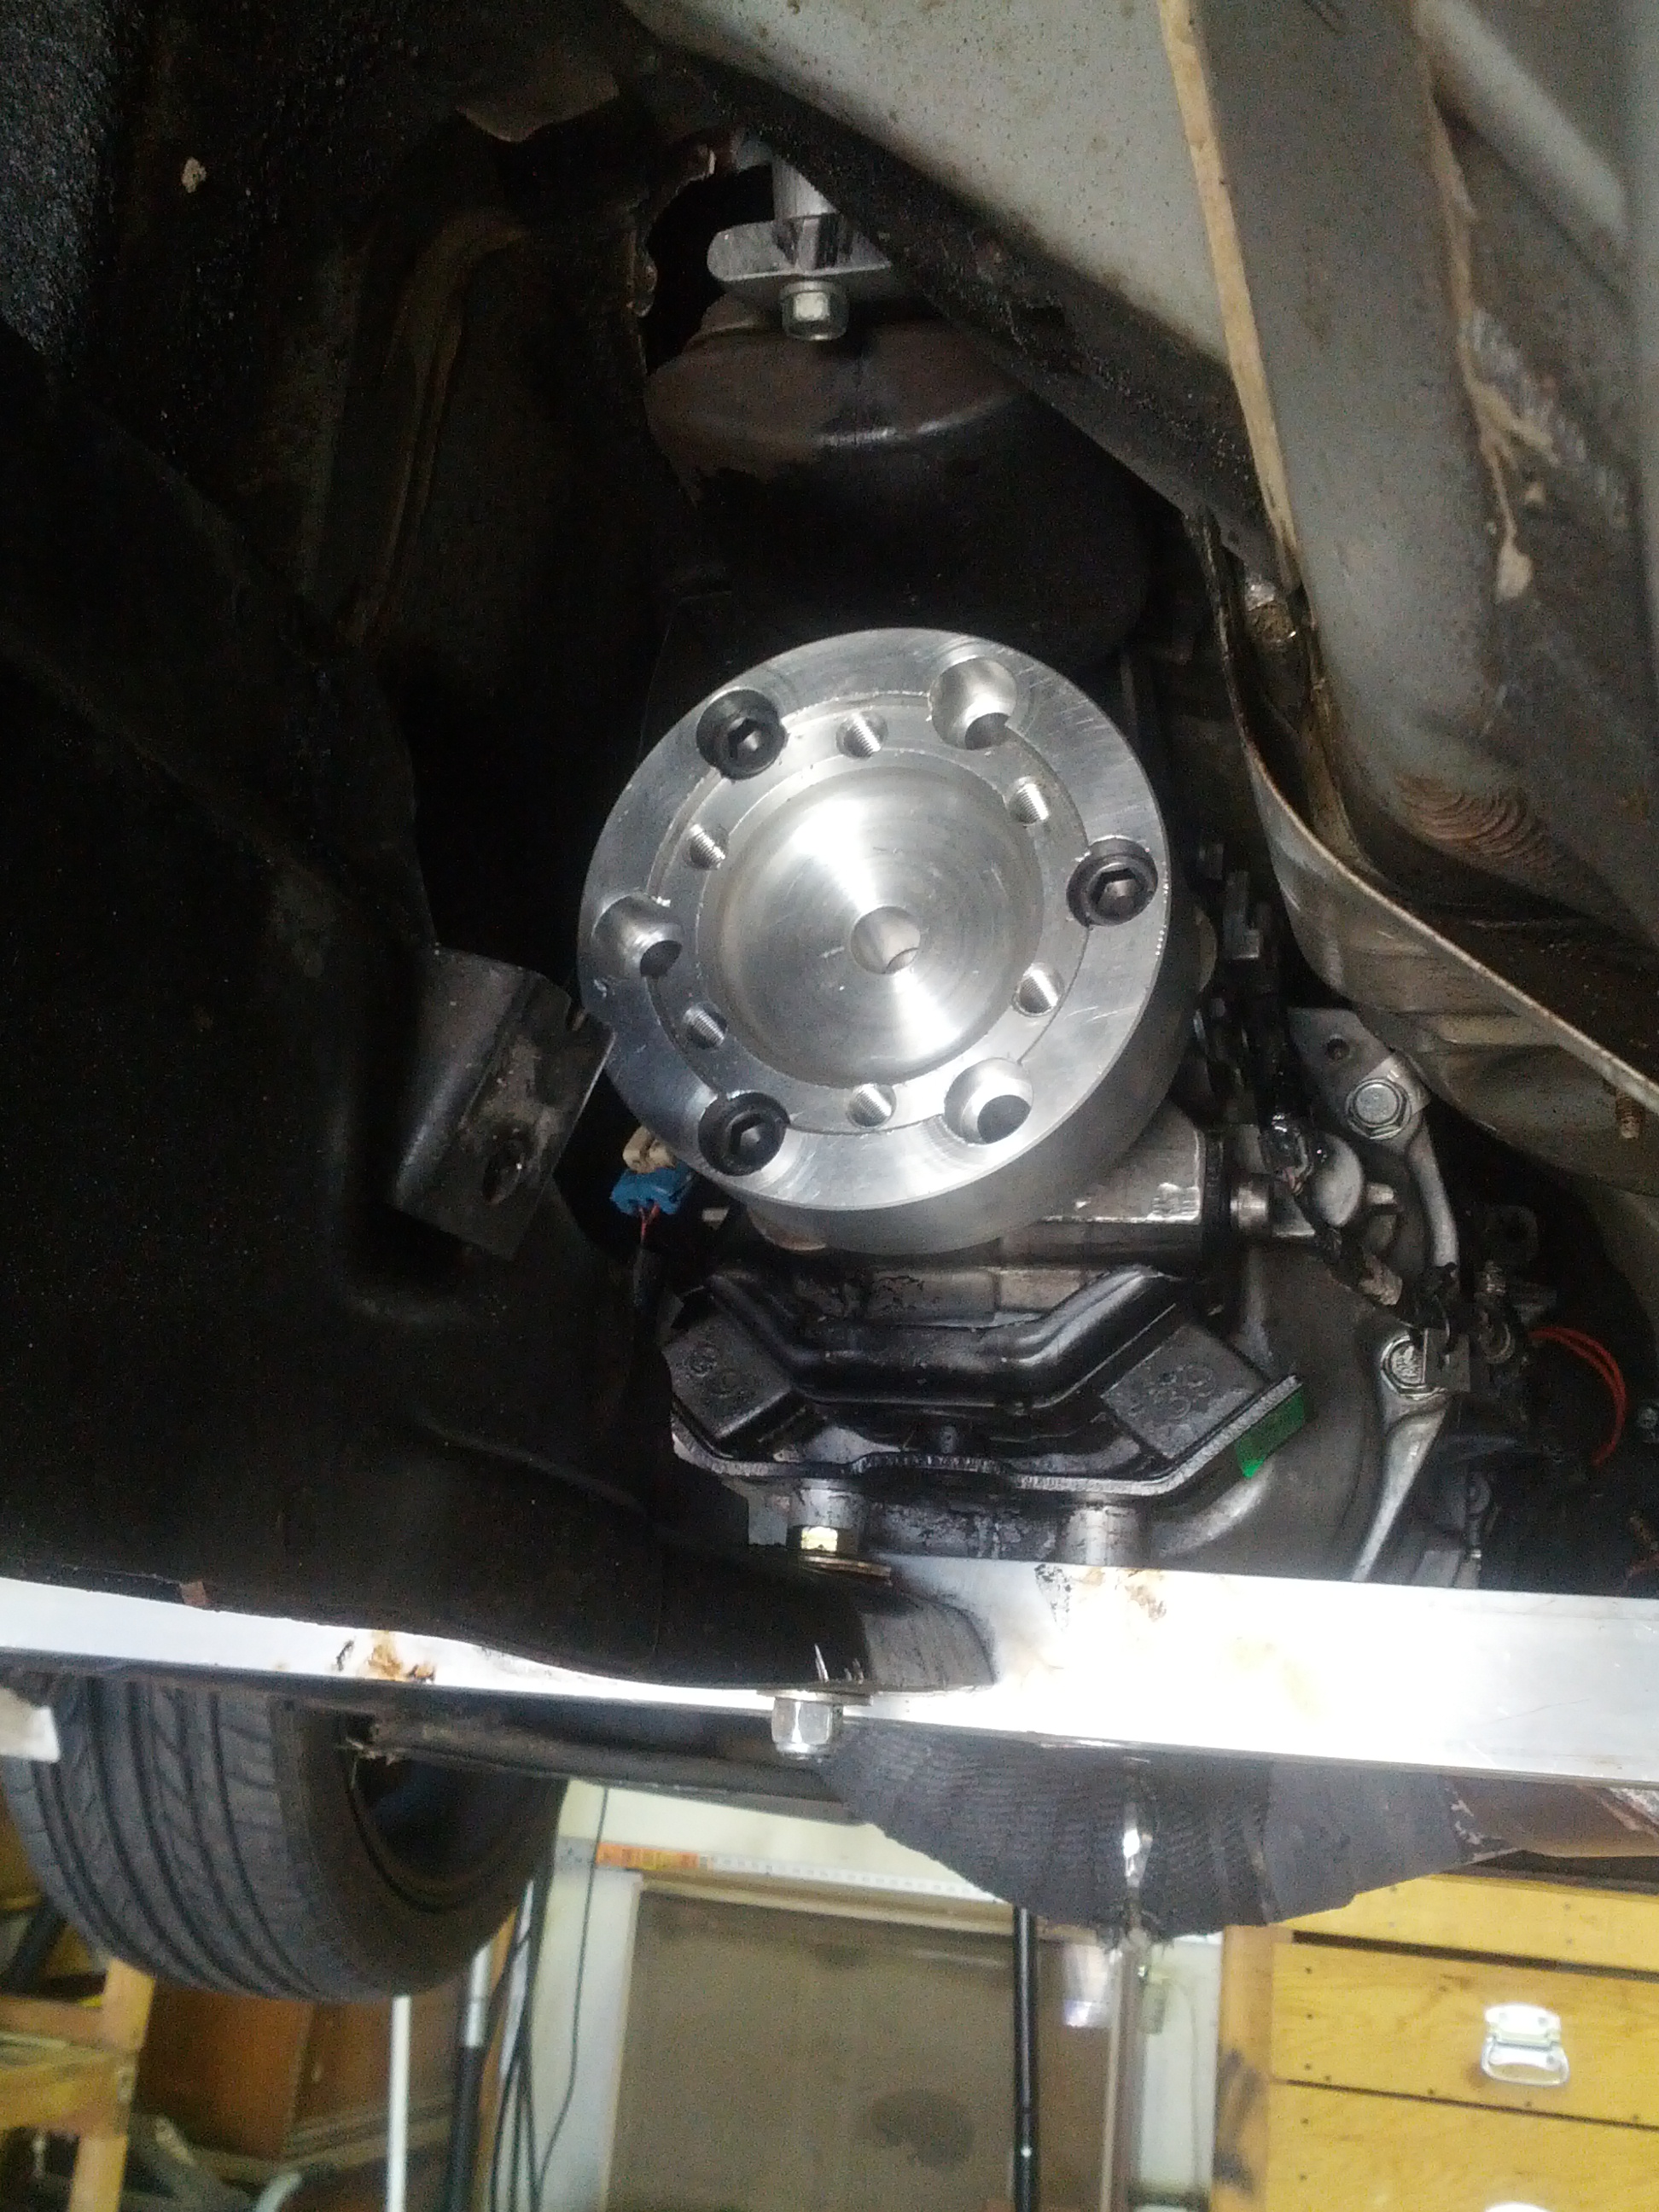
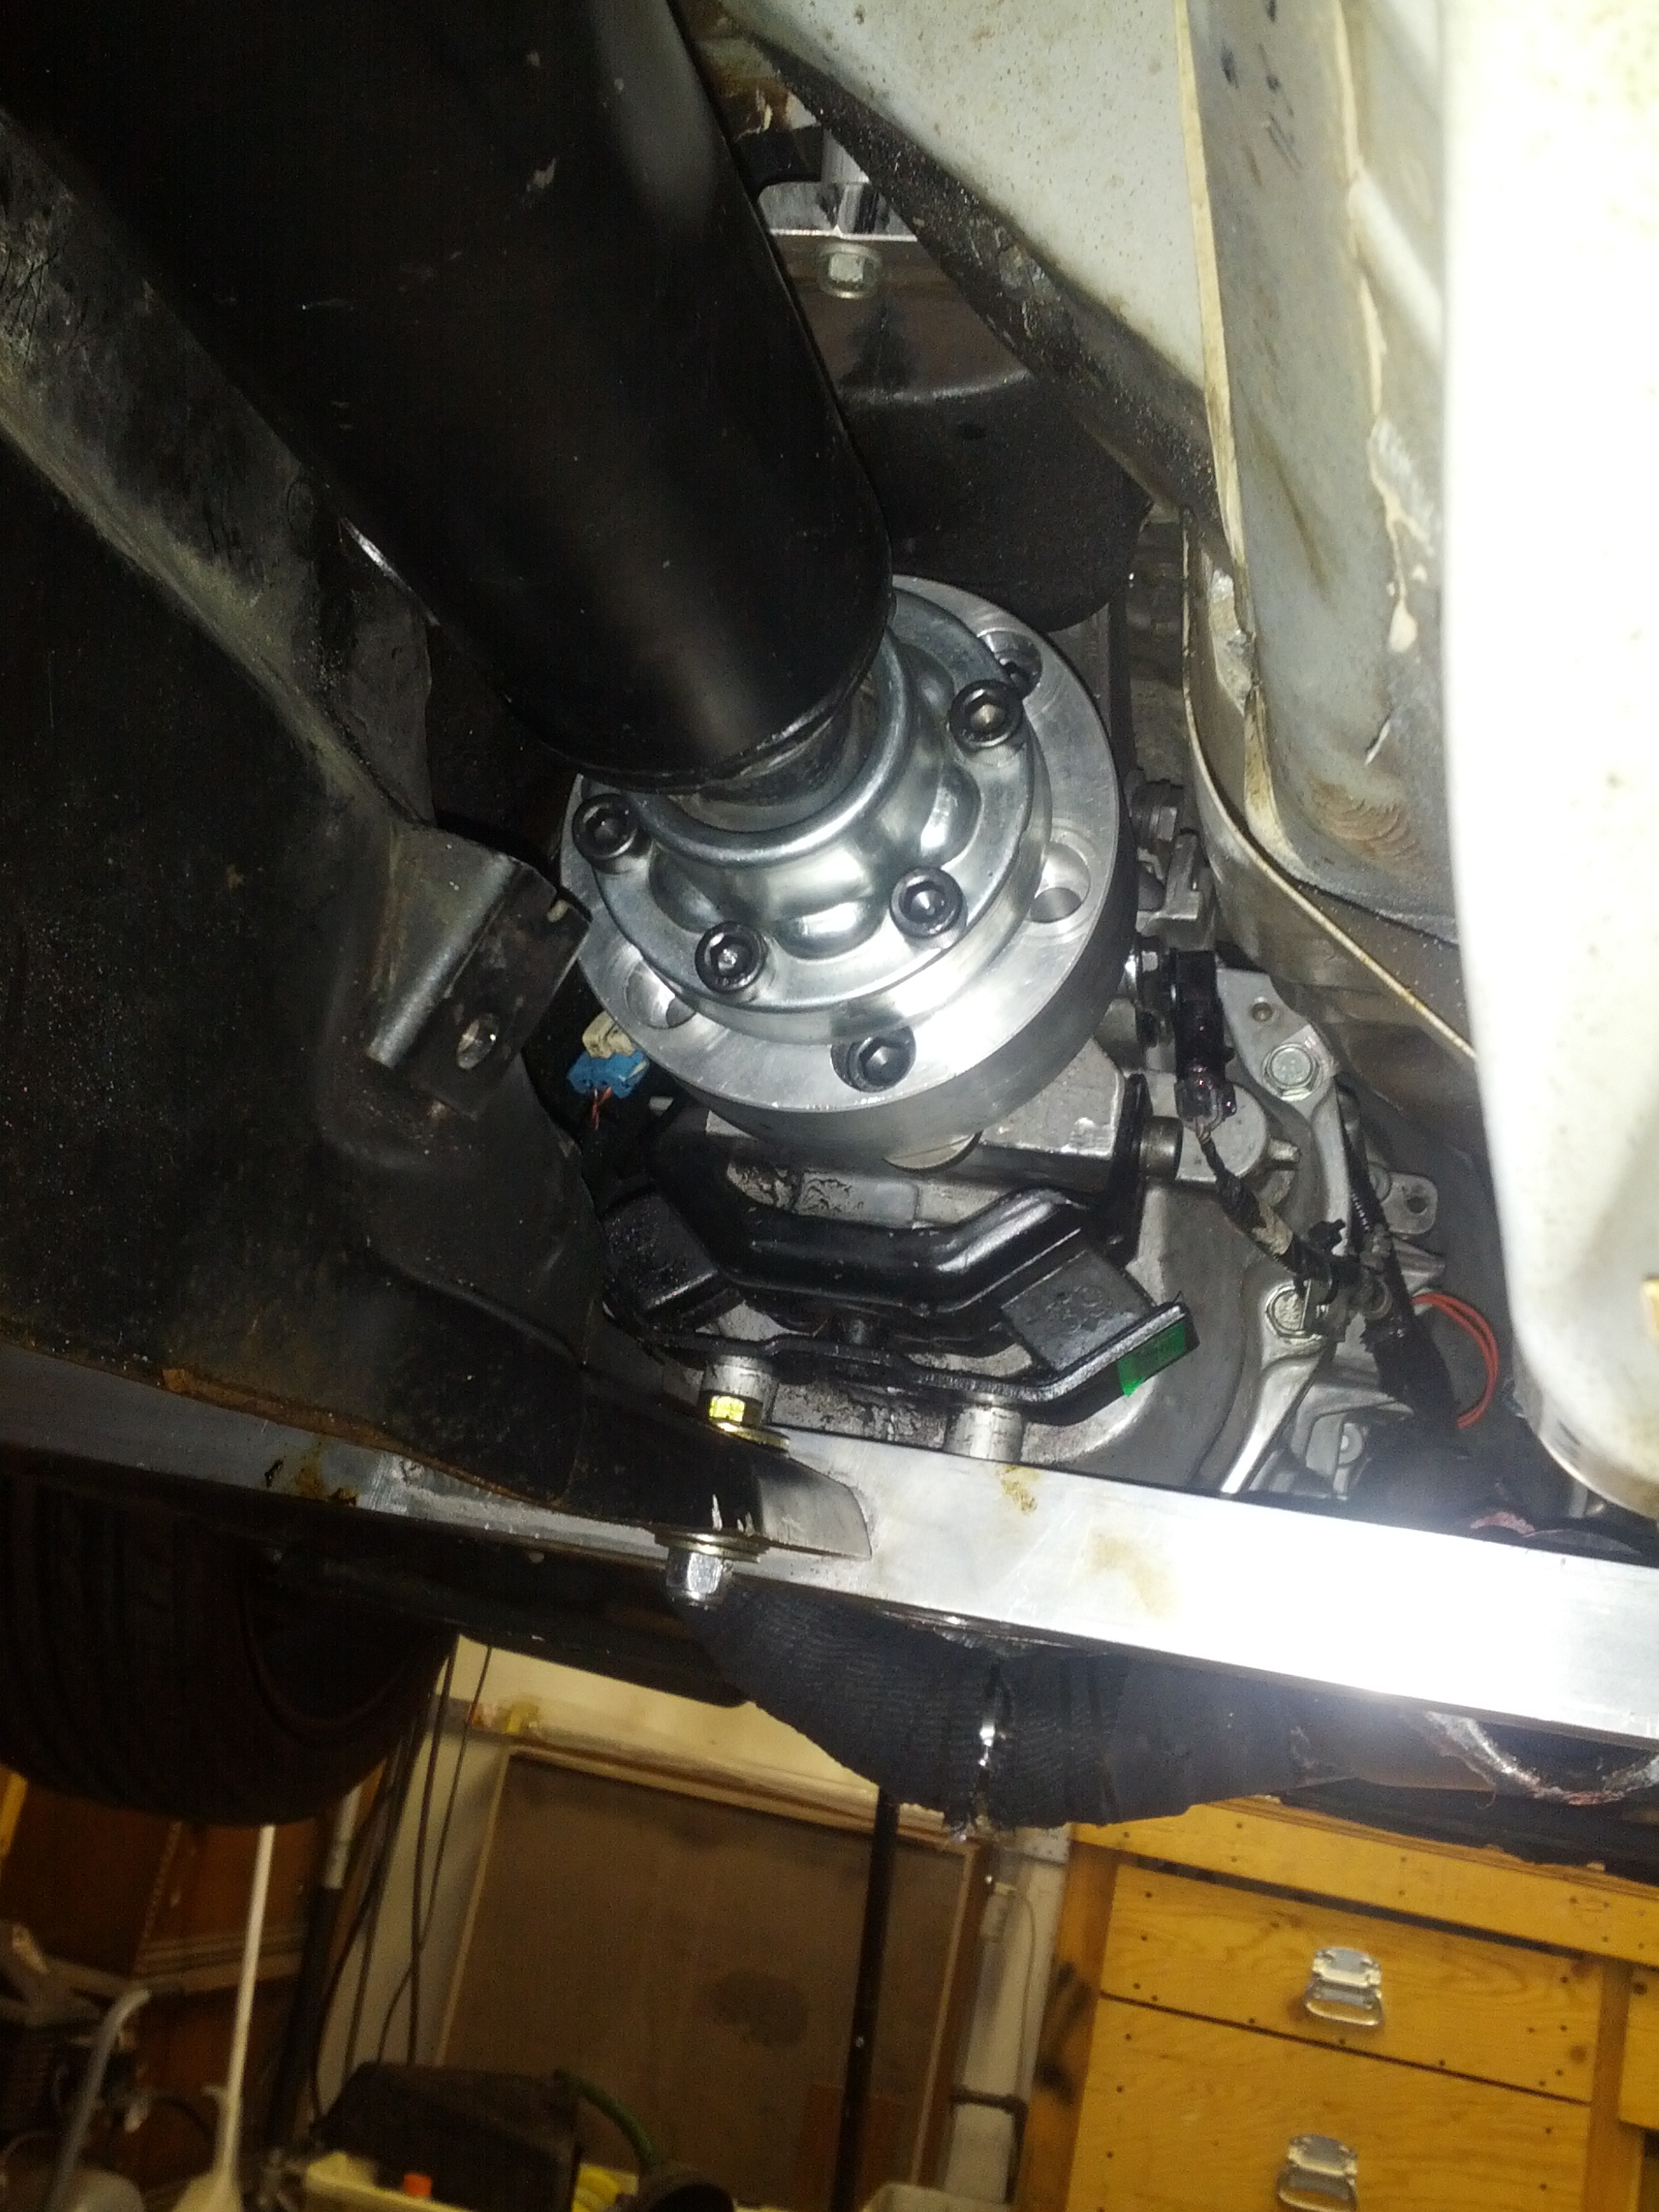
Needless to say, 80 mph sucks, and it was really taking away from the car. It was only this summer I decided to use the old internet and find someone who can make me a proper shaft. I got in touch with a guy in Florida who made me a shaft using a CV joint instead of a slip yoke, and all necessary adapters/flanges to meet my specifications. It works great, and was the best $700 I have ever spent... What a relief.


As you can see, I decided to keep the factory torque arm (with small mods) rather than creating an independent mount for the front of the differential. This has worked out well for me thus far. I made a little polyurethane bushing to mount it onto the aluminum frame crossmember to minimize vibration. The weight of the torque arm is pretty minimal and this was easy and cheap.
There are few options here when it comes to the rear end...
I drove the car with the stock 4.44 rear end and the gears were just too short. I got an amazing deal on a 3.91 rear end from a turbo automatic FD so this is the route I took.
Luckily the gears, and the actual differential drops right into the RX8 pumpkin. Friend of mine who knows how to put these things together did an excellent job assembling it for few bucks.
I have to say I am extremely happy with the ratio and its overall properties over the crappy RX8 spring loaded pseudo-differential.
Clutch / wiring next...
This is another section, where I decided to save few bucks and keep most stock RX8 parts.
I kept the stock radiator and condenser, mounted under a slanted angle much like the stock car. The catch is that I had to move the assembly forward about 4" and create custom mounting points. The top sits right against the frame crossmember, with little L-shaped anchor points, I welded up custom brackets to accept the bottom rubber grommets.
I will have to go back and take some pictures as a part of a planned winter overhaul. The lack of my documenting really is abysmal.
I kept the stock coolant tank in its original location and ran a small line to the LS head steamer port. In order to prevent air trapping, a high point needs to be maintained, so I created a secondary non pressurized overflow, which I mounted to the front of the left head, where the power steering pump used to sit. I used a small Suzuki Samurai overflow for $10 shipped from India.
I was also able to reuse most OEM hoses, somehow this worked out, although I can't recall what goes where.
I created a T-piece adapter to splice into the bottom rad hose and connect this to the bottom of the pressurized RX8 coolant reservoir. This adapter also enabled me to account for the difference in size between the top and bottom coolant hose on the LS block. "Jagsthatrun.com" makes great T-adapters like this for very reasonable price.
Finally a picture of something... (adapter and tranny cooler lines)
I used both of the RX8's oil coolers since they were already there.
Passenger side for transmission, driver side for engine oil.
Note that the oil cooler side has a "Improved Racing" unit with coupling attachments and couple of 1/8 NPT ports to mount oil pressure and/or temperature gauge sensors. This allowed me to use the RX8 sensor as well as the LS sensor on top of the block.
BTW - those are wrong lines for high pressure oil, it was a test fit, only to realize that there is no room between exhaust, steering, and subframe. I ended up routing the actual SS braided lines a pretty crafty way through the driver side wheel well. (pictures coming, sorry).
I don't have a lot to say about air conditioning... in a nutshell:
RX condenser, LS compressor, RX ECU controlling the compressor clutch and climate overall.
I outsourced the lines at a local shop. The guy quoted me around $300, although I warned him the fitment is tight. I got a call at 10:30PM when he finished, the price was closer to $900.
Lastly, heater hoses were a breeze, I fabricated a heat insulating tunnel from scrap aluminum, to run them close to the passenger side strut tower and keep them away from the exhaust.
PART V: Driveshaft and rear end:
OK, I have some pictures here...
The challenge I encountered is that the TR6060 uses a rubber flex coupling rather than the old school flange / yoke setup found of the T56 and Mazda transmission alike.
This means coming up with some kind of a hybrid shaft which will couple to the regular square differential flange on the back and the triangular flange in the front. Plus there needs to be a slip yoke of some kind...
I went to every driveshaft shop in town and was laughed out the door, as this apparently "Can't be done!". All these geniuses have ever seen is a pickup truck driveshaft design from the 60's with one-piece stick and 2 U-joints, one on each end. Now, it is worth mentioning that Edmonton is a city of roughly 1 million, based almost solely on heavy machining / welding industry supplying the oil field operations north of us. You'd think someone competent would be around... It turns out that when it comes to custom car building this place is redneck Deliverance country! (no offense to those of you from wherever Deliverance was filmed).
Anyway, long story short, I was on my own (and I don't really know what I am doing, as will become apparent).
Trial one was an outright fail; I tried to use most of the Camaro's 2-piece shaft to utilize the slip yoke in the middle and modify rear portion to accept the Mazda rear U-joint. I was not able to balance/center the thing at all. Vibration was bad even at regular speeds.
Trial two was much better; I used on output shaft out of an RX7 transmission, cut it off at an opportune length then machined and adapter to weld it onto. I carefully centred this thing and cleaned it up in a lathe. It was surprisingly true... The big advantage was the ability to easily use the OEM RX driveshaft and the output shaft acted as a slip yoke.
This thing took me through the first year, and survived few track days under heavy abuse. The vibration only came at around 130 kph (80 mph).

Needless to say, 80 mph sucks, and it was really taking away from the car. It was only this summer I decided to use the old internet and find someone who can make me a proper shaft. I got in touch with a guy in Florida who made me a shaft using a CV joint instead of a slip yoke, and all necessary adapters/flanges to meet my specifications. It works great, and was the best $700 I have ever spent... What a relief.
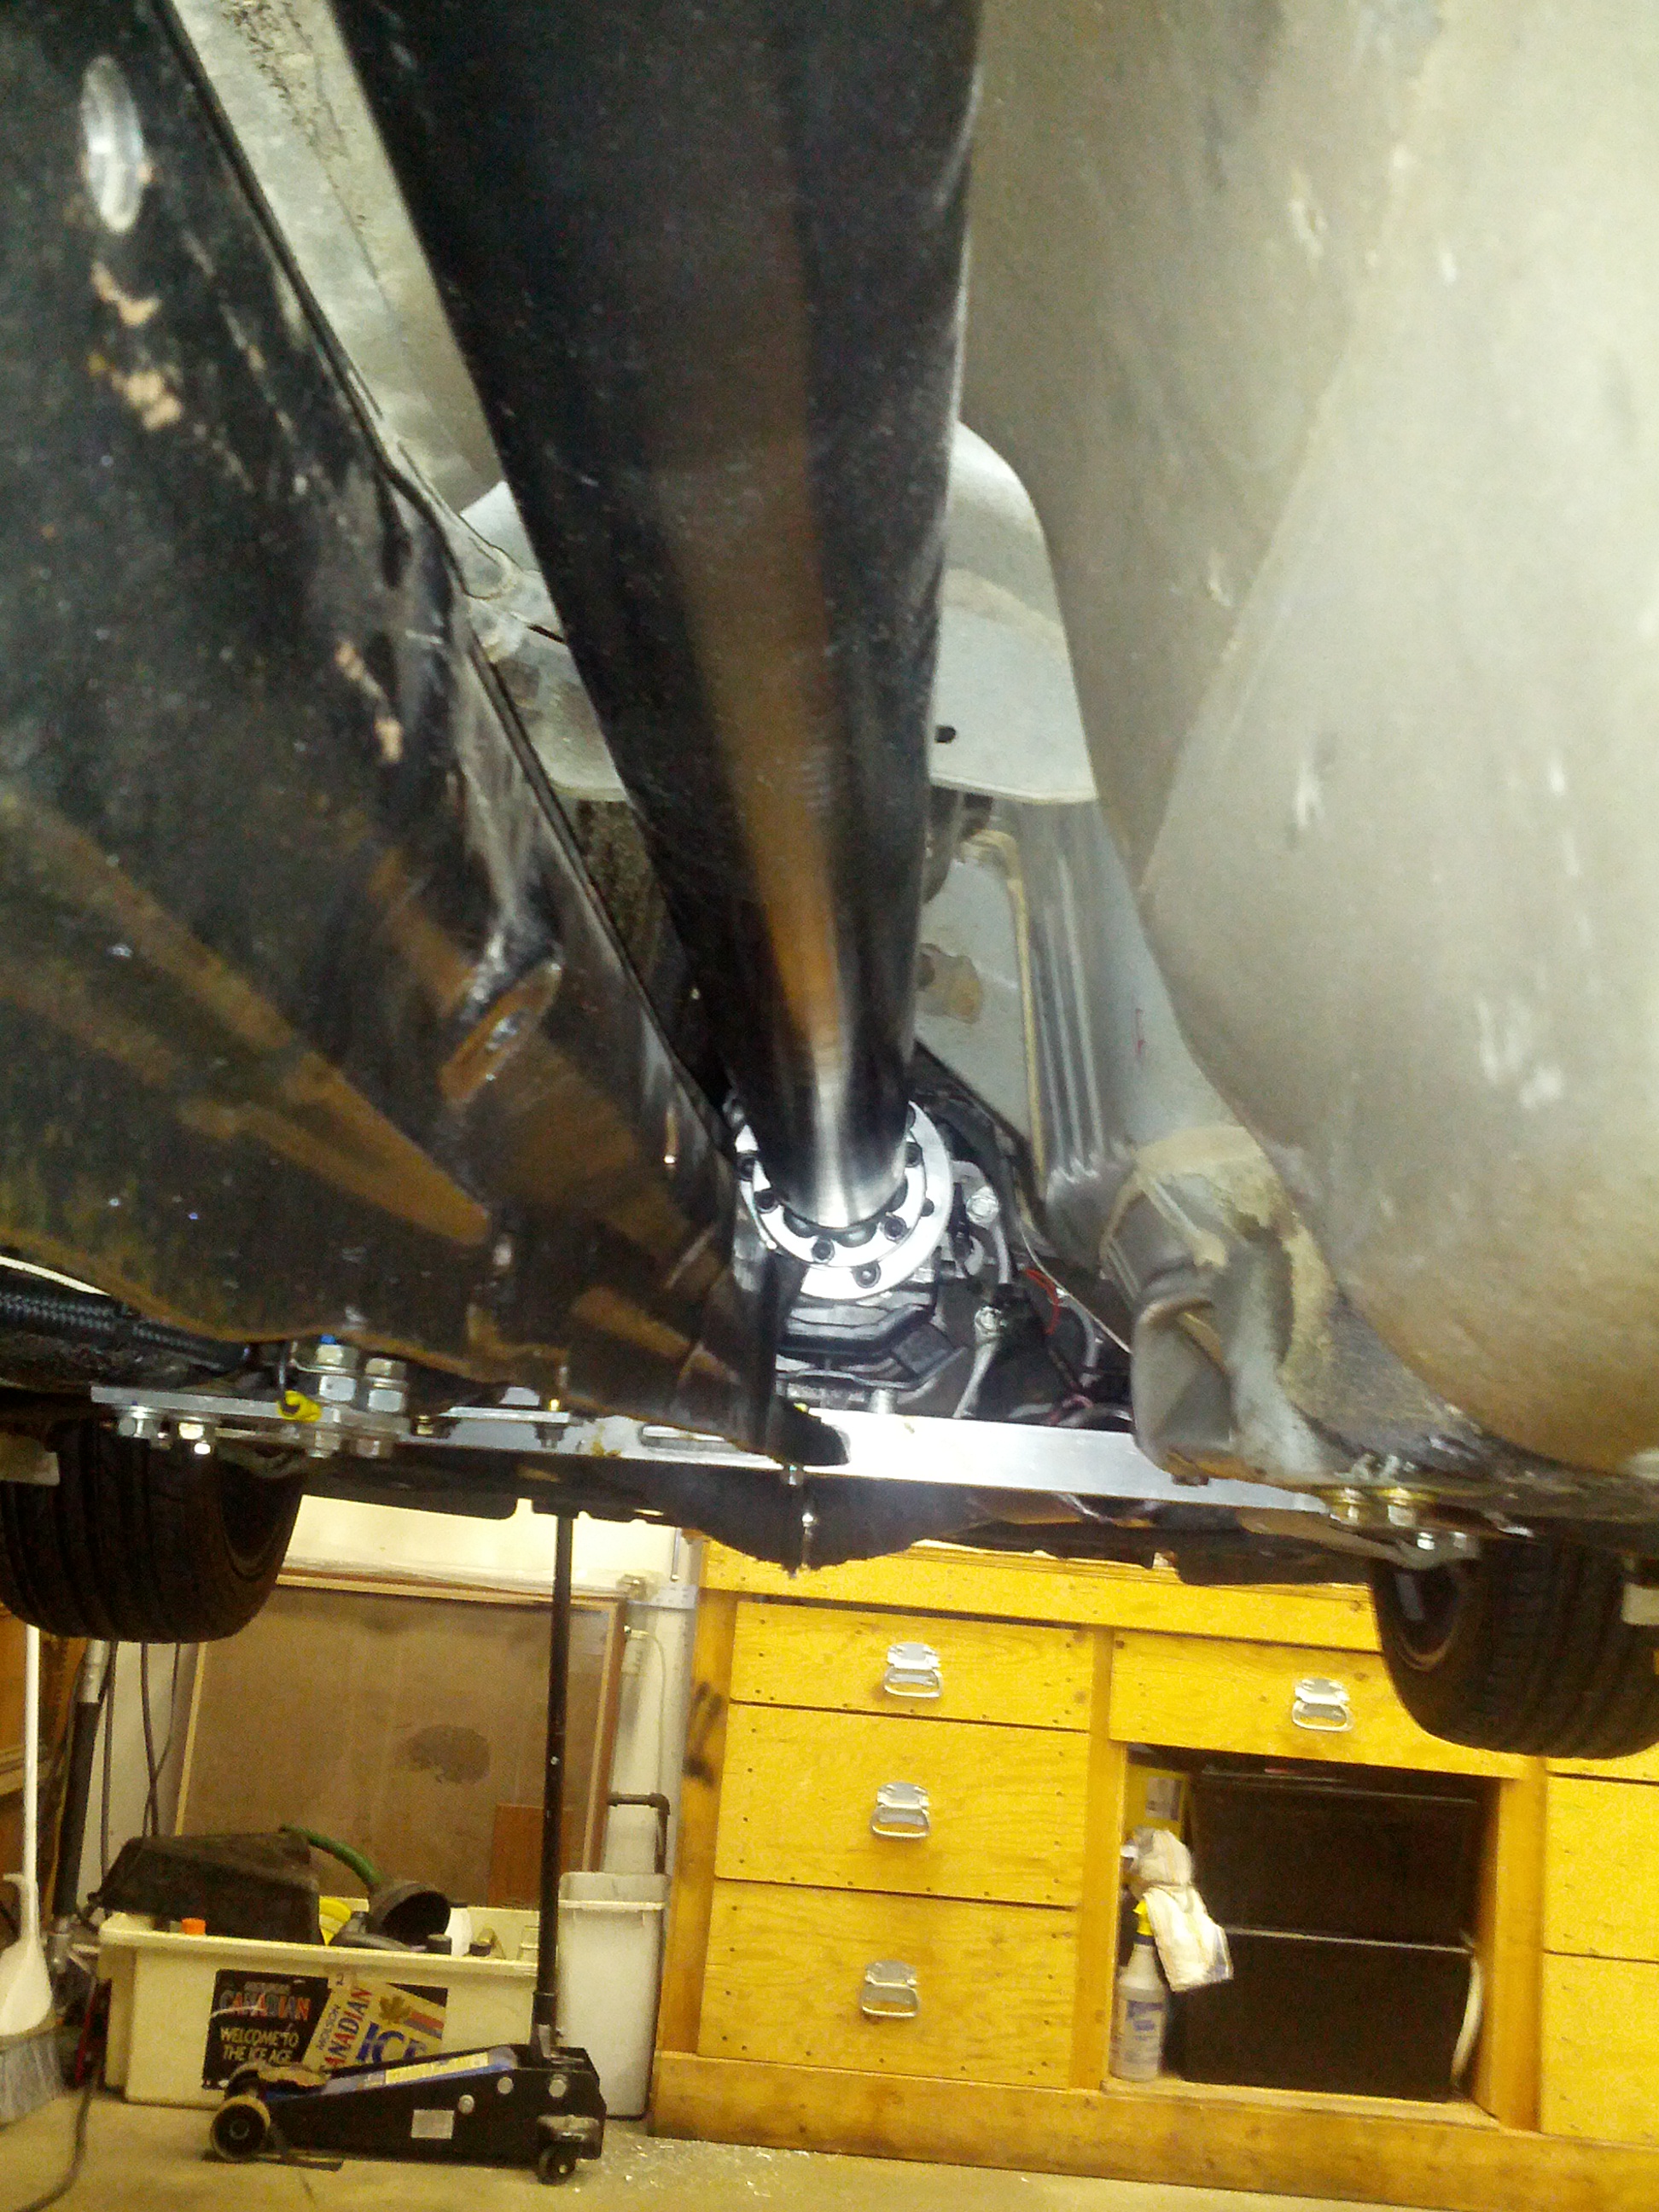
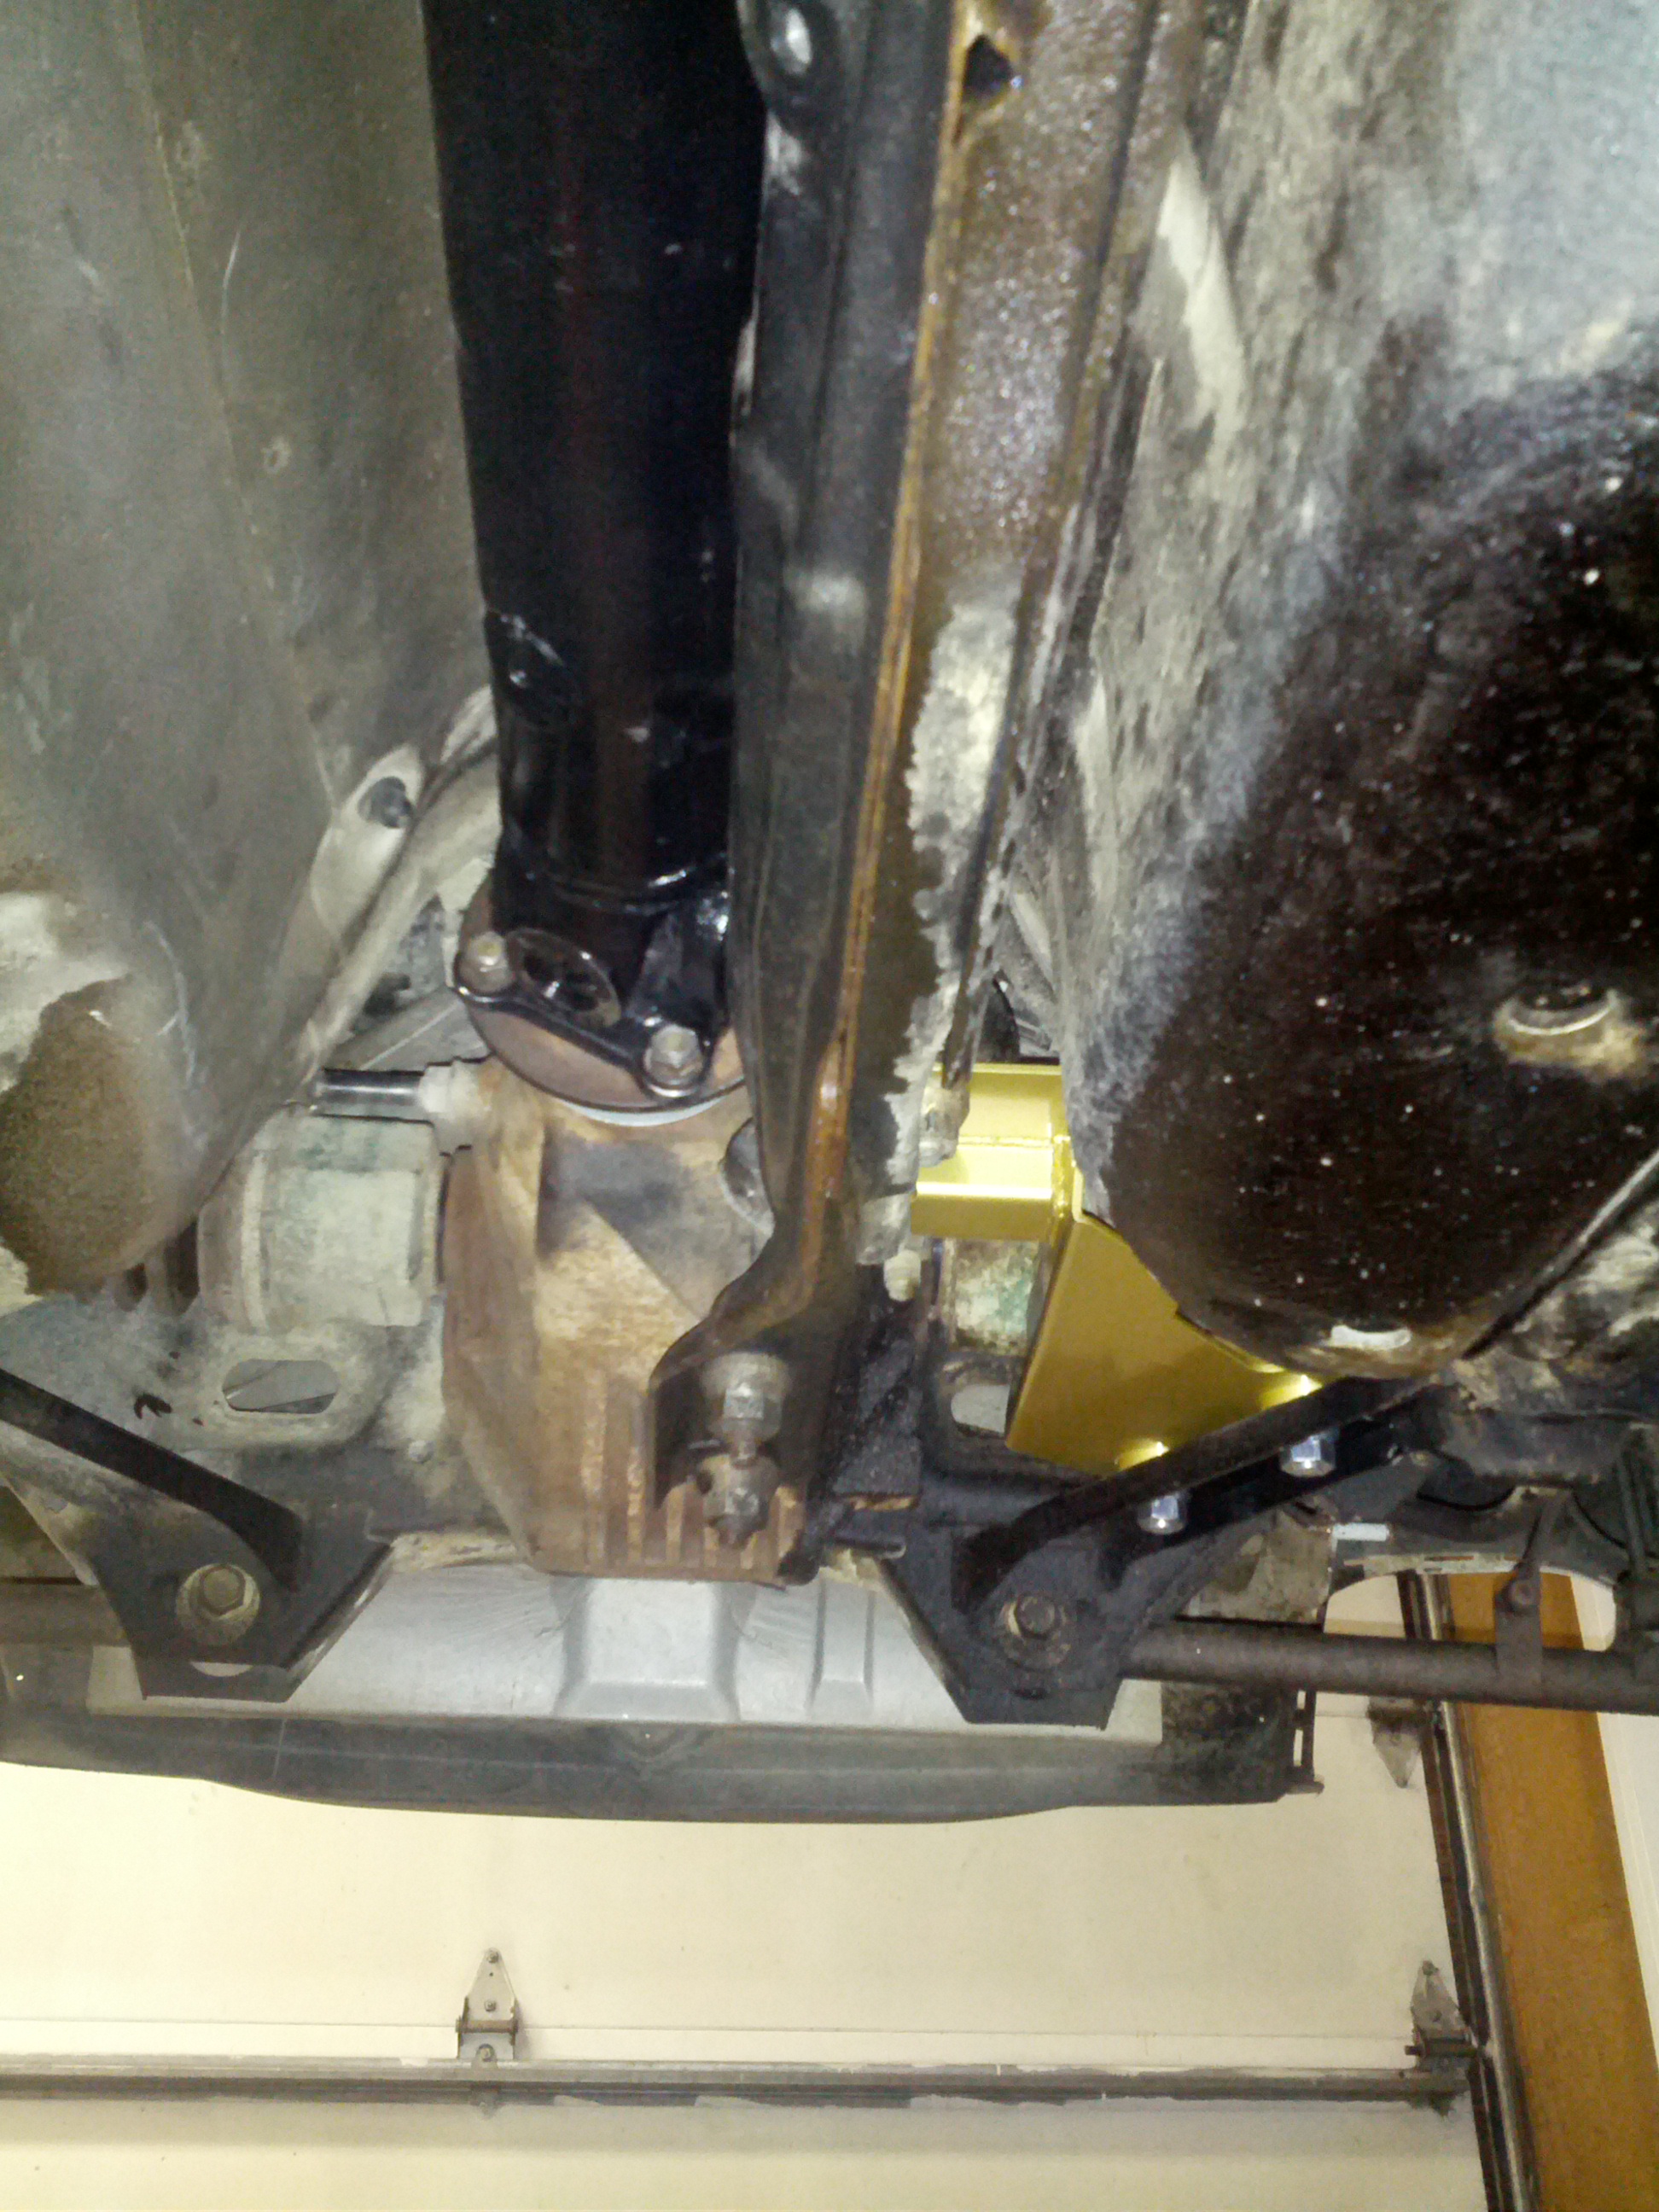
As you can see, I decided to keep the factory torque arm (with small mods) rather than creating an independent mount for the front of the differential. This has worked out well for me thus far. I made a little polyurethane bushing to mount it onto the aluminum frame crossmember to minimize vibration. The weight of the torque arm is pretty minimal and this was easy and cheap.
There are few options here when it comes to the rear end...
I drove the car with the stock 4.44 rear end and the gears were just too short. I got an amazing deal on a 3.91 rear end from a turbo automatic FD so this is the route I took.
Luckily the gears, and the actual differential drops right into the RX8 pumpkin. Friend of mine who knows how to put these things together did an excellent job assembling it for few bucks.
I have to say I am extremely happy with the ratio and its overall properties over the crappy RX8 spring loaded pseudo-differential.
Clutch / wiring next...
10-30-2015, 06:35 PM
#10
Registered
Thread Starter
PART VI: Small necessary things...
Clutch was a breeze... 1" Willwood master cylinder, correct length linkage to couple to the RX8 pedal, and a SS braided clutch line. Master takes fluid from the RX8 brake fluid reservoir just like the OEM cylinder would. The TR6060 has a super easy access to the bleeding nipple.
Throttle pedal was also relatively straightforward. I ran the wiring for it behind the firewall insulator and crossed the firewall on driver's side. You really can't see anything.
I managed to install the Camaro throttle pedal in pretty much exactly the same location as the Mazda pedal was. I don't have any pictures here, but it very easy after few careful measurements to allow for a smooth heel-toe action
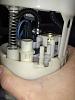
Fuel... Once you past the idiotic plastic ring holding the fuel pump that is...
Really, sky's the limit here, and it depends on how much power you wanna make. I went with the "budget" approach again, although I received most of the fuel components from Steve at LS1RX8 as part of the aforementioned kit. I did not end up needing most of it.
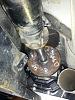
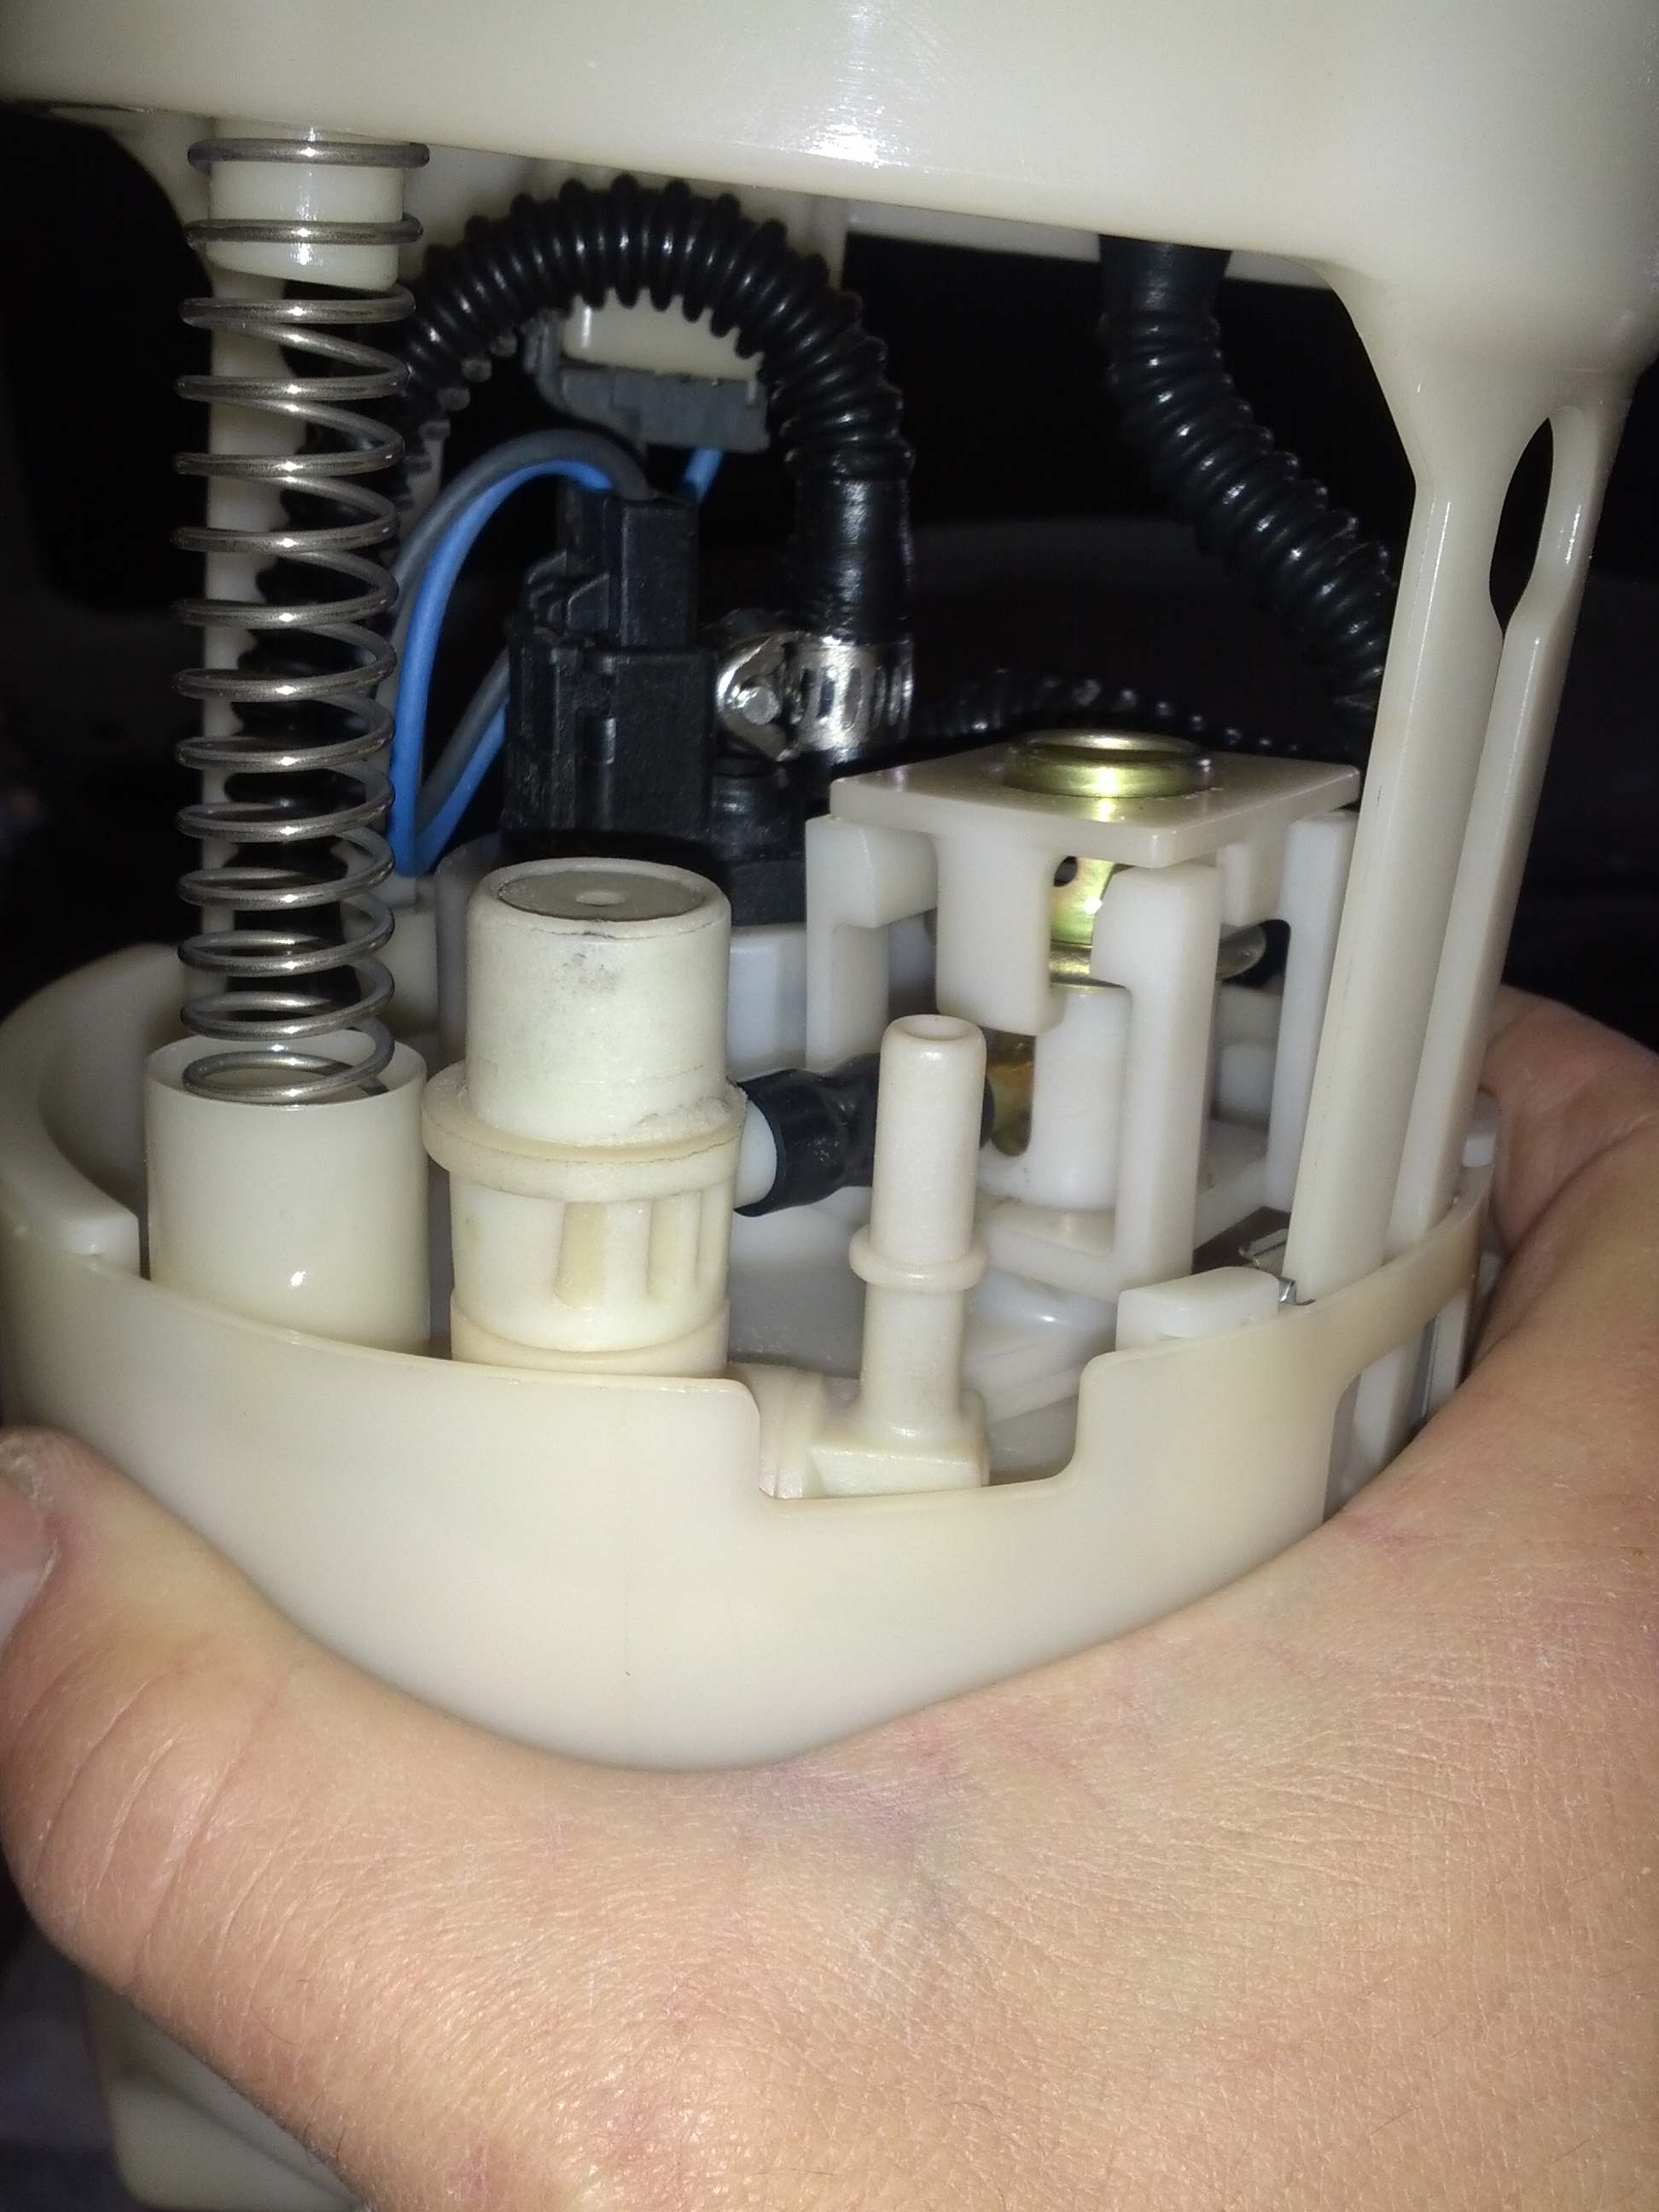
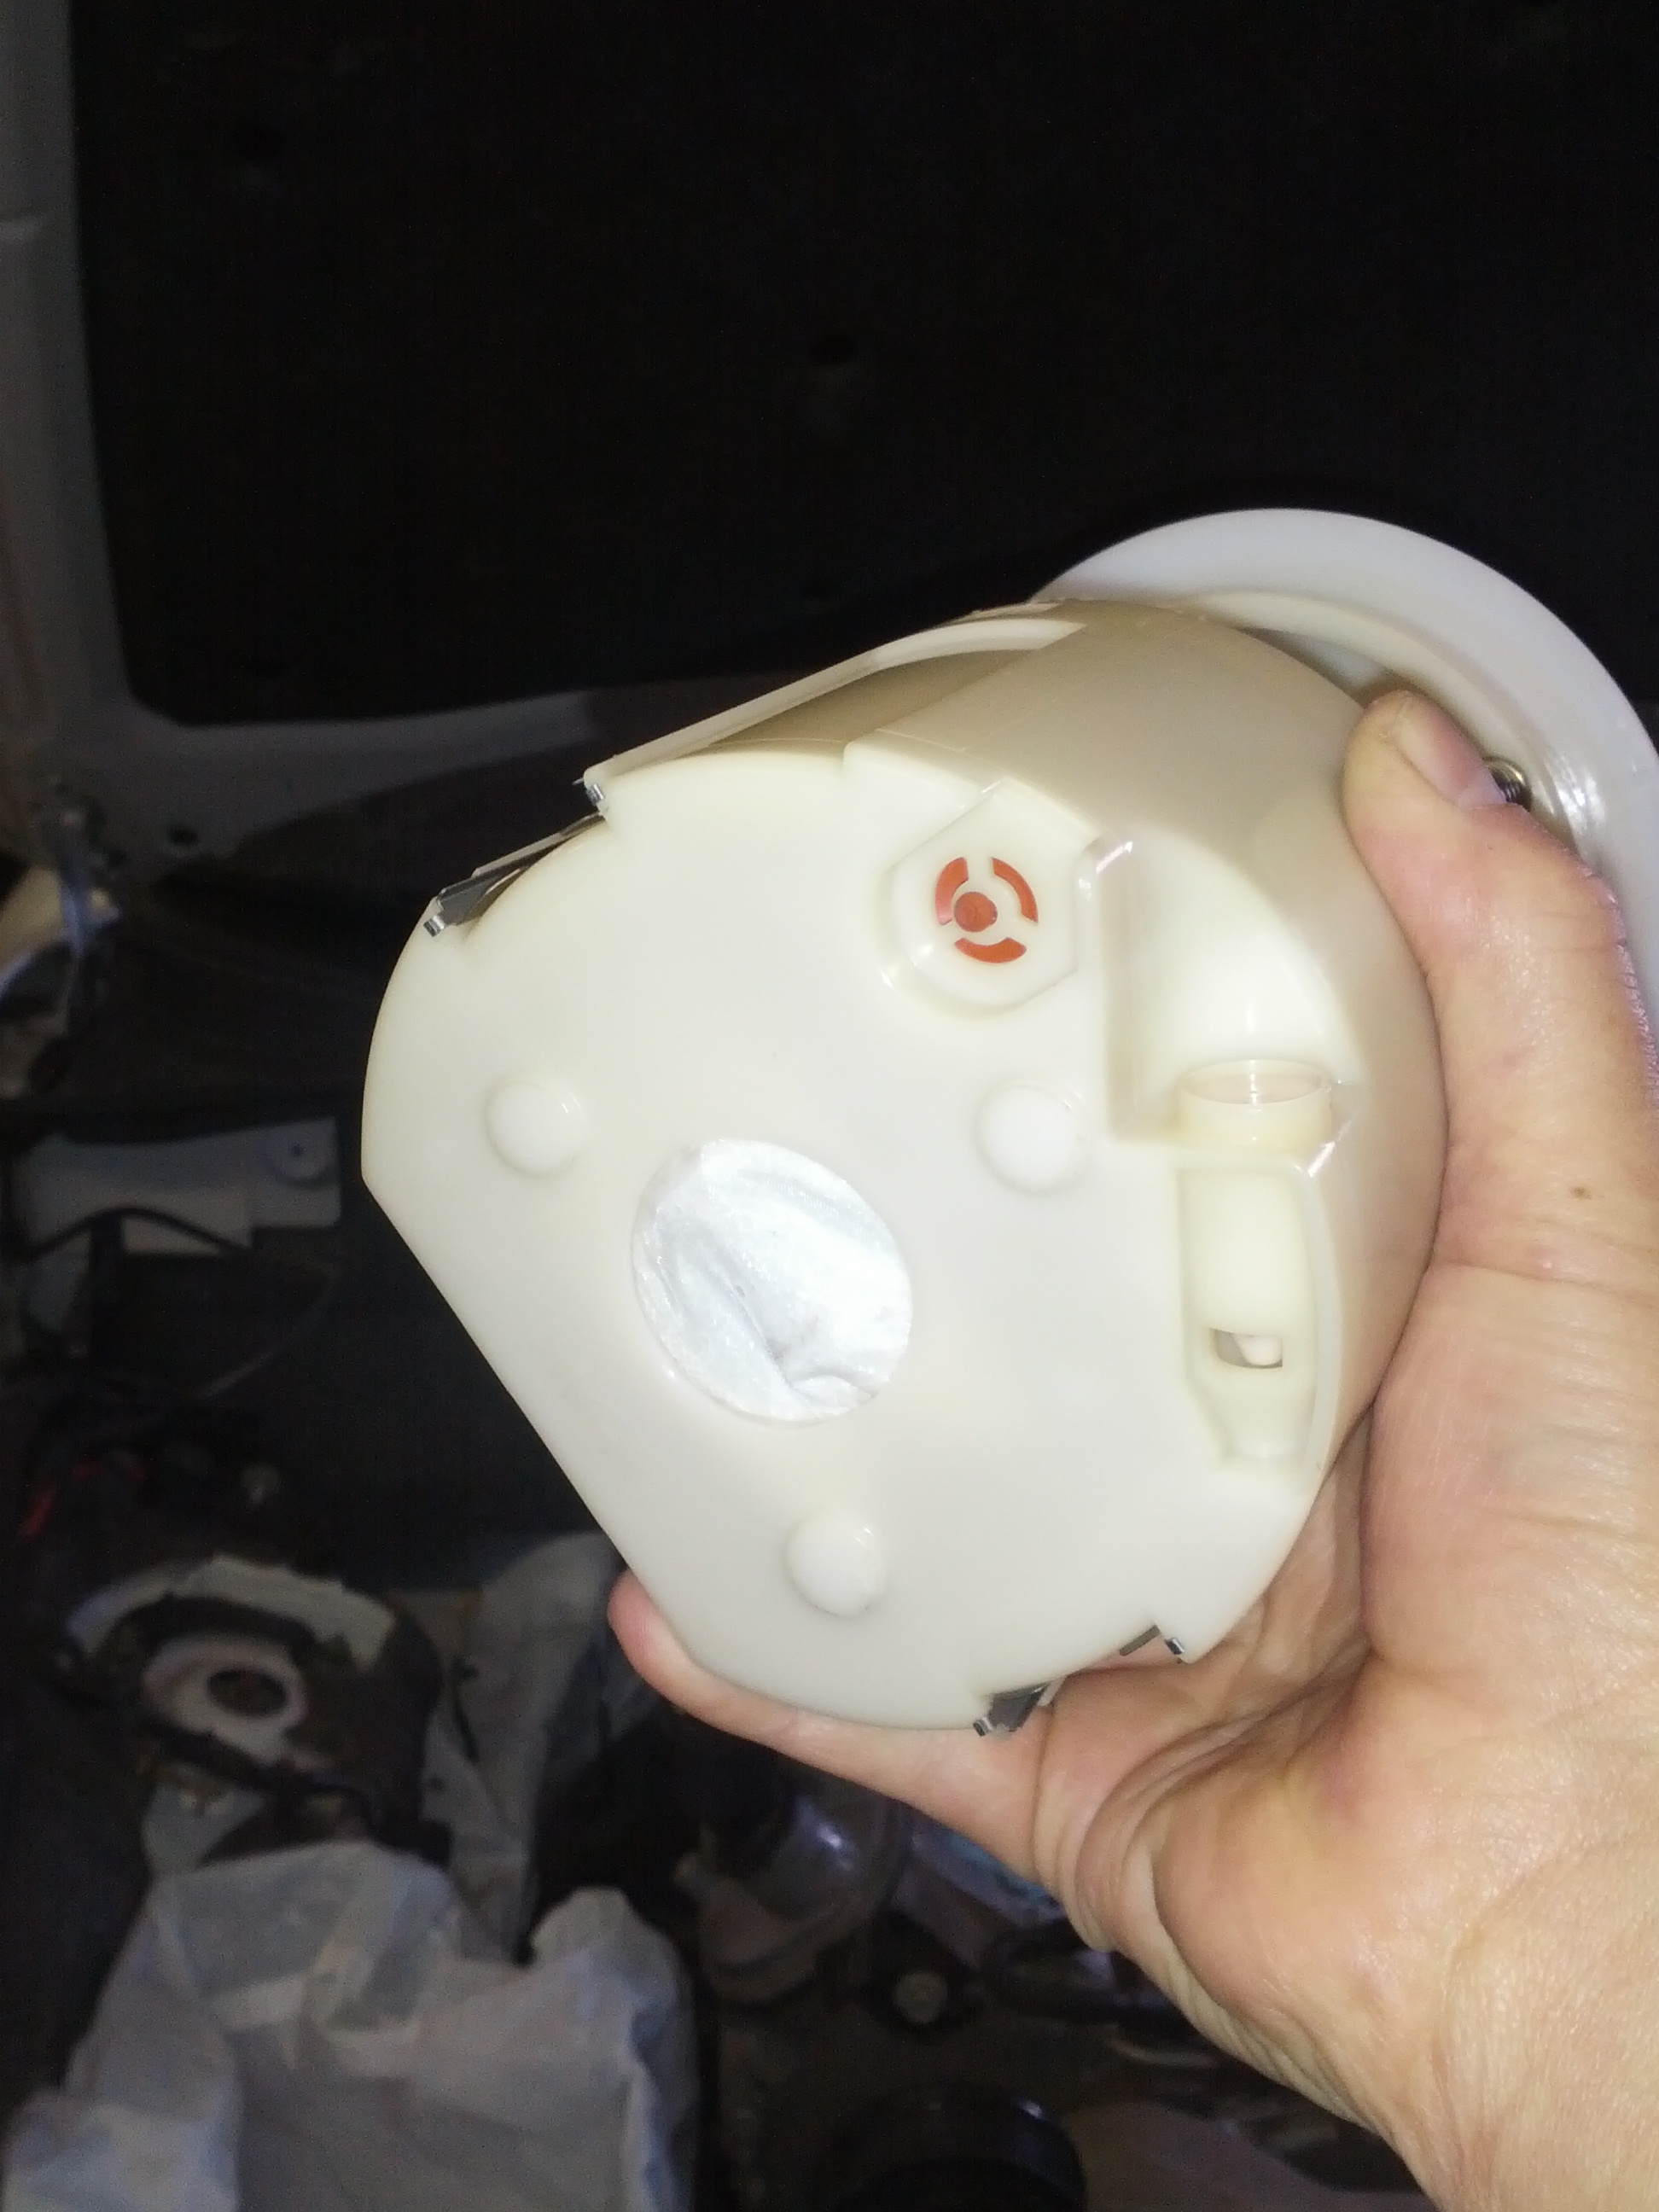
I find this can be as complicated or as simple as one wants to make it. I modified the stock Mazda fuel pump bracket in order to retain the Mazda FPR and fuel filter (and more importantly the siphon system which enables the RX8 to use the saddle shaped tank), yet to allow more flow. There is a Walbro pump (replacement for F-body cars) which fits right in, and plugs right in. Literally the only thing you need to do is drill a hole in the bottom of the in-tank assembly, see picture.

This way you can also use the Mazda hard line going to the engine, and only create a small pigtail adapter to hook up to the LS fuel rail.
In order to get the correct pressure (58-62 psi or so), you need to run the low-voltage Mazda circuit to the pump (more on this in electrical). I have tested this on the dyno, the track, and have watched 2 separate FP gauges for few months. Works like a charm and will run you about $150 all said and done.
PART VII: Electrical...
I must make couple of disclaimers here: I do not like electrical, and am lousy at it at best.
What am I doing?

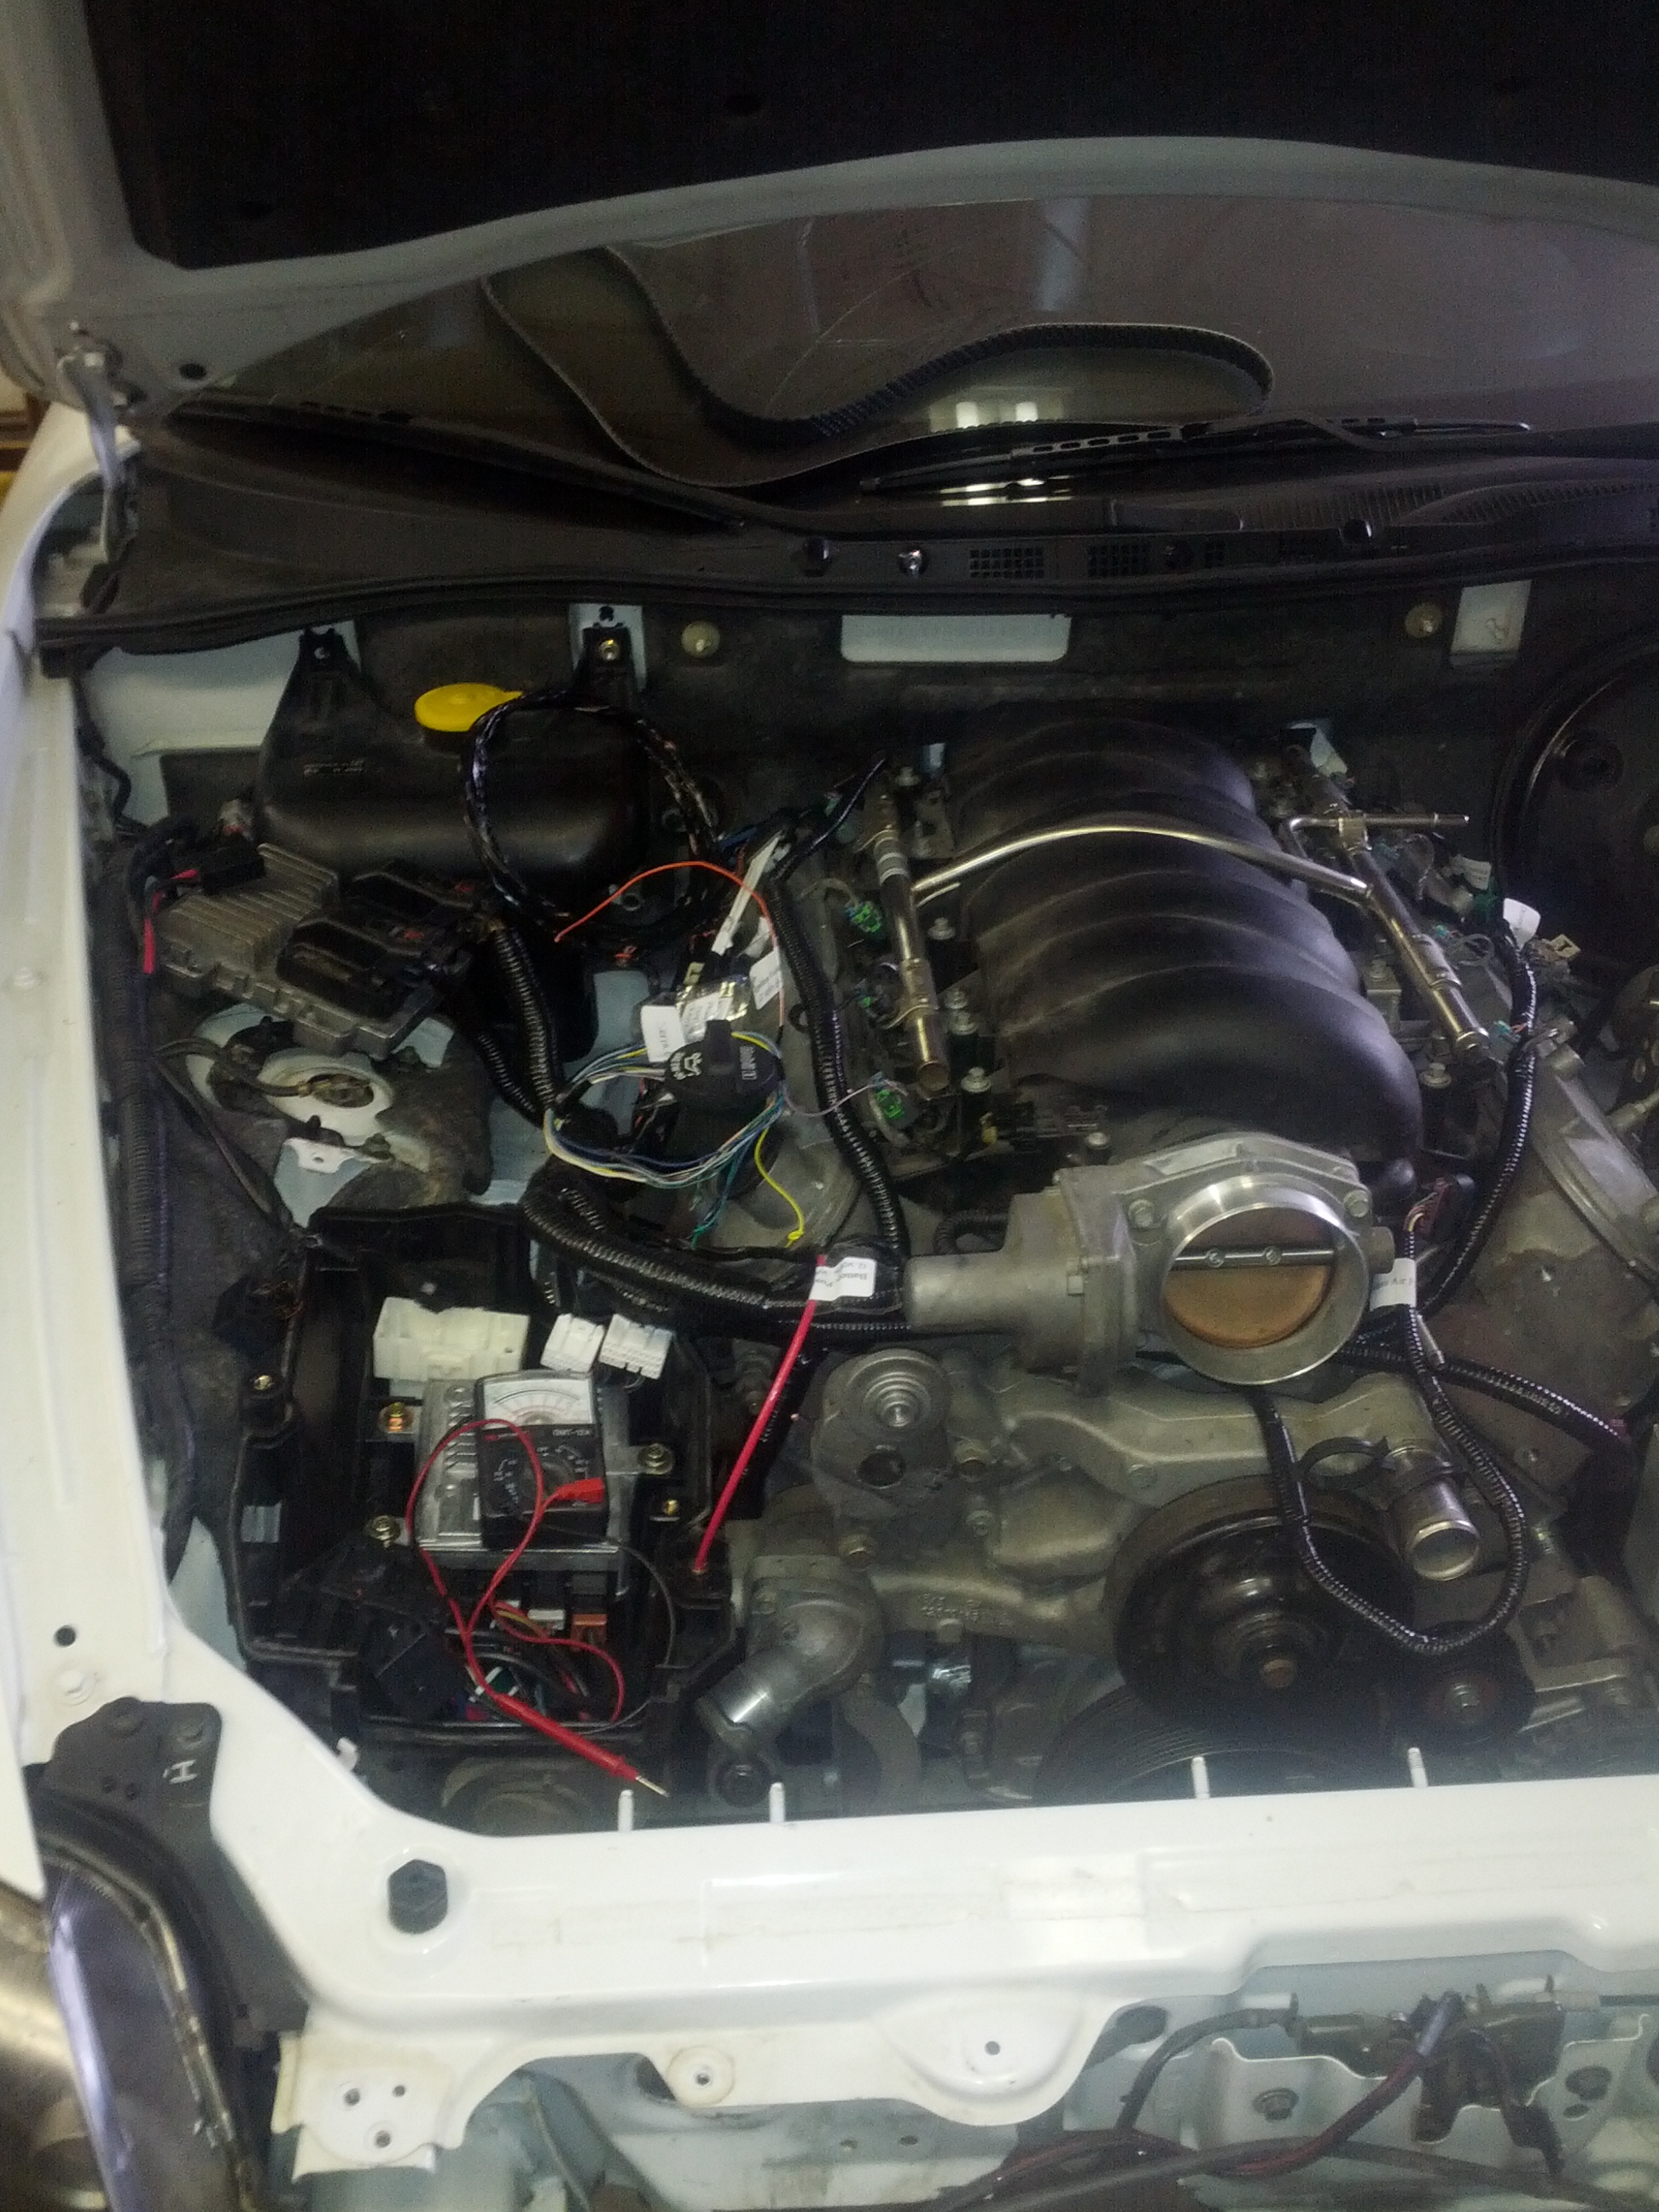
I paid a guy to reprogram my ECU (delete VATS, etc.) and at the same time simplify and clean up the LS wiring harness (plus label the remainder). Few hundred bucks well spent. This guy is Jesse Bubb, and if you have done an LS swap, chances are you have come across his name. This was done by mail (from Canada) and his turnaround time was less than 2 weeks.
I would have liked to mount the LS ECU inside the car, but the harness was pretty short, so I mounted it where the RX8 air pump would have lived.
This made it very easy to splice into the Mazda wiring in the Mazda ECU box.
I used the air pump circuit to power the LS, with an additional fuse and ignition activated relay. Piece of cake.
Somehow the Mazda wiring reached my battery terminals, the alternator, and the starter without mods and extensions... amazing. (the Optima battery lives right next to the fuse box)
Really the only thing I needed to wire was fuel pump control, cooling fan relays, OBD2 port, reverse lights, A/C clutch, oil pressure, coolant temp, eccentric shaft position, and throttle pedal.
Fans were easily accomplished right on the passenger side, nicely tucked away in the stock ECU box. Mazda uses 3 circuits for cooling fans, you splice into 2 of them with the help of wiring diagrams. Splicing into the ECU signal wires allows you to keep the whole downstream circuit (fuses, relays, etc.).
RX8 uses 2 different fuel circuits to minimize emissions. Having my fuel set up the way I described above, I need to use the low voltage circuit, otherwise my pressure is too high (68-70 psi) and the pump is much louder, and not likely to last as long. Again this is a matter of splicing into a single wire in the ECU box, although you might have to reverse polarity of the signal... I can't remember here.
There are few sensors you need to utilize from the Renesis. In order to keep your gauges working and use the EPS. Temp, oil pressure, and eccentric shaft sensor. These are easily installed and wired... Water temp goes right into the LS head port on opposite side from the LS sensor. Oil pressure goes into the oil cooler adapter assembly. Steve from LS1RX8 sent me a machined aluminum spacer to sit in the harmonic balancer and hold the Mazda trigger wheel, so it was just a matter of mounting the sensor somewhere.

Honestly, this only took about 4-6 hours, after I stressed about it for months.
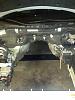
Now...
sI know there has been much discussion about the dash light and gauge operation...
I wish I could provide some revolutionary solution here, but I am afraid I took the easy way out. When I was first tackling this (spring 2014) the promised CanBus conversion was long way away and I was not going to wait.
I took apart the dash and took out LEDs I did not need that were still on (battery, traction). I took the signal for the CEL from the LS ECU and soldered a new LED in place of the Mazda CEL in order to pass emissions etc.
This is not an elegant solution, but I do have a dash that is not constantly lit up, and all the moving bits work I also have working EPS, A/C, and ABS.
The parts I do not have are traction control and cruise.
Next up... Brakes, suspension, choice of tires... And let's hit the track!!! I have some neat action shots coming, stay tuned.
Clutch was a breeze... 1" Willwood master cylinder, correct length linkage to couple to the RX8 pedal, and a SS braided clutch line. Master takes fluid from the RX8 brake fluid reservoir just like the OEM cylinder would. The TR6060 has a super easy access to the bleeding nipple.
Throttle pedal was also relatively straightforward. I ran the wiring for it behind the firewall insulator and crossed the firewall on driver's side. You really can't see anything.
I managed to install the Camaro throttle pedal in pretty much exactly the same location as the Mazda pedal was. I don't have any pictures here, but it very easy after few careful measurements to allow for a smooth heel-toe action
Fuel... Once you past the idiotic plastic ring holding the fuel pump that is...
Really, sky's the limit here, and it depends on how much power you wanna make. I went with the "budget" approach again, although I received most of the fuel components from Steve at LS1RX8 as part of the aforementioned kit. I did not end up needing most of it.
I find this can be as complicated or as simple as one wants to make it. I modified the stock Mazda fuel pump bracket in order to retain the Mazda FPR and fuel filter (and more importantly the siphon system which enables the RX8 to use the saddle shaped tank), yet to allow more flow. There is a Walbro pump (replacement for F-body cars) which fits right in, and plugs right in. Literally the only thing you need to do is drill a hole in the bottom of the in-tank assembly, see picture.
This way you can also use the Mazda hard line going to the engine, and only create a small pigtail adapter to hook up to the LS fuel rail.
In order to get the correct pressure (58-62 psi or so), you need to run the low-voltage Mazda circuit to the pump (more on this in electrical). I have tested this on the dyno, the track, and have watched 2 separate FP gauges for few months. Works like a charm and will run you about $150 all said and done.
PART VII: Electrical...
I must make couple of disclaimers here: I do not like electrical, and am lousy at it at best.
What am I doing?
I paid a guy to reprogram my ECU (delete VATS, etc.) and at the same time simplify and clean up the LS wiring harness (plus label the remainder
). Few hundred bucks well spent. This guy is Jesse Bubb, and if you have done an LS swap, chances are you have come across his name. This was done by mail (from Canada) and his turnaround time was less than 2 weeks.I would have liked to mount the LS ECU inside the car, but the harness was pretty short, so I mounted it where the RX8 air pump would have lived.
This made it very easy to splice into the Mazda wiring in the Mazda ECU box.
I used the air pump circuit to power the LS, with an additional fuse and ignition activated relay. Piece of cake.
Somehow the Mazda wiring reached my battery terminals, the alternator, and the starter without mods and extensions... amazing. (the Optima battery lives right next to the fuse box)
Really the only thing I needed to wire was fuel pump control, cooling fan relays, OBD2 port, reverse lights, A/C clutch, oil pressure, coolant temp, eccentric shaft position, and throttle pedal.
Fans were easily accomplished right on the passenger side, nicely tucked away in the stock ECU box. Mazda uses 3 circuits for cooling fans, you splice into 2 of them with the help of wiring diagrams. Splicing into the ECU signal wires allows you to keep the whole downstream circuit (fuses, relays, etc.).
RX8 uses 2 different fuel circuits to minimize emissions. Having my fuel set up the way I described above, I need to use the low voltage circuit, otherwise my pressure is too high (68-70 psi) and the pump is much louder, and not likely to last as long. Again this is a matter of splicing into a single wire in the ECU box, although you might have to reverse polarity of the signal... I can't remember here.
There are few sensors you need to utilize from the Renesis. In order to keep your gauges working and use the EPS. Temp, oil pressure, and eccentric shaft sensor. These are easily installed and wired... Water temp goes right into the LS head port on opposite side from the LS sensor. Oil pressure goes into the oil cooler adapter assembly. Steve from LS1RX8 sent me a machined aluminum spacer to sit in the harmonic balancer and hold the Mazda trigger wheel, so it was just a matter of mounting the sensor somewhere.
Honestly, this only took about 4-6 hours, after I stressed about it for months.
Now...
sI know there has been much discussion about the dash light and gauge operation...
I wish I could provide some revolutionary solution here, but I am afraid I took the easy way out. When I was first tackling this (spring 2014) the promised CanBus conversion was long way away and I was not going to wait.
I took apart the dash and took out LEDs I did not need that were still on (battery, traction). I took the signal for the CEL from the LS ECU and soldered a new LED in place of the Mazda CEL in order to pass emissions etc.
This is not an elegant solution, but I do have a dash that is not constantly lit up, and all the moving bits work
I also have working EPS, A/C, and ABS.The parts I do not have are traction control and cruise.
Next up... Brakes, suspension, choice of tires... And let's hit the track!!! I have some neat action shots coming, stay tuned.
10-31-2015, 01:07 PM
#12

This is just awesome work. Well done... Parts I am interested in are how well it deals with heat on the track (engine, brakes, gearbox diff...), what the handling is like (weight distribution, steering, ?), and of course, power?
11-03-2015, 08:19 PM
#13
Registered
Thread Starter
Haven't looked into quite honestly... The LS ECU receives (or at least could easily be made to receive) all the necessary signals. I assume the steering wheel cruise controls could be made to work with the LS ECU in turn.
I will do some reading over the winter and see if I can figure this out. If anyone has made it work, please chime in...
I will do some reading over the winter and see if I can figure this out. If anyone has made it work, please chime in...
11-03-2015, 08:49 PM
#14
Registered
Thread Starter
Heat distribution is definitely challenging with a big engine in a relatively small space. I have spent countless hours on heat insulating hoses / wiring / exhaust / brake lines / etc. I will try to find more pics once I get the exhaust part of the write up. There most definitely are few "crux" areas where exhaust is basically right adjacent to other parts.
Having said all that... I have bagged the car on track on some warm days and have not had issues. The temp gauge does not budge (I realize this is in part due to the fact that the RX8 gauge is not designed for linear response and really sucks in a nutshell), but I have data logged temp from the Chevy sensors and it has stayed well within its operating range. I think the oil cooler helps as well, and I might put in an actual oil temp gauge to monitor this in the future.
On a different note, I am not certain how good the stock F-body oil pan is under hard cornering... If I did it again, knowing how much track time it would see, I'd have gone with a performance option (Moroso or similar).
I am not too worried about the transmission temp as it runs a big cooler and the TR6060 is a very resilient platform.
I have not monitored rear diff temperatures, but I plan to have a look at the gear oil over the winter. A cooler could be added without much struggle, if deemed necessary.
I run 6-piston front brakes (Wilwood), and could not be happier with those. More on this is coming. I have also made few adjustments to the suspension to account for the increase in the weight over the front axle (again, I will get into more detail in few days).
I have had other people (good driver's familiar with RX7/8's with rotary and V8 powerplants) drive the car around the track and give me their 2 cents. The consensus was overwhelmingly positive. Overall, I am very happy with the handling and packaging, keeping in mind it still is a street car first and foremost.
The gearing and the power delivery is bang-on IMO, very forgiving and predictable. Currently, the car is hanging in the middle of the pack with brand new M-cars, 911's, and other V8 and turbo rotary Mazdas.
Next up, I will write up intake / exhaust quickly, then move the brakes/suspension, then finish with few esthetics touches. I have a friend putting together an amazing Flickr album of some track / street action.
11-03-2015, 09:18 PM
#15
What am I doing here?
Join Date: Mar 2006
Location: 2017 Miata RF Launch Edition
Posts: 3,606
Received 649 Likes
on
510 Posts
Haven't looked into quite honestly... The LS ECU receives (or at least could easily be made to receive) all the necessary signals. I assume the steering wheel cruise controls could be made to work with the LS ECU in turn.
I will do some reading over the winter and see if I can figure this out. If anyone has made it work, please chime in...
I will do some reading over the winter and see if I can figure this out. If anyone has made it work, please chime in...
If this is the case, you'd have to hook up a listening device on the CAN bus and check out what packets are being sent when you press the various cruise buttons. Once you know which buttons trigger which packets, you'd probably need an Arduino setup to translate from CAN messages to something that the LS ECU understands.
Another, likely easier option, would be to use an aftermarket unit like what this place offers:
http://www.thecruisecontrolstore.com/
Last edited by NotAPreppie; 11-03-2015 at 09:20 PM.
11-04-2015, 08:12 PM
#16
Registered
Thread Starter
It may be a CAN bus signal. (I'm pretty sure that turning the cruise control lights on in the gauge cluster is a CAN bus signal.)
If this is the case, you'd have to hook up a listening device on the CAN bus and check out what packets are being sent when you press the various cruise buttons. Once you know which buttons trigger which packets, you'd probably need an Arduino setup to translate from CAN messages to something that the LS ECU understands.
Another, likely easier option, would be to use an aftermarket unit like what this place offers:
Best Universal Cruise Control Systems for Cars
I think you are exactly right... This stuff is a bit above my pay grade
Nonetheless I'll do some research over winter and see what I can do.
11-04-2015, 08:47 PM
#17
Registered
Thread Starter
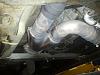
PART VIII: Intake / exhaust.
Only few words and a picture on the intake... Since the naturally aspirated LS does not really need a massive amount of airflow I decided to tuck my intake inside the front bumper routing it right above the radiator. This leaves me with a pretty small air filter but after doing the math it causes no restriction. The advantage is making space for the battery as well as the oil cooler, plus it creates its own "cold air intake" since the space is conveniently separated from the engine bay.
Really, all I did is take a few measurements, ordered a filter to fit, and take a grinder to the sheet metal. Ebay special 4" aluminum pipe and silicone couplings from China do the rest. I welded the AIT/AFM sensor to the bottom of the aluminum pipe, nicely out of the way.
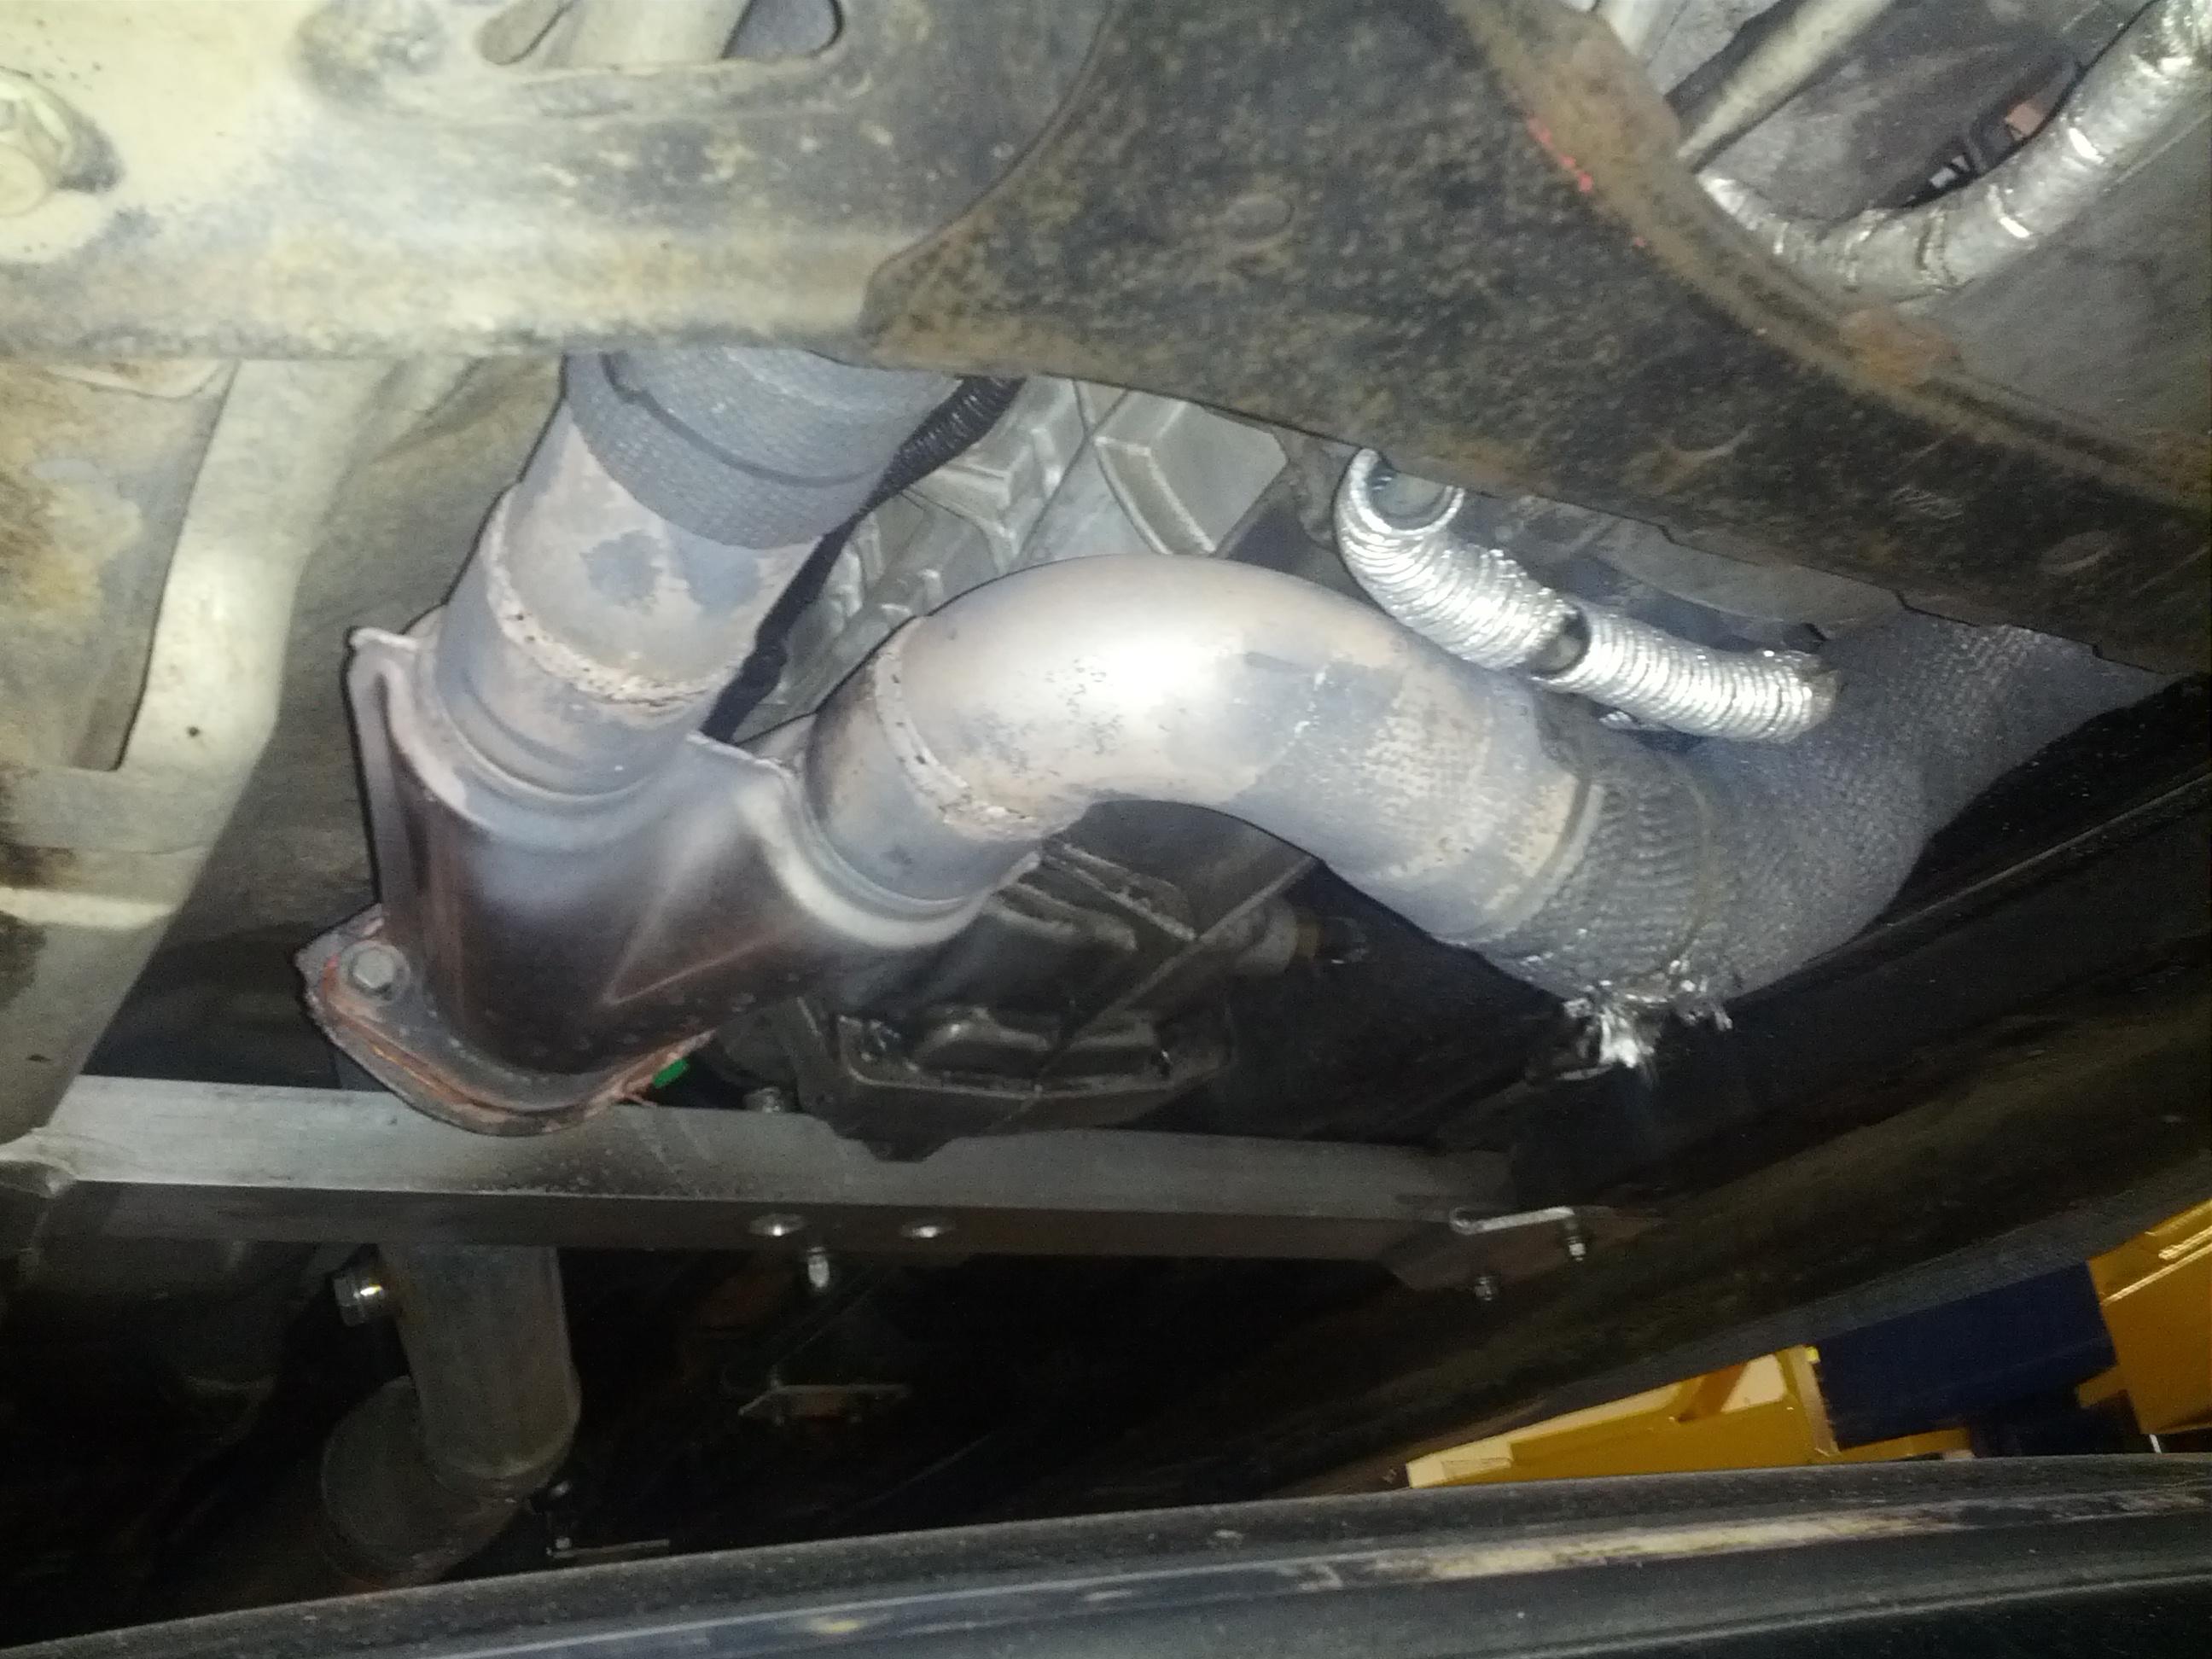
Alright... the exhaust was a bit more challenging!
To be honest, the fitment did not seem that bad until I started routing the exhaust. It only sunk in then, how tight things need to be, and how much heat insulating will need to be done.
Choice of headers was a guess... My engine came with some sort of aftermarket long tube SS headers - those would not fit.
I had set of LS1 headers - no go.
Looked at the Hinson headers - $1,000 and they do not clear the removable subframe crossmember - ruled out.
In the end I took a guess and ordered a pair of short block huggers from Speedway and was determined to work from there. Luckily they sort of fit! I had to modify the driver's side to clear my steering column shaft. And by modify, I mean... hammer the **** out of couple of the runners whilst preserving inner diameter and flow. Unfortunately no pics here.
With a little help from friends I was able to build a Y-pipe downpipe, but damn these headers are short and access really sucks!
The rest of the exhaust is garage special... I had some 4" SS pipe left over so I made a midpipe resonator and tied into the stock RX8 muffler. I opened things up a bit and added 3.5" SS tips. There - budget!

The car is very quiet, and frankly, I am happy with that. It has a nice, non-offensive tone, but there still are moments when I wish it would scream. I might go with a nice SS 3" RX8 catback if I can score a used one for a good price and tie it to the existing setup.
Only few words and a picture on the intake... Since the naturally aspirated LS does not really need a massive amount of airflow I decided to tuck my intake inside the front bumper routing it right above the radiator. This leaves me with a pretty small air filter but after doing the math it causes no restriction. The advantage is making space for the battery as well as the oil cooler, plus it creates its own "cold air intake" since the space is conveniently separated from the engine bay.
Really, all I did is take a few measurements, ordered a filter to fit, and take a grinder to the sheet metal. Ebay special 4" aluminum pipe and silicone couplings from China do the rest. I welded the AIT/AFM sensor to the bottom of the aluminum pipe, nicely out of the way.
Alright... the exhaust was a bit more challenging!
To be honest, the fitment did not seem that bad until I started routing the exhaust. It only sunk in then, how tight things need to be, and how much heat insulating will need to be done.
Choice of headers was a guess... My engine came with some sort of aftermarket long tube SS headers - those would not fit.
I had set of LS1 headers - no go.
Looked at the Hinson headers - $1,000 and they do not clear the removable subframe crossmember - ruled out.
In the end I took a guess and ordered a pair of short block huggers from Speedway and was determined to work from there. Luckily they sort of fit! I had to modify the driver's side to clear my steering column shaft. And by modify, I mean... hammer the **** out of couple of the runners whilst preserving inner diameter and flow. Unfortunately no pics here.
With a little help from friends I was able to build a Y-pipe downpipe, but damn these headers are short and access really sucks!


The rest of the exhaust is garage special... I had some 4" SS pipe left over so I made a midpipe resonator and tied into the stock RX8 muffler. I opened things up a bit and added 3.5" SS tips. There - budget!
The car is very quiet, and frankly, I am happy with that. It has a nice, non-offensive tone, but there still are moments when I wish it would scream. I might go with a nice SS 3" RX8 catback if I can score a used one for a good price and tie it to the existing setup.
11-04-2015, 10:15 PM
#18
Registered
Thread Starter
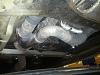
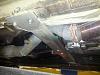
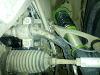
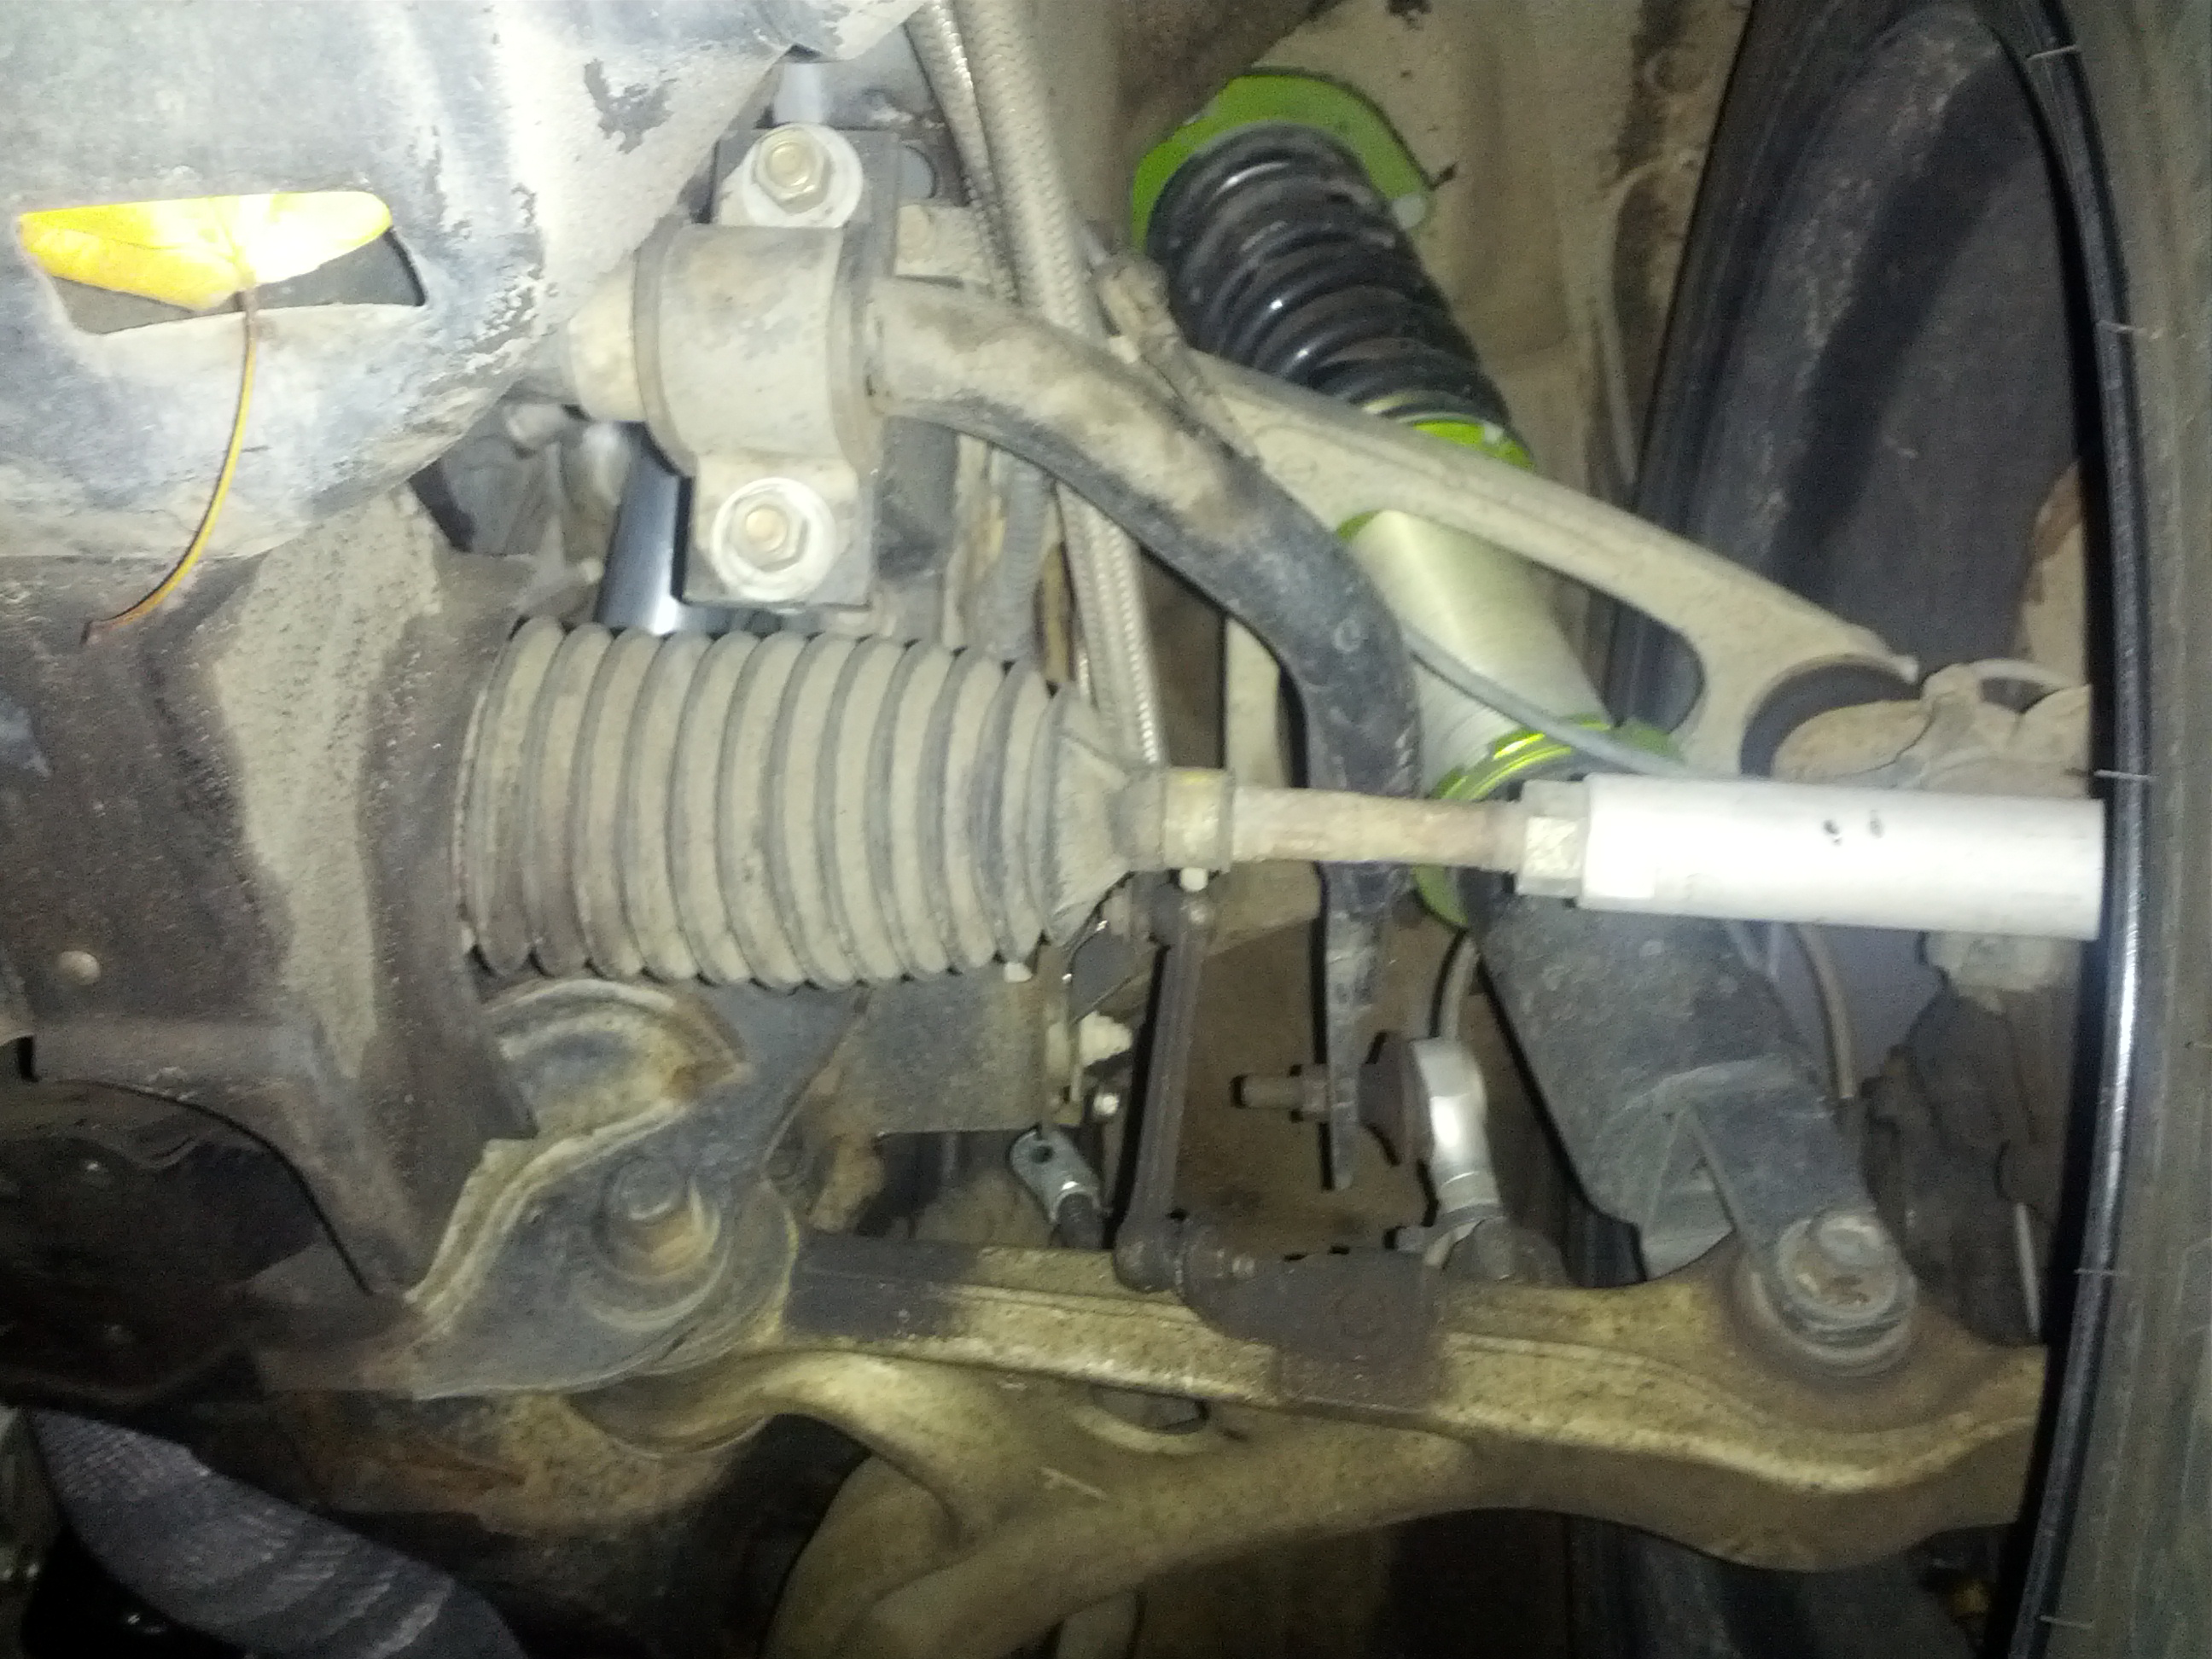
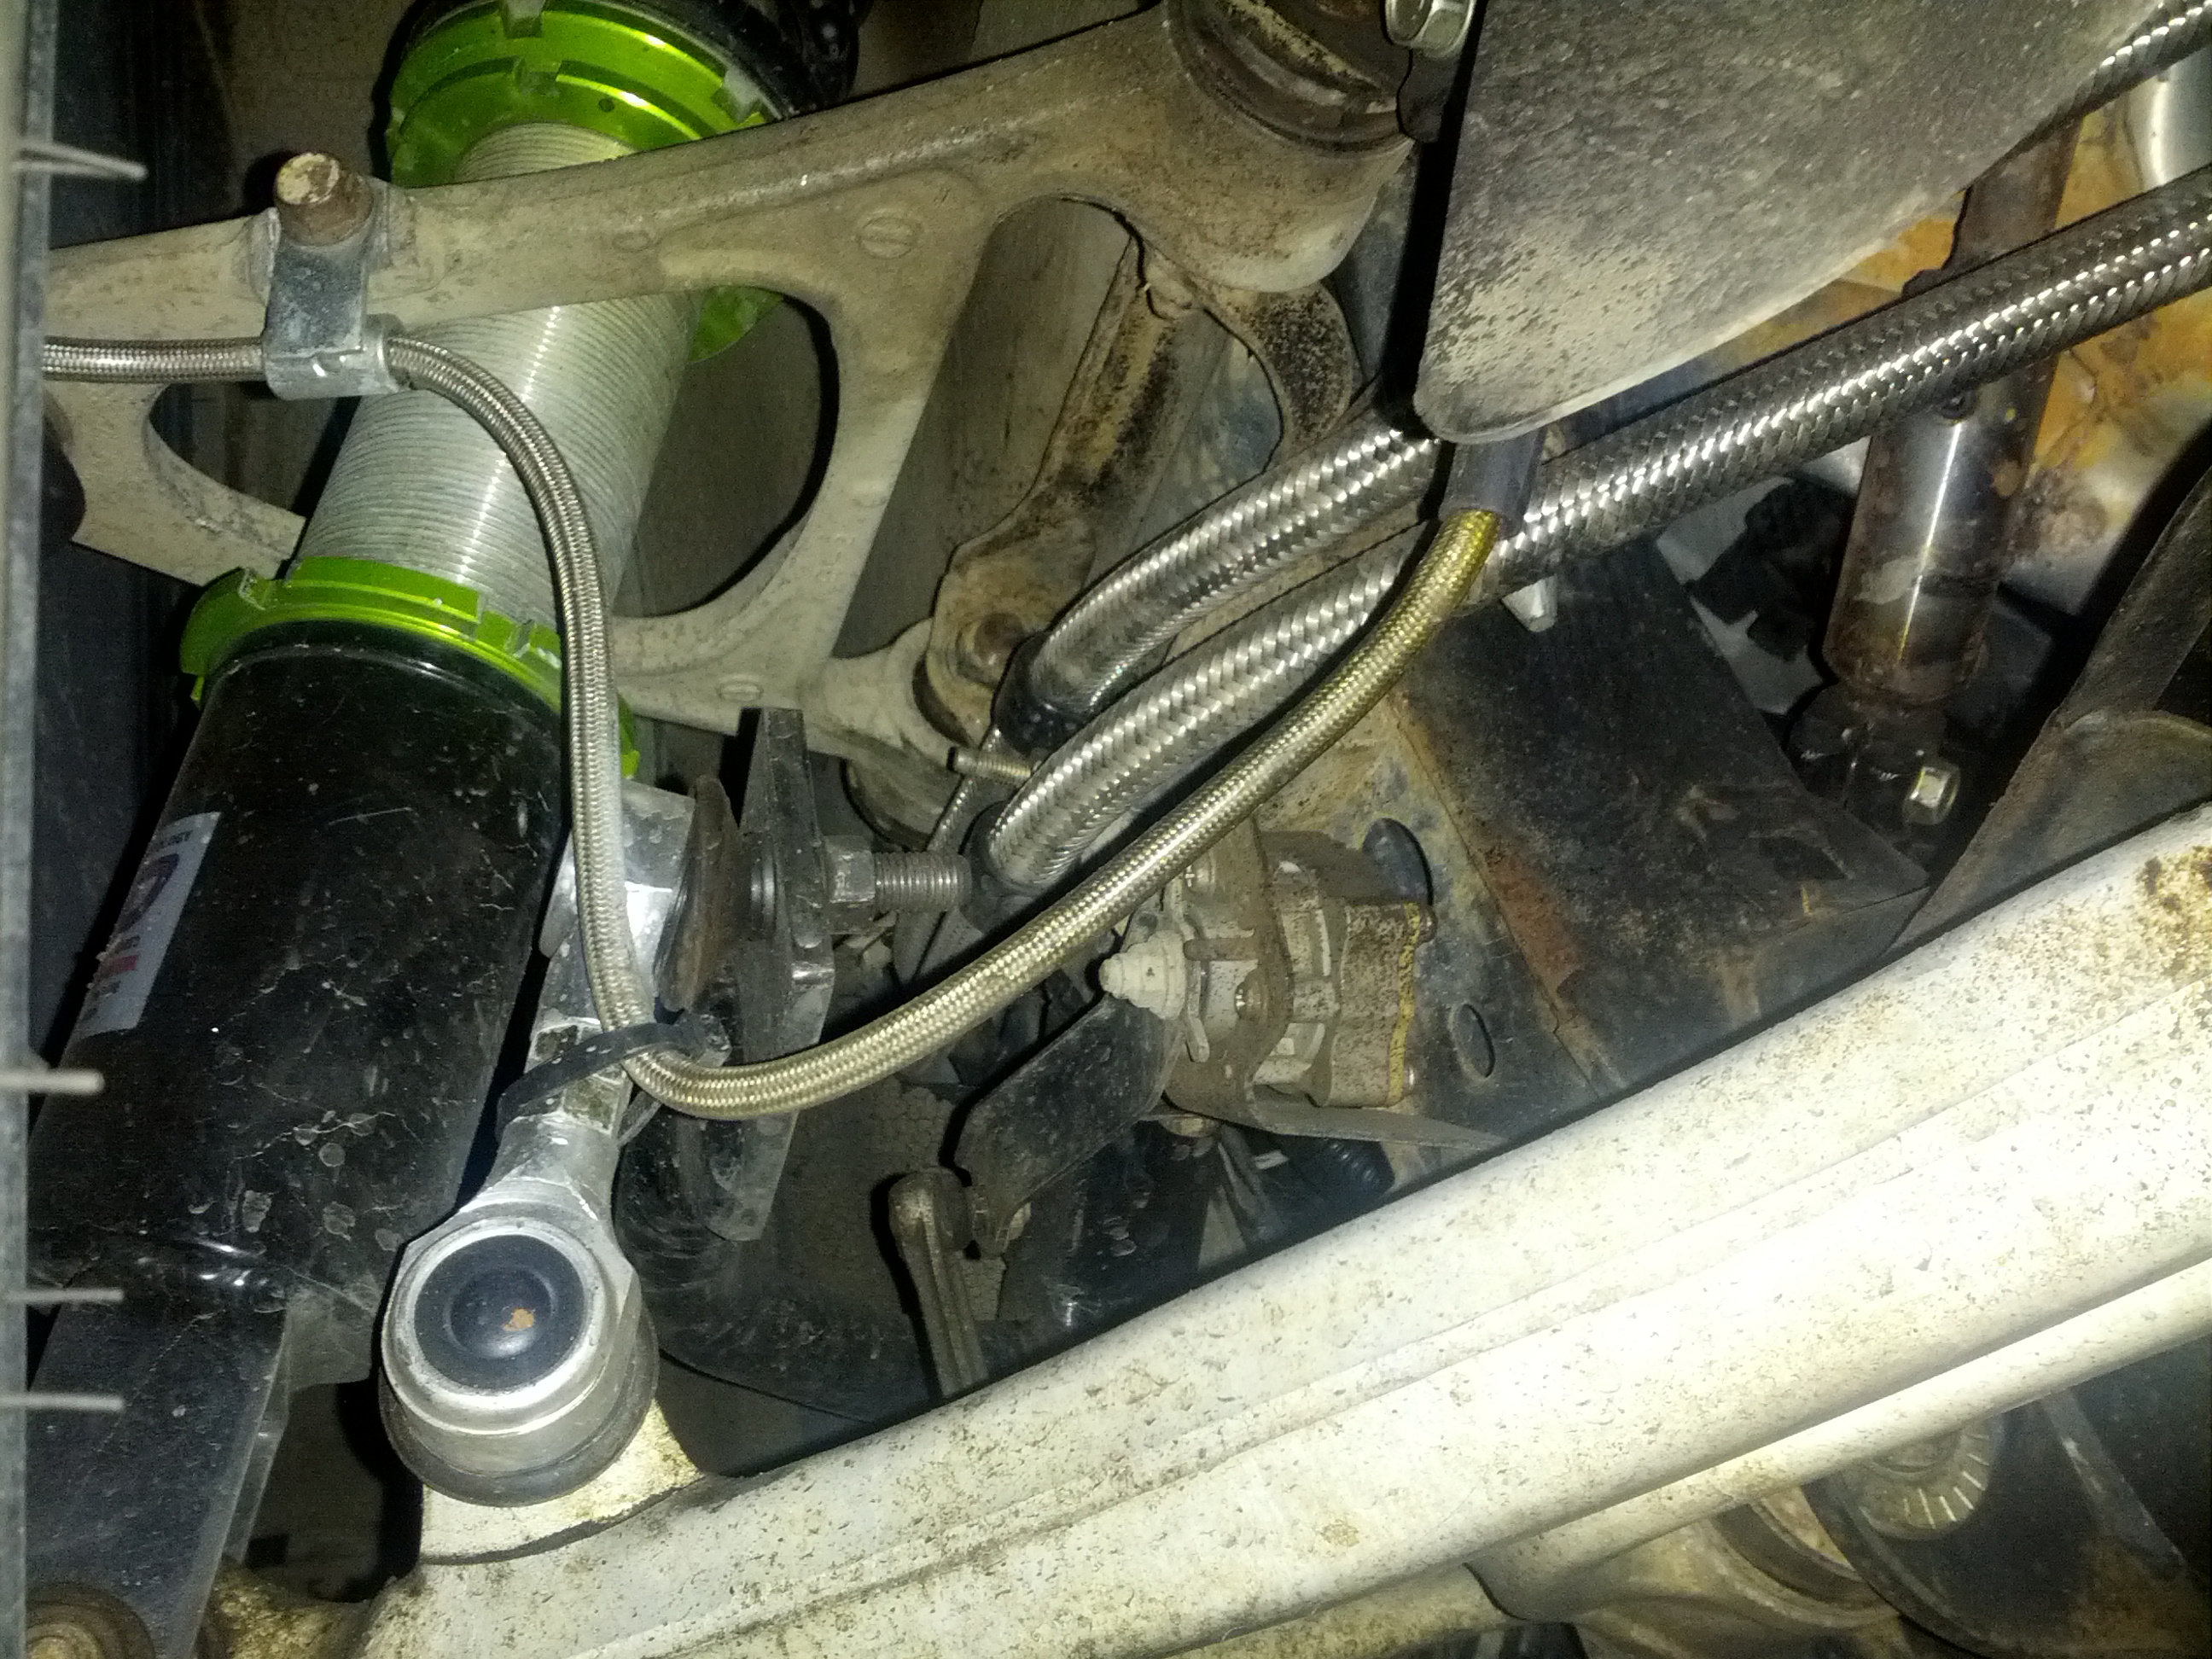
PART IX: Few things about the suspension and brakes.
Obviously front suspension geometry will be bastardized to some degree by this whole undertaking. I tried to counter / remedy most changes, and by no means am I claiming a perfect outcome.
The front swaybar needed to be relocated further forward and lower. I have seen people just turn around the sway links and make the stock bar work. This approach did not work out for me, things were too close to the shocks, and car handled like ****.
I decided to extend the OEM sway bar by couple of inches and use adjustable short sway bar linkages - this seems to work.
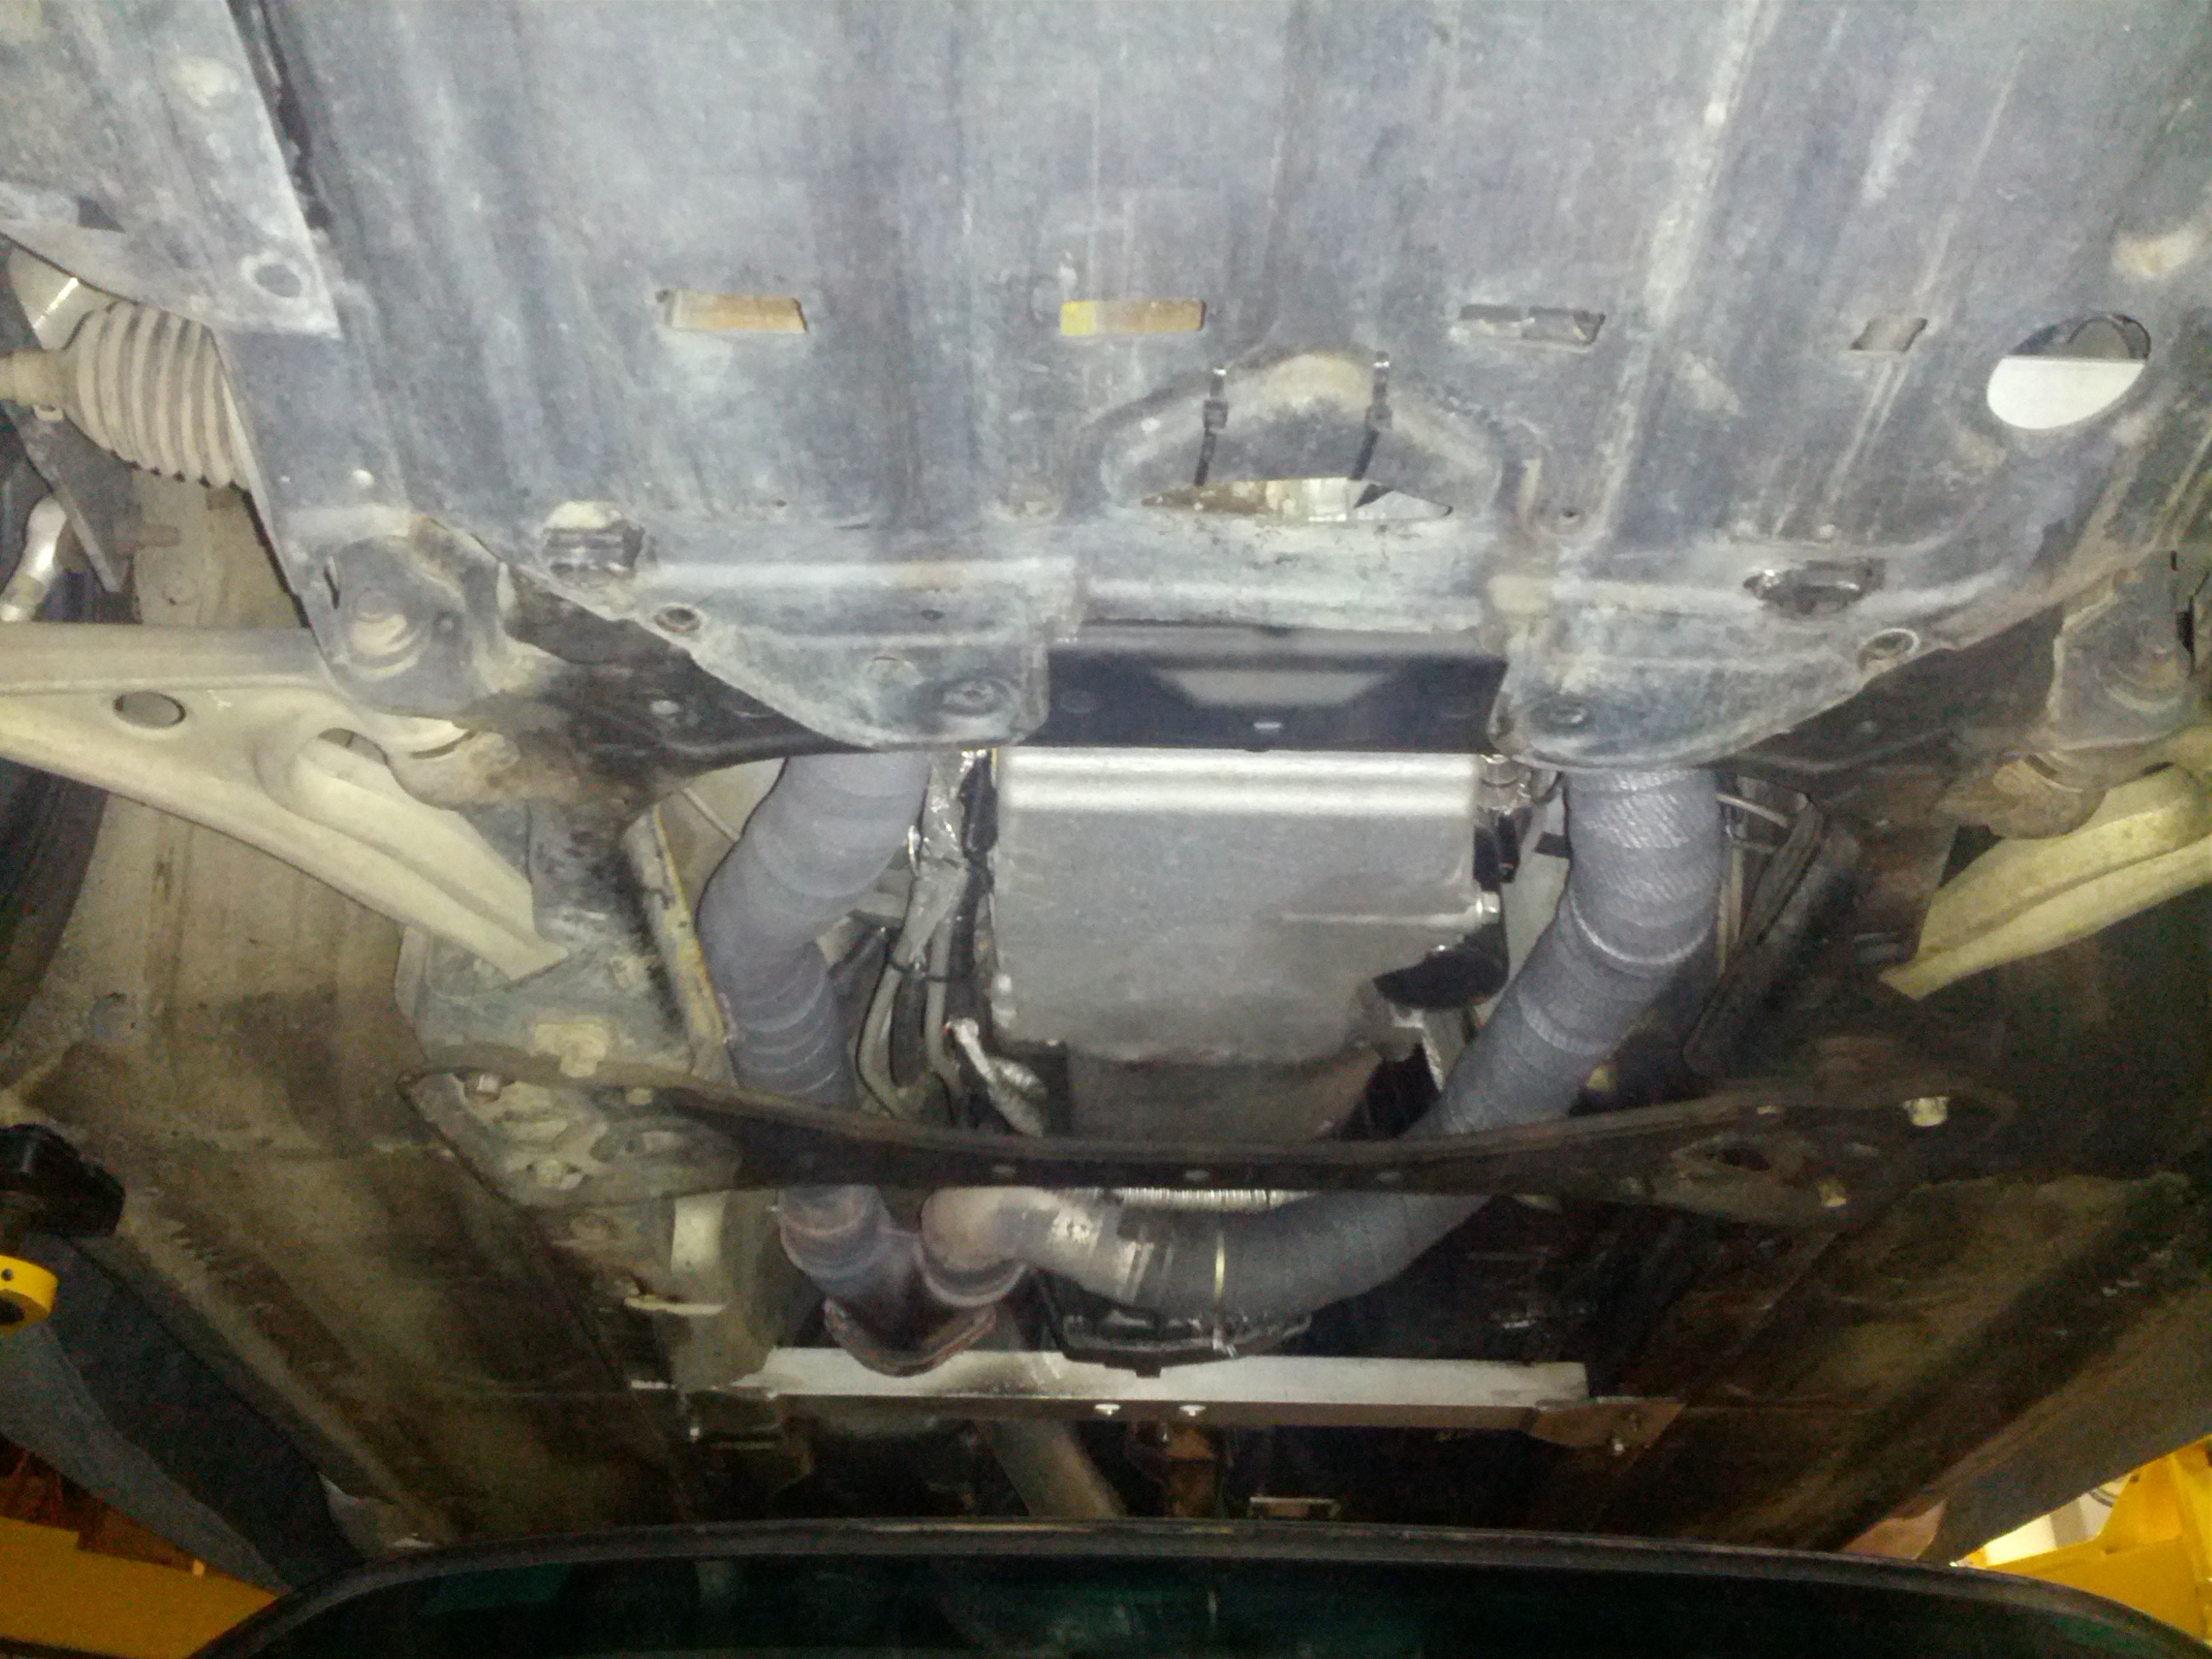
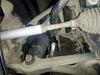
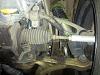
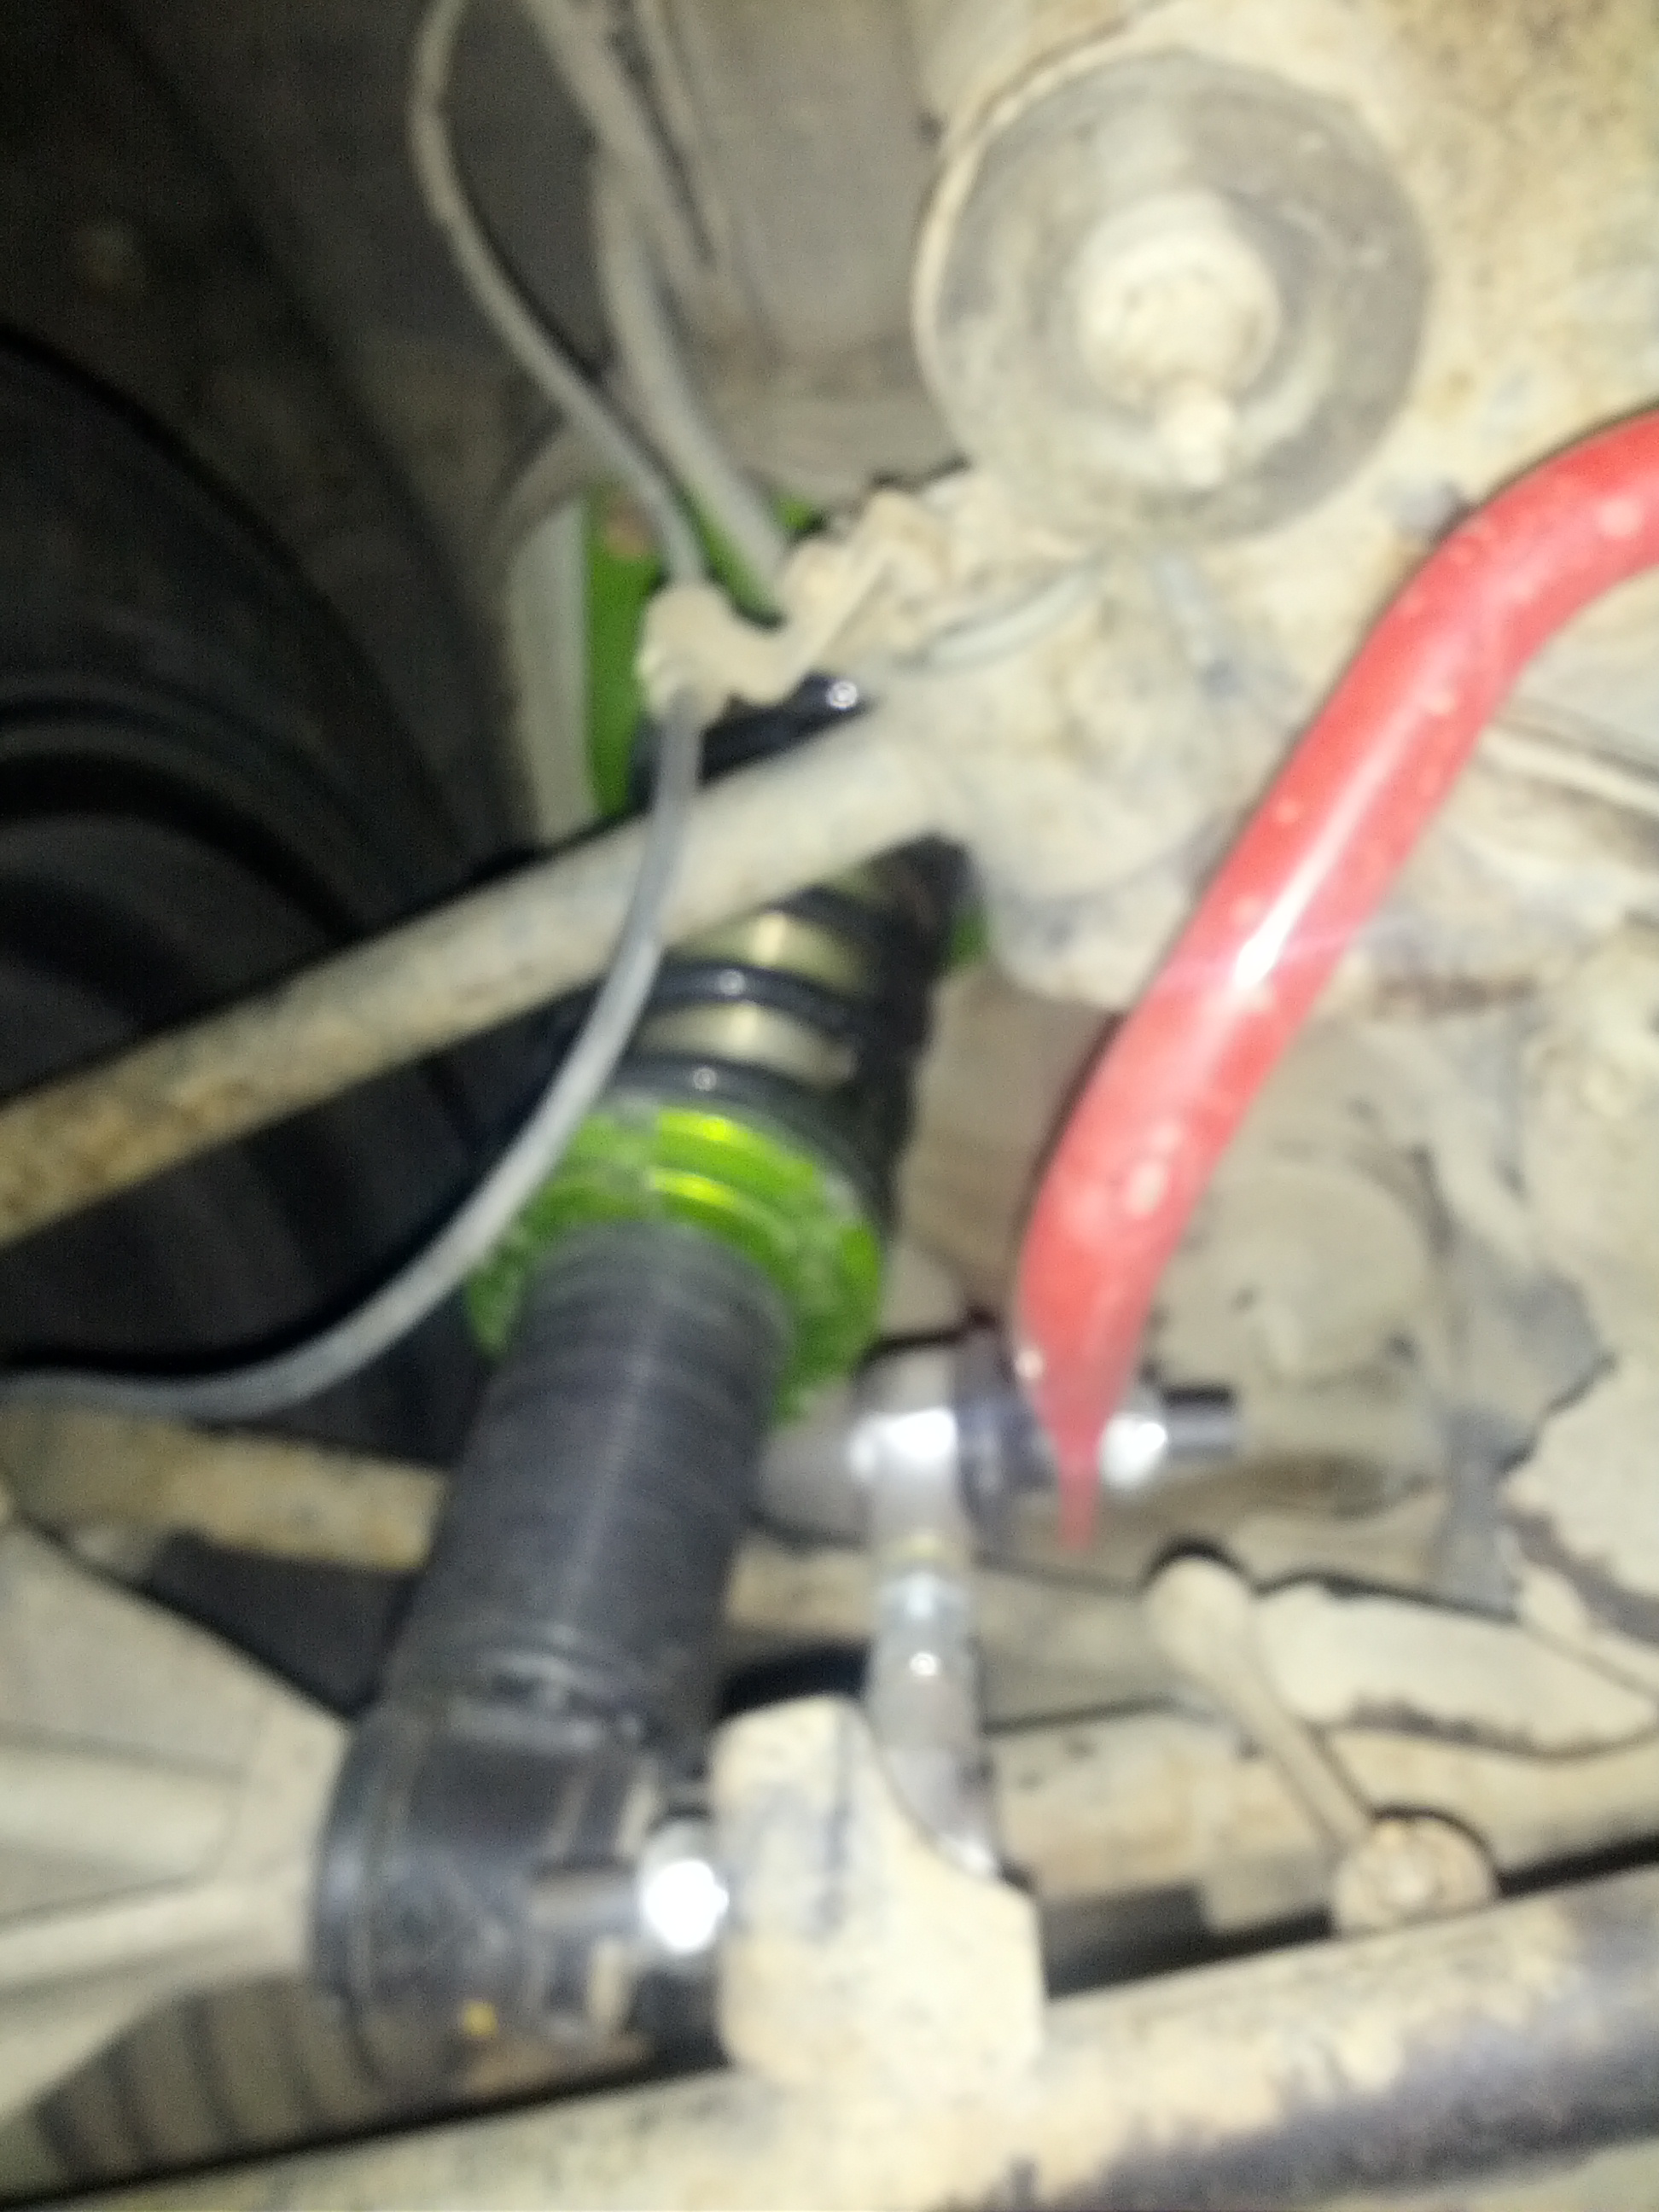
Sorry about some of the blurry pics, only realized after I took them...
The swaybar relocation brackets and the bump steer kit were supplied by Steven at LS1RX8.
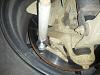
Few more things you can see in these "after the fact" pictures, is the routing of my oil cooler lines, and the steering extension.
The car will have more weight over the front axle, although it is less than most would think. I decided to go with coilover suspension with adjustable height as well as spring preload.
I came across a set of slightly used HSD coils and these have done fine for the most part. I did have some issues with the bushings on the rear basically falling apart, and I wasted 2 weeks making my own polyurethane bushings. This is what you get for second hand price I suppose.
And now fixed...


The rear sway bar and links have been upgraded while I was there. I also plan to do a full urethane bushing swap over the winter.
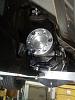
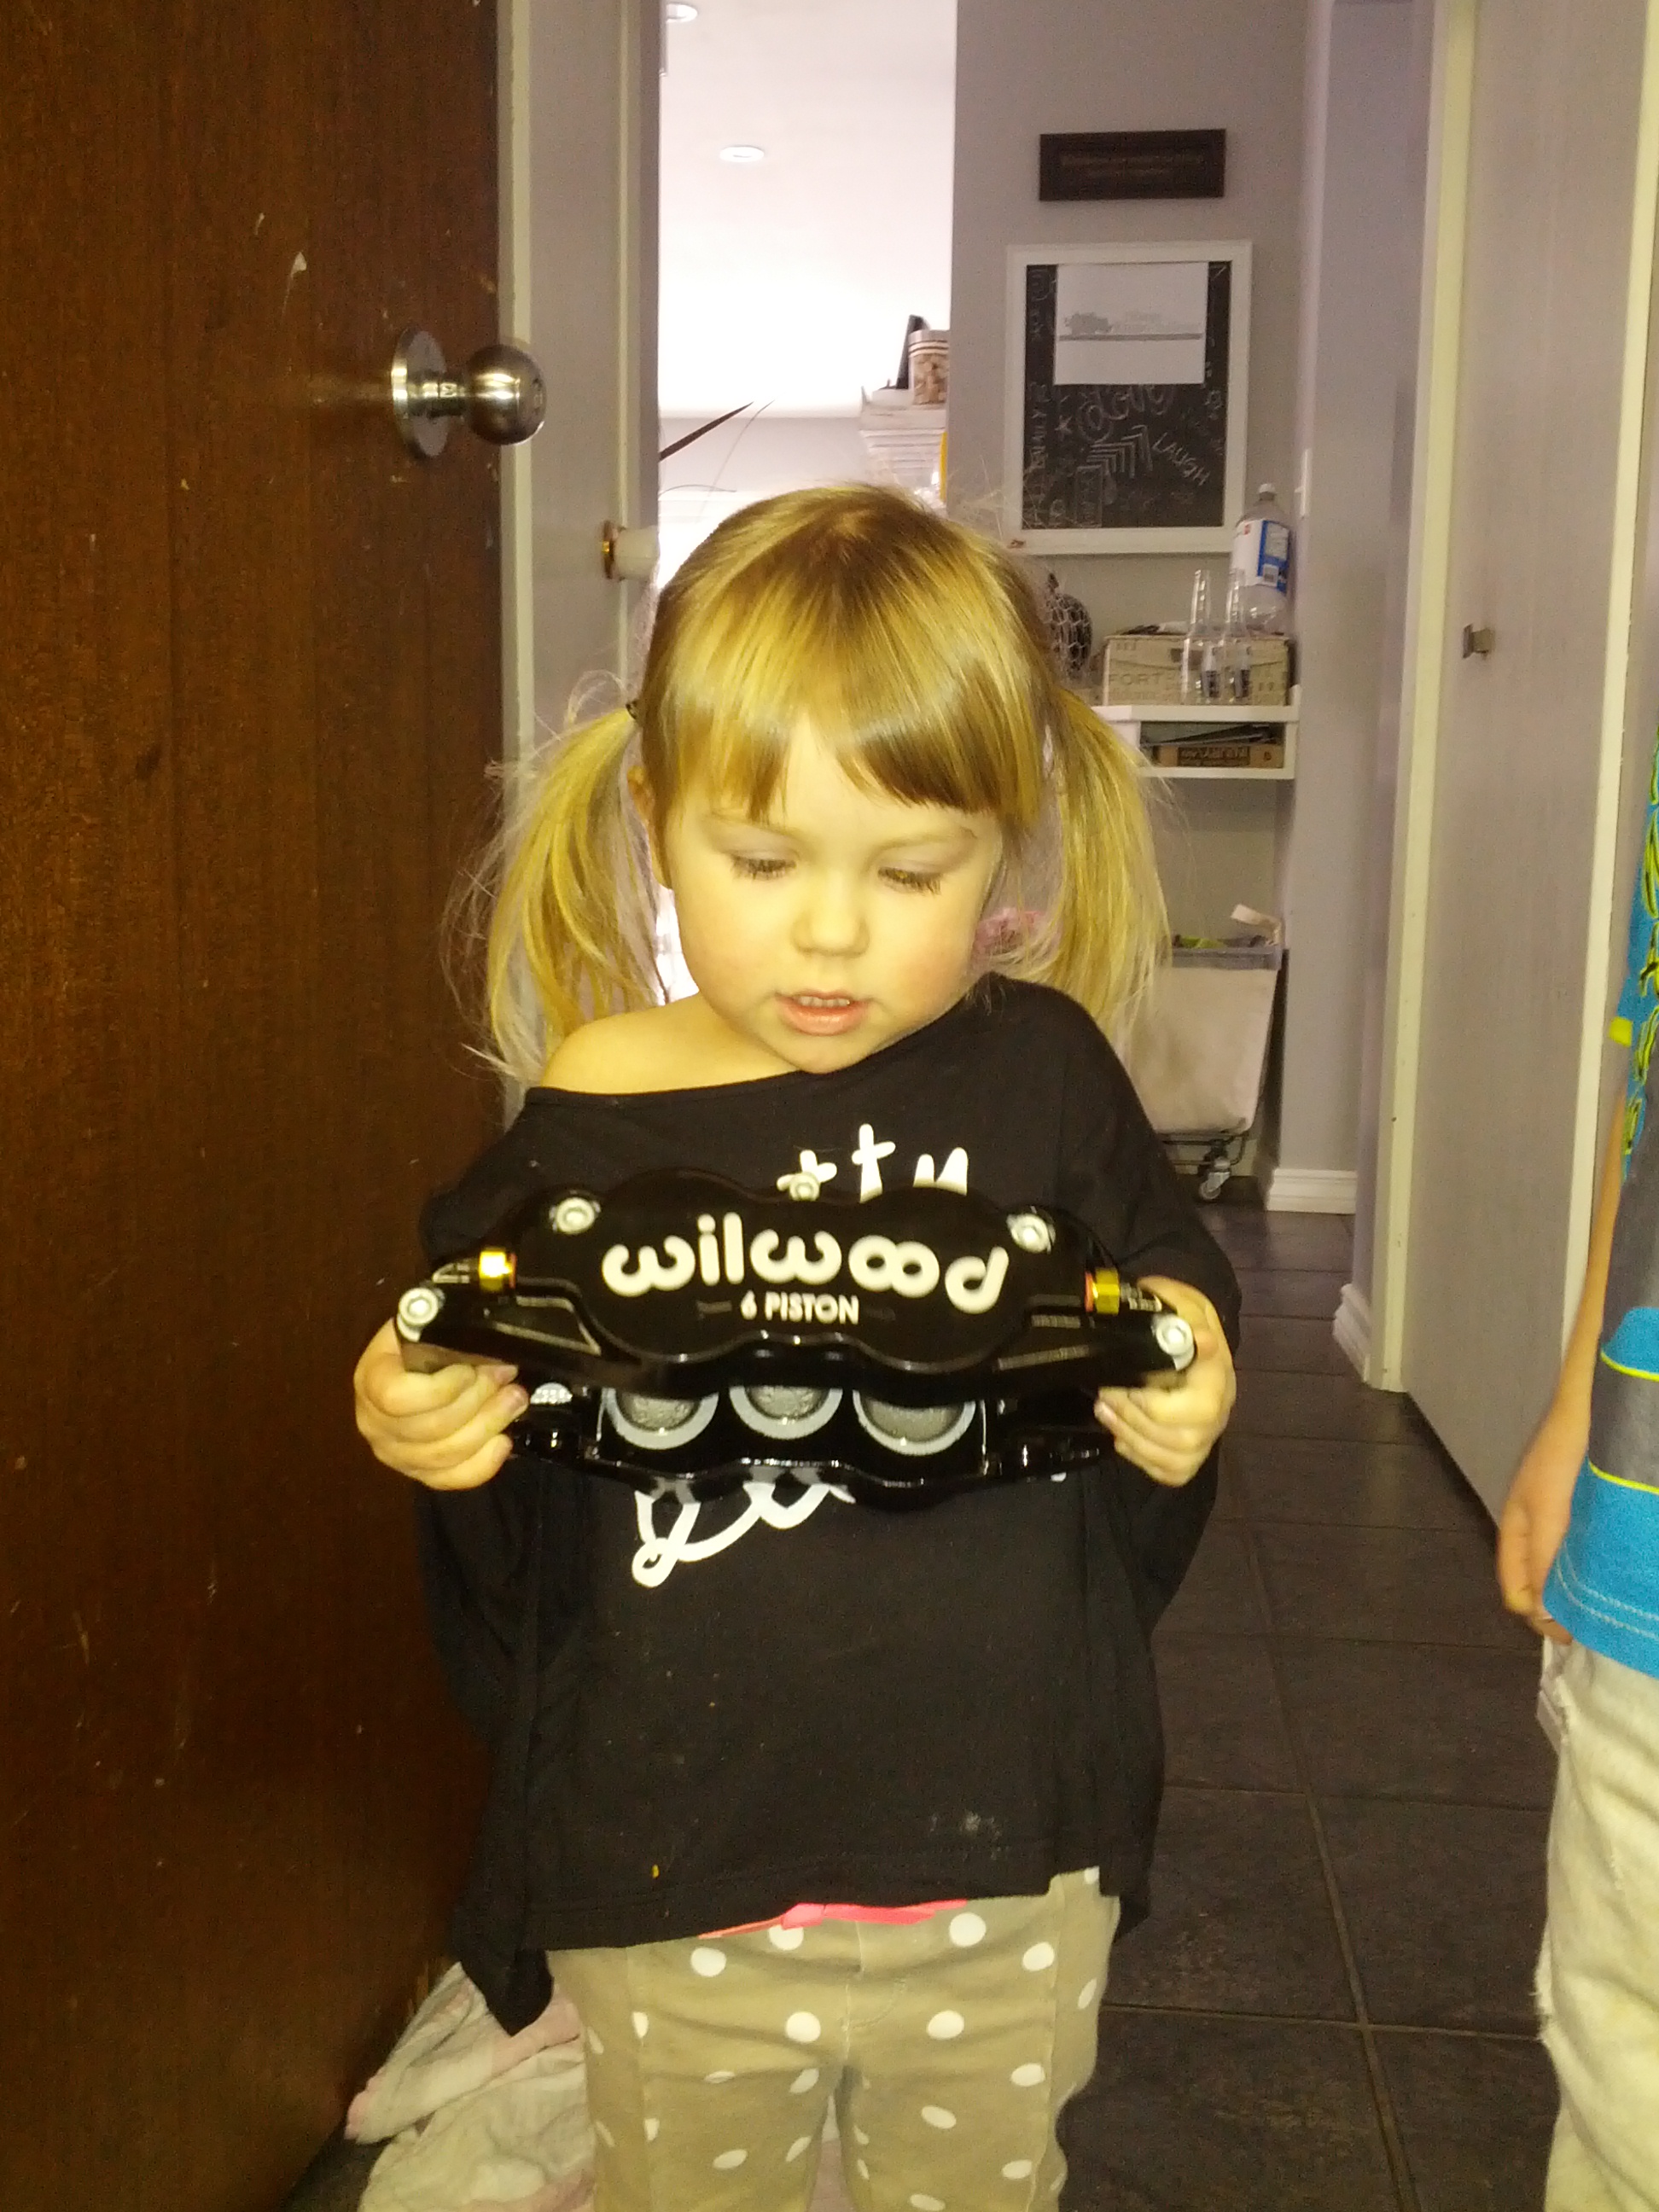
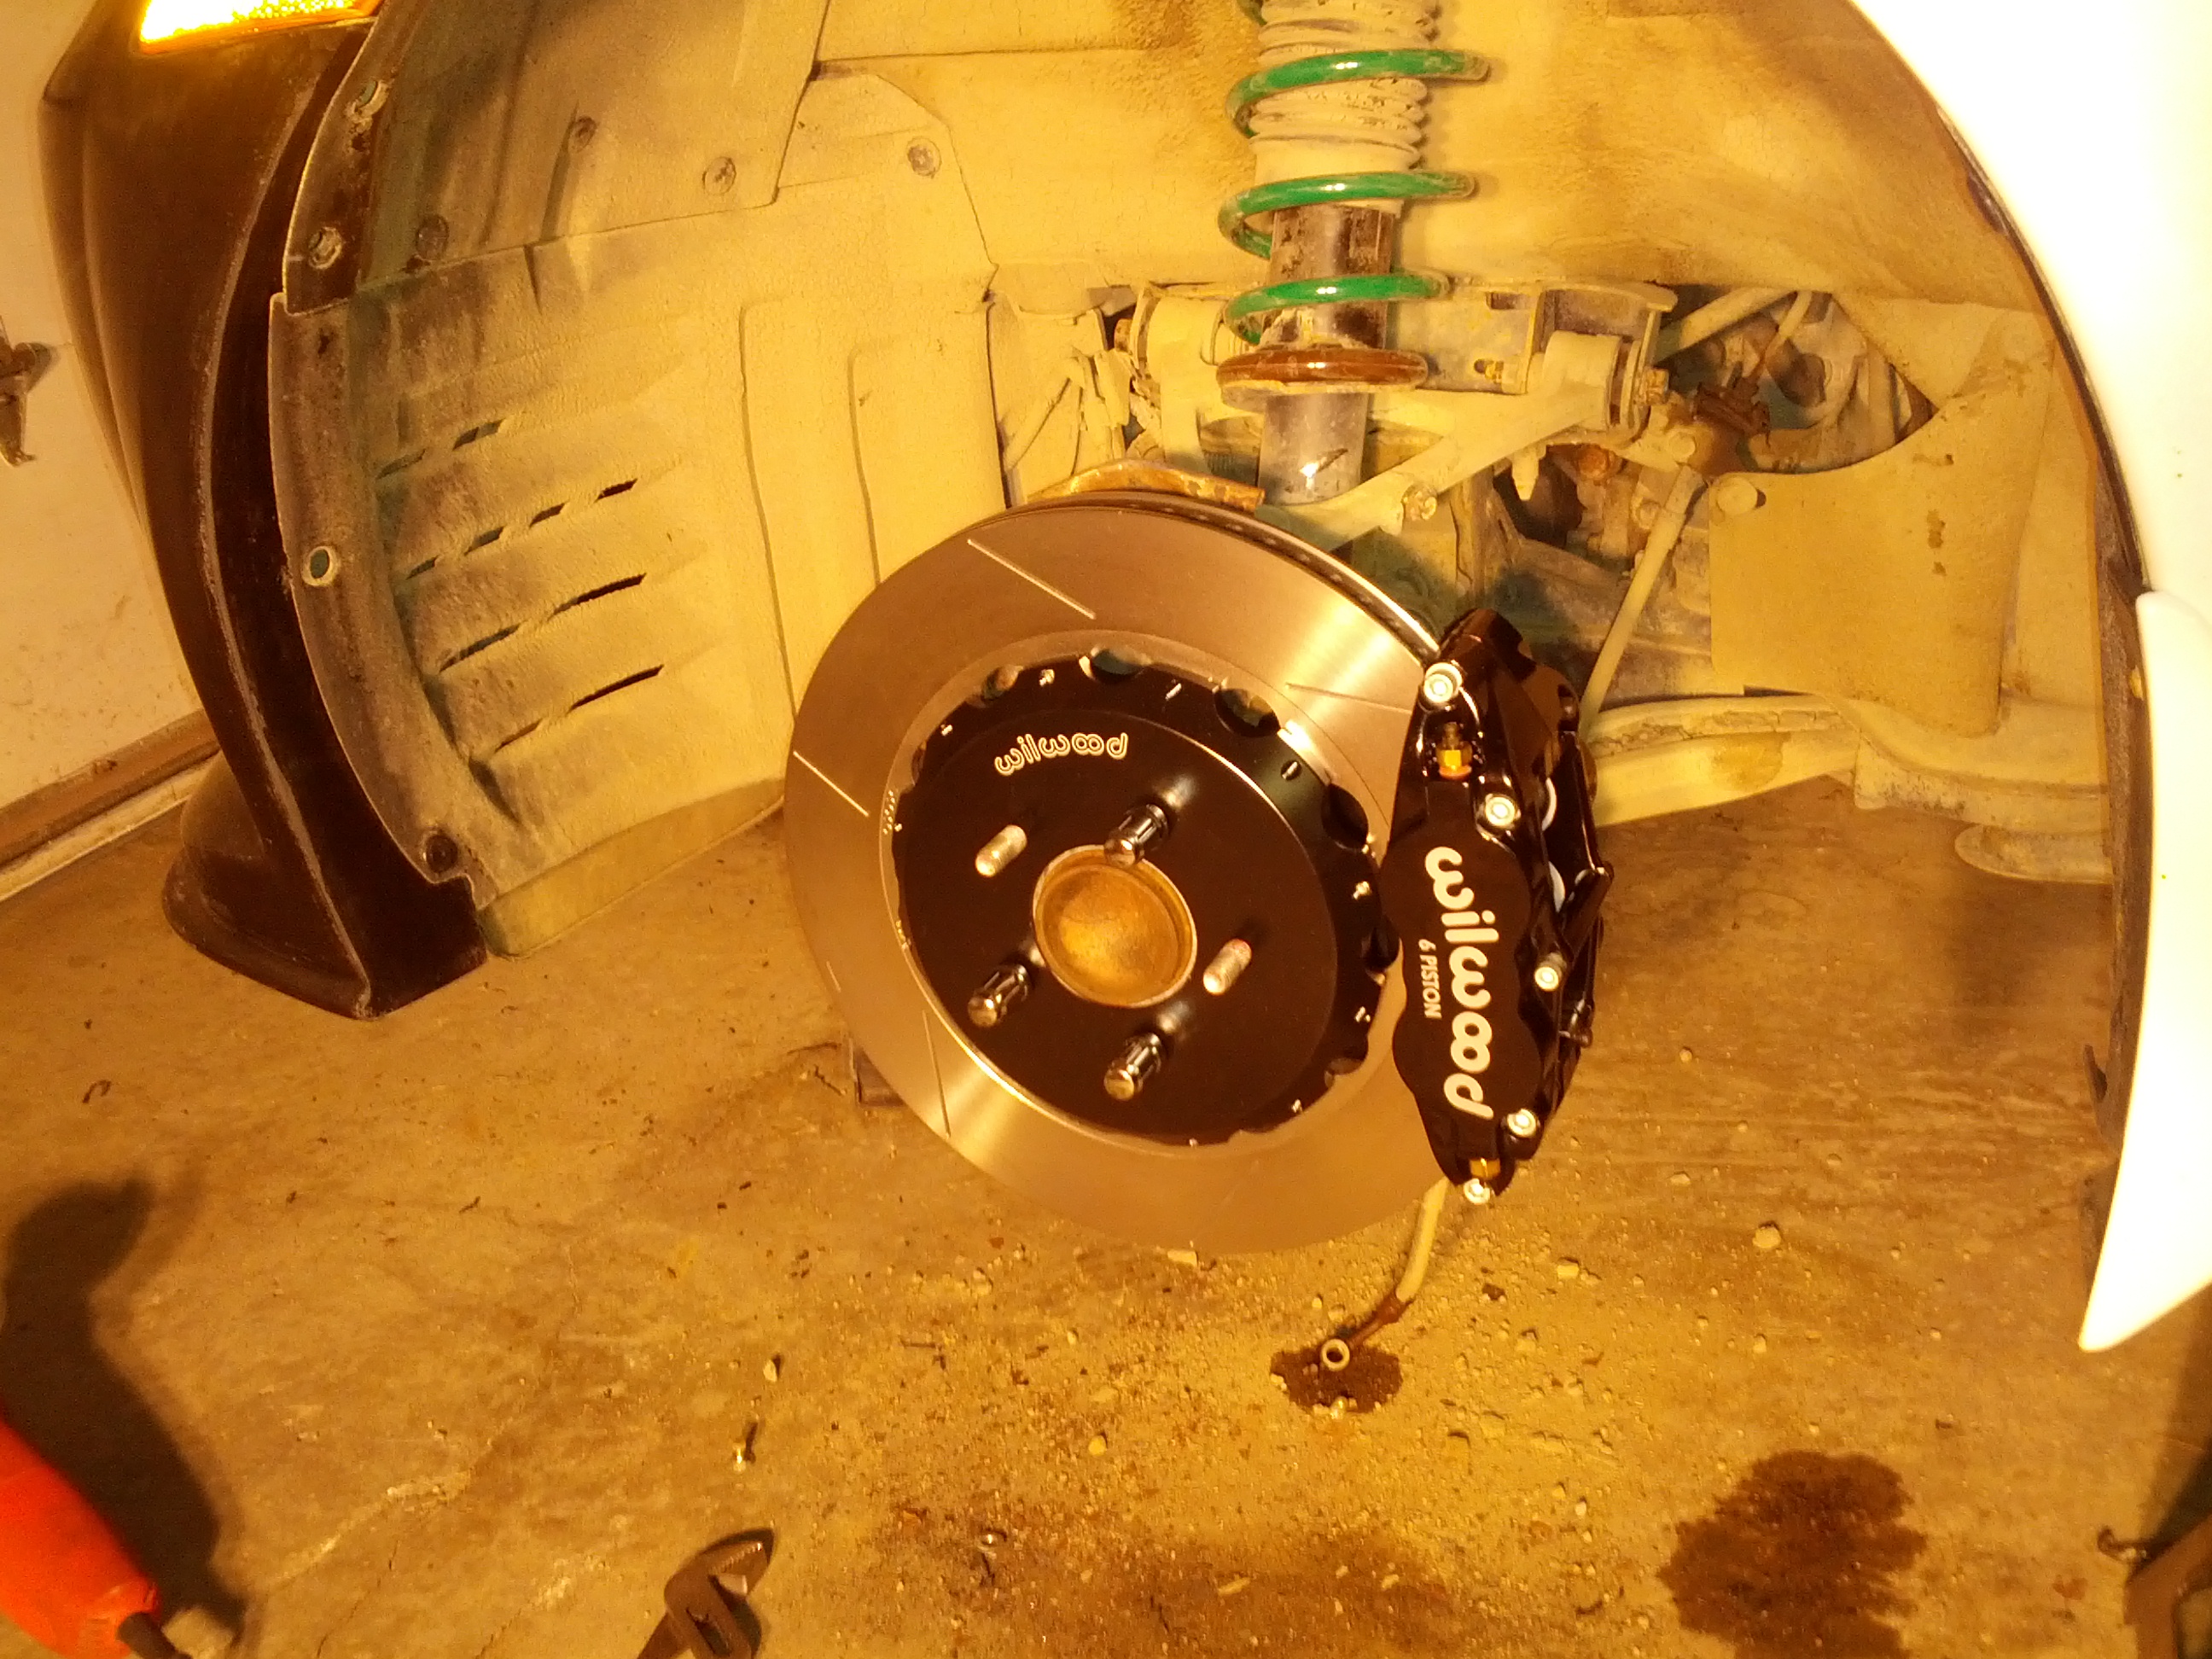
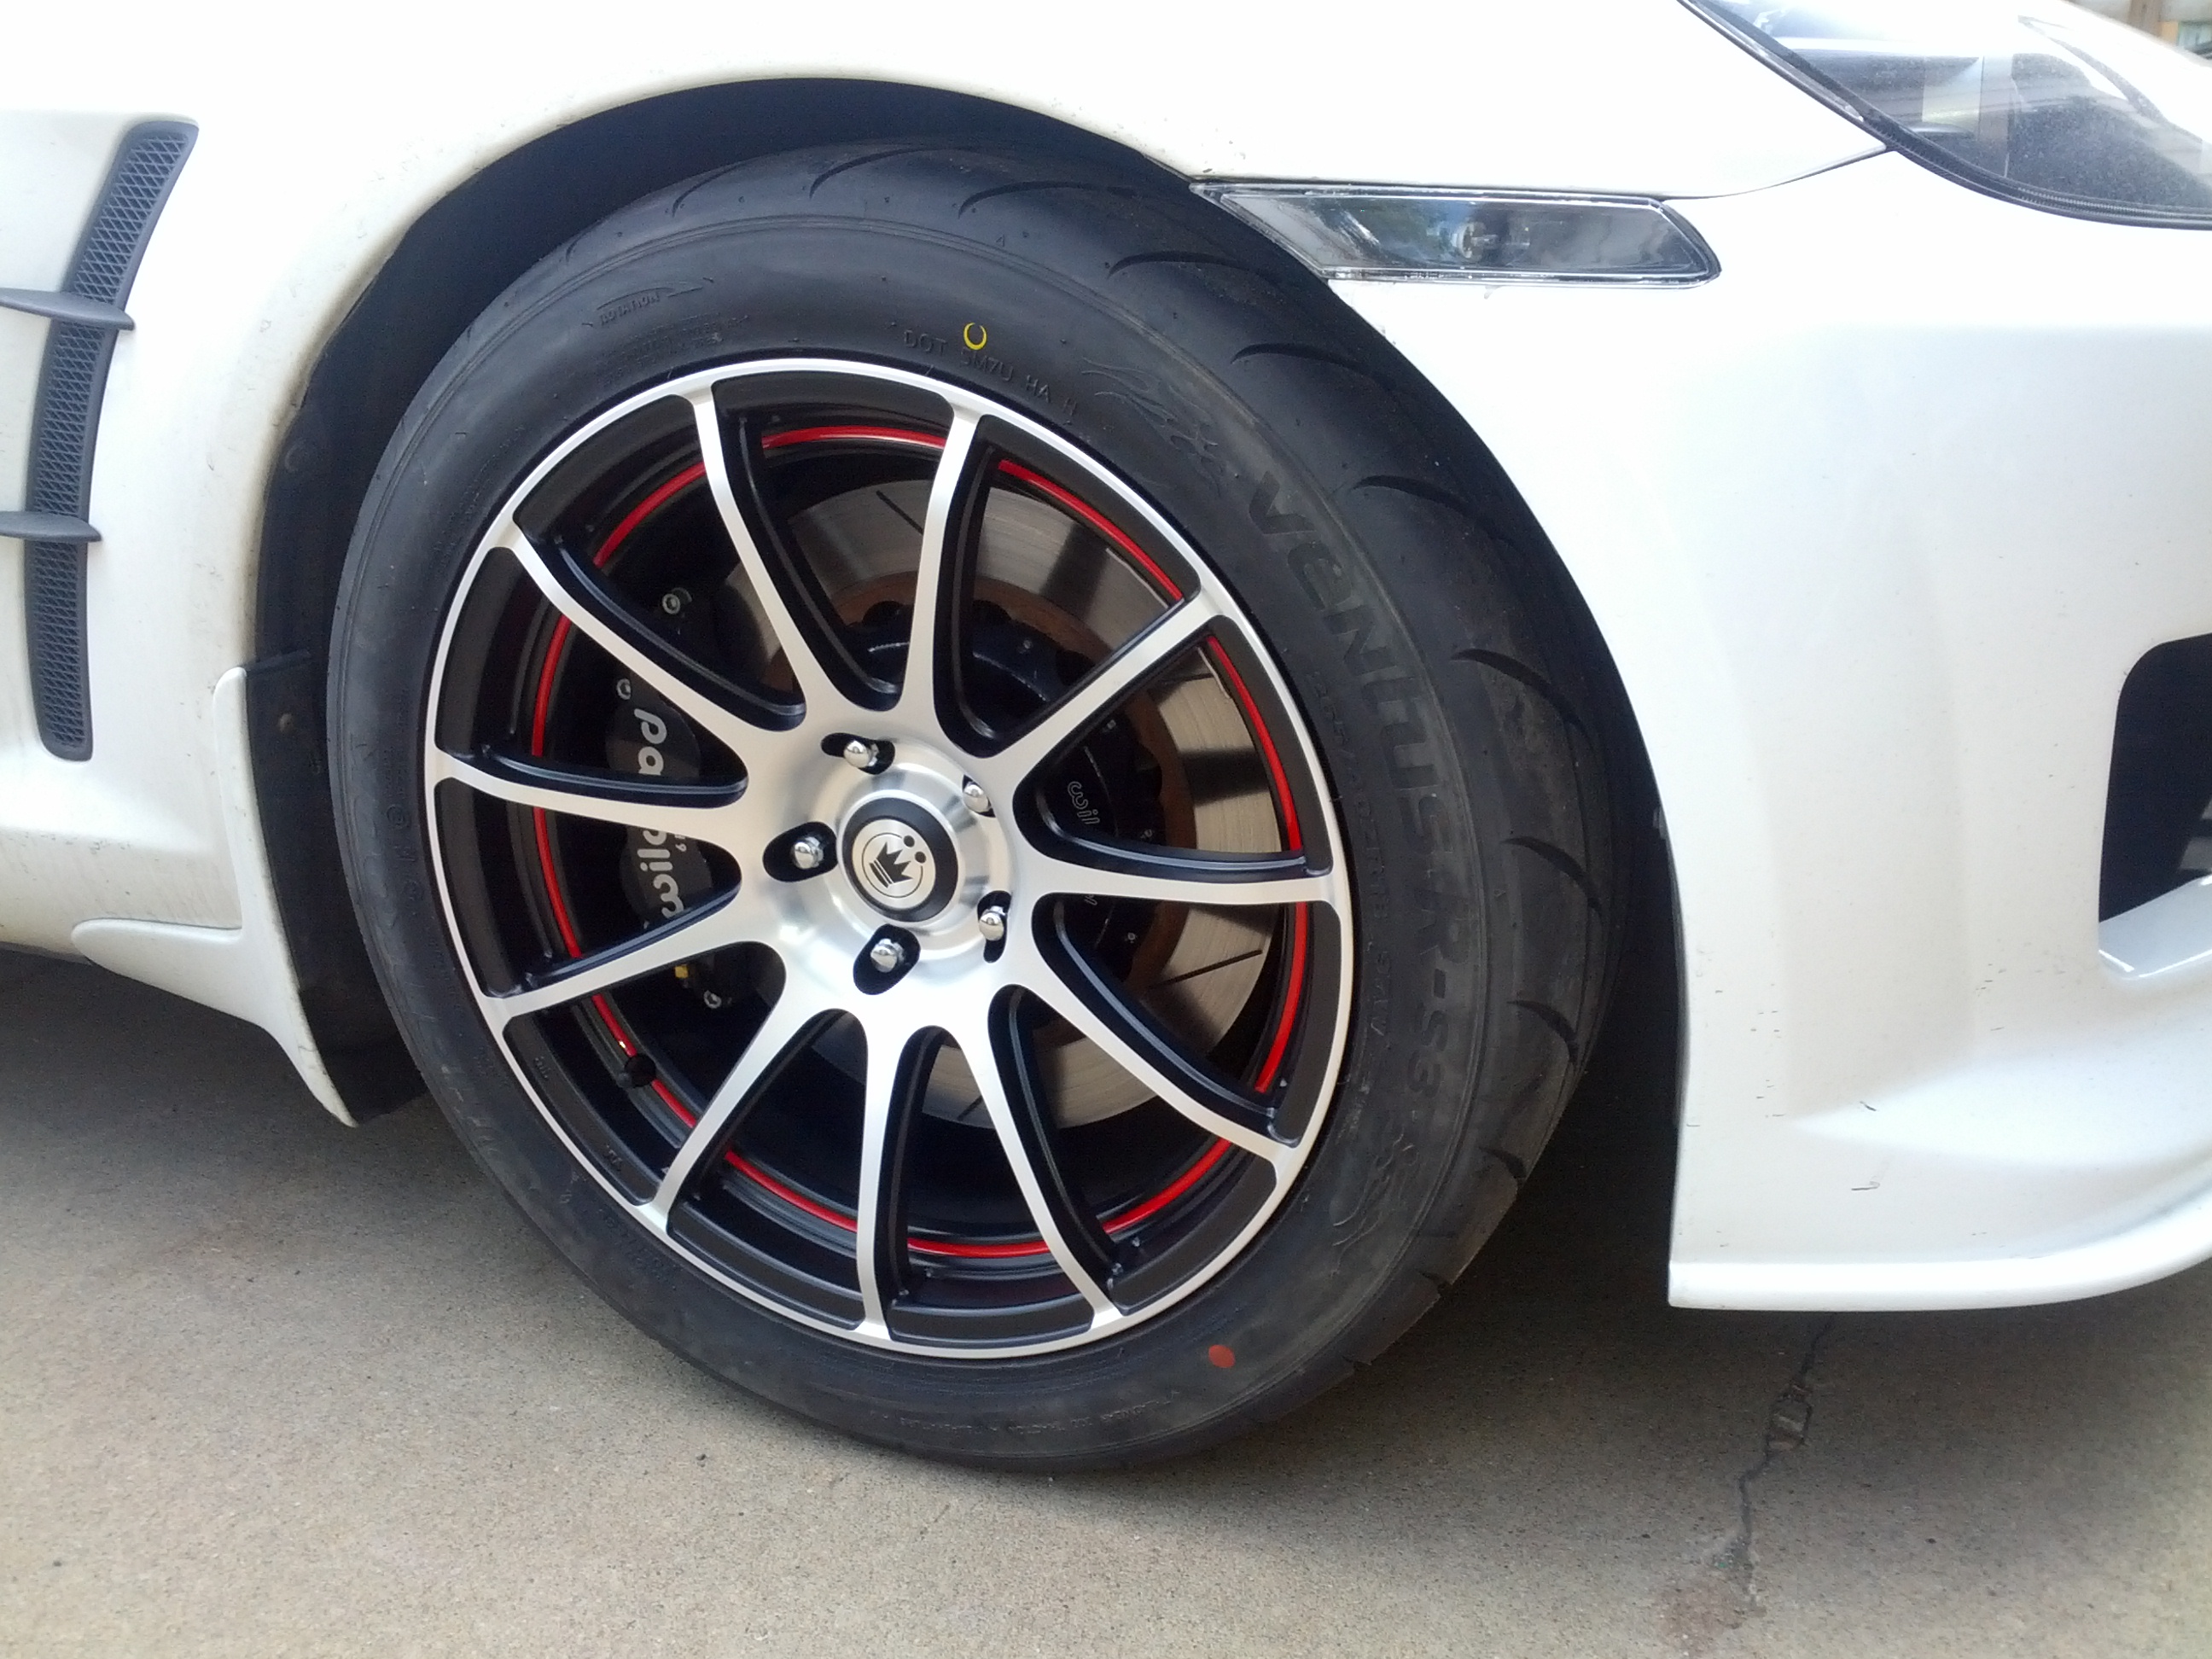
The one thing I really needed to have was a big brake kit. First to account for the extra weight in the front, second to have more track capability, and third for the looks
Ironically, I got so excited about this, that it was one of the first things I installed (yes, even before I put the LS3 in). I got a set of 6-piston Wilwoods on 14" rotors for a pretty decent price, and am very happy with them overall. I run the most aggressive pad and it seems to match the rear well with the OEM proportioning. These also, are designed to work with the stock master cylinder.


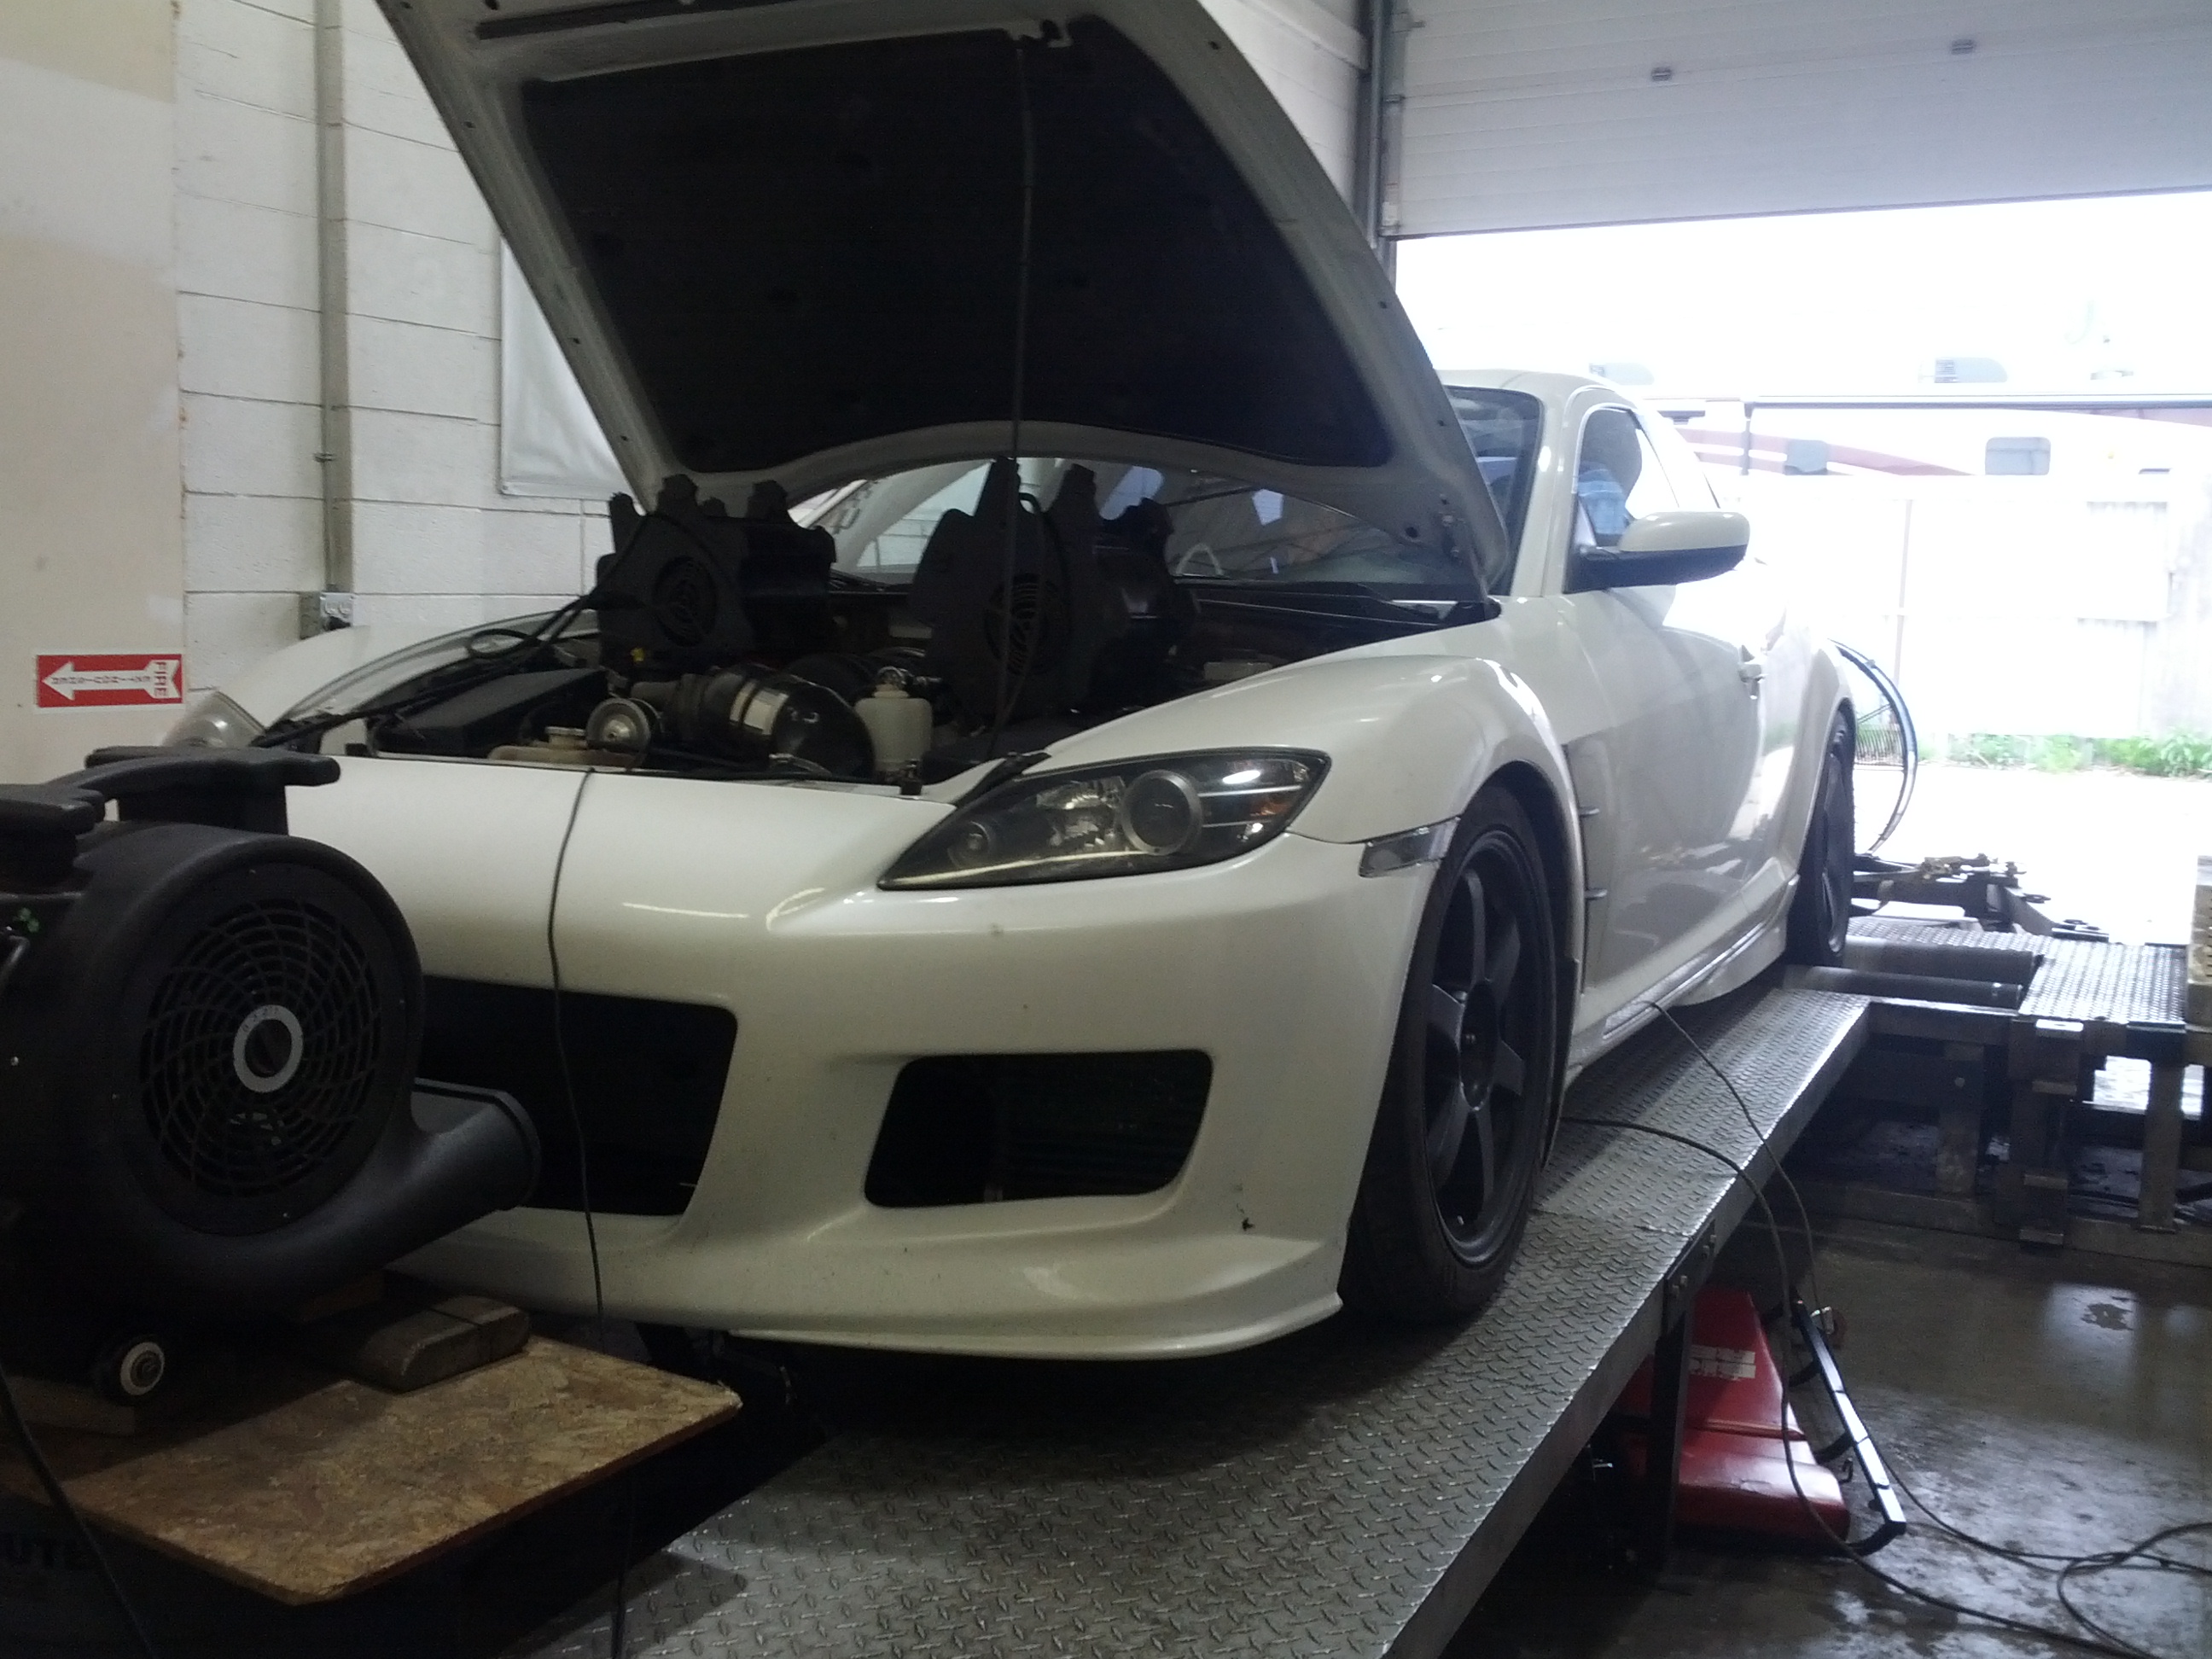
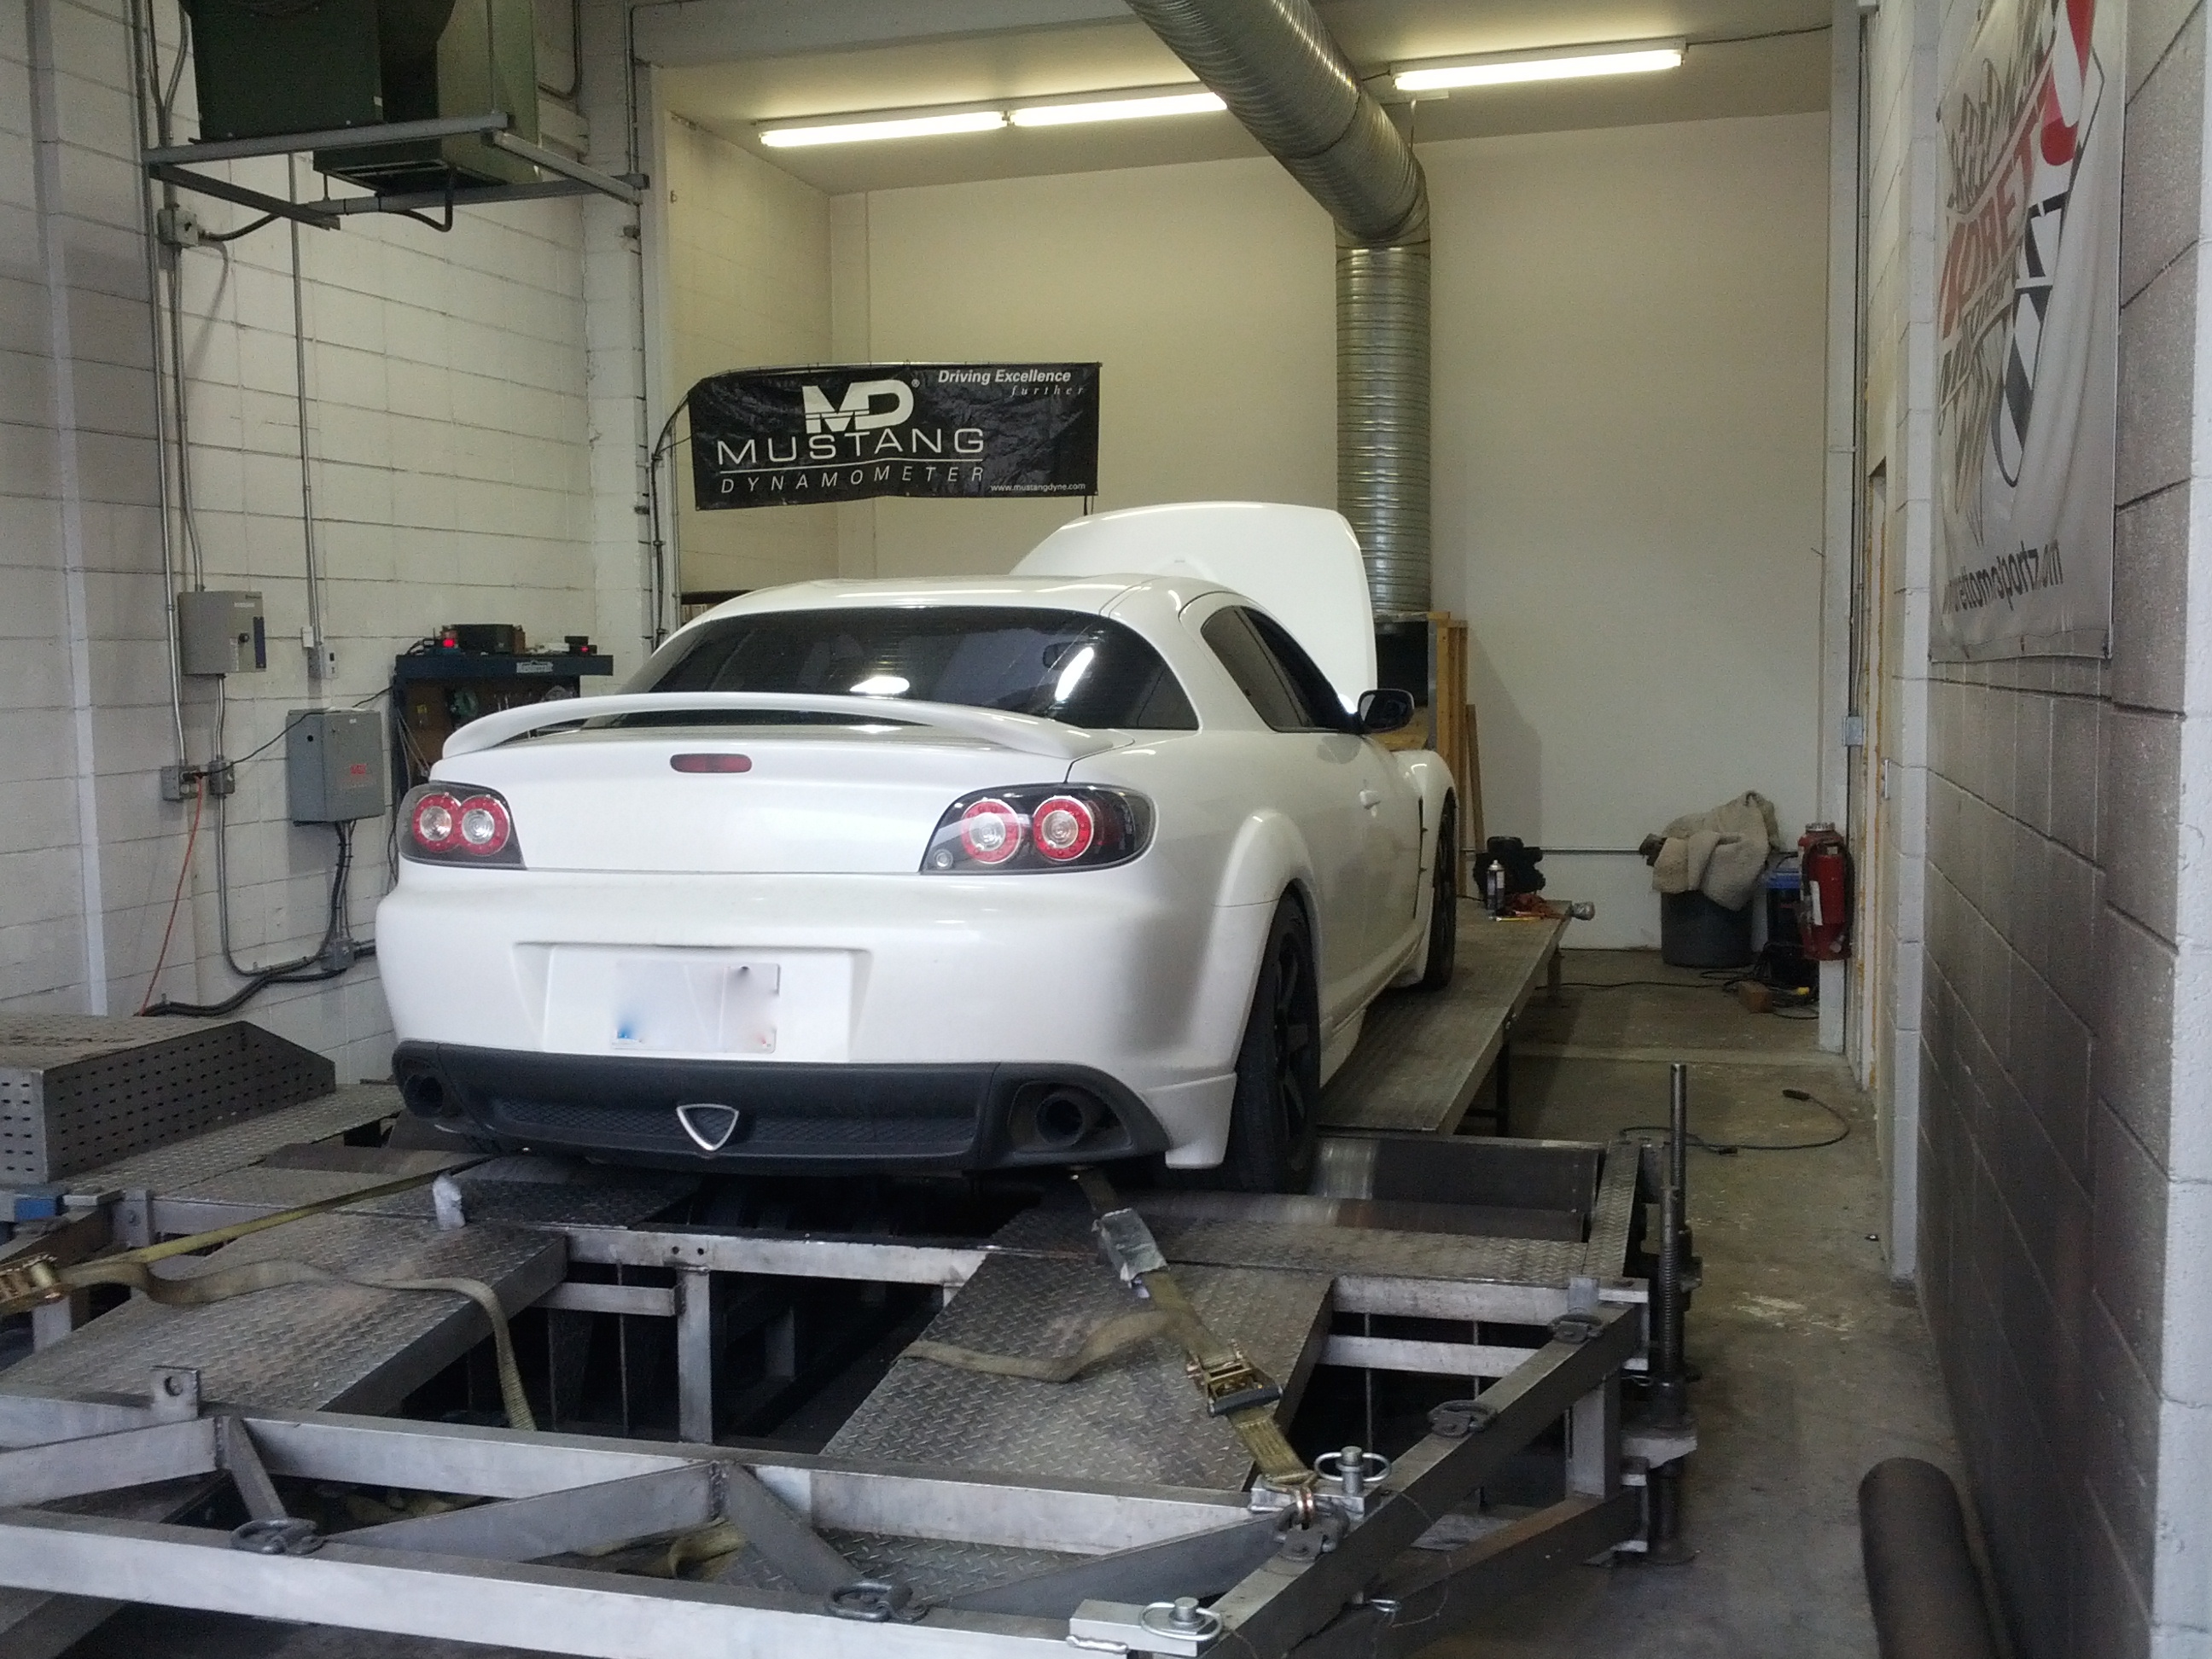
PART X: Getting ready for the track...
First of all, I took the car to a local dyno. Not really for the numbers, but to make sure everything runs healthy.
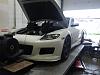
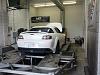
I put down 380 whp / 370 wtq on a Mustang Dyno. Nothing impressive, but around what you'd expect from a stock LS3 on 94 octane, at our altitude, on this dyno.
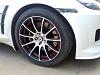
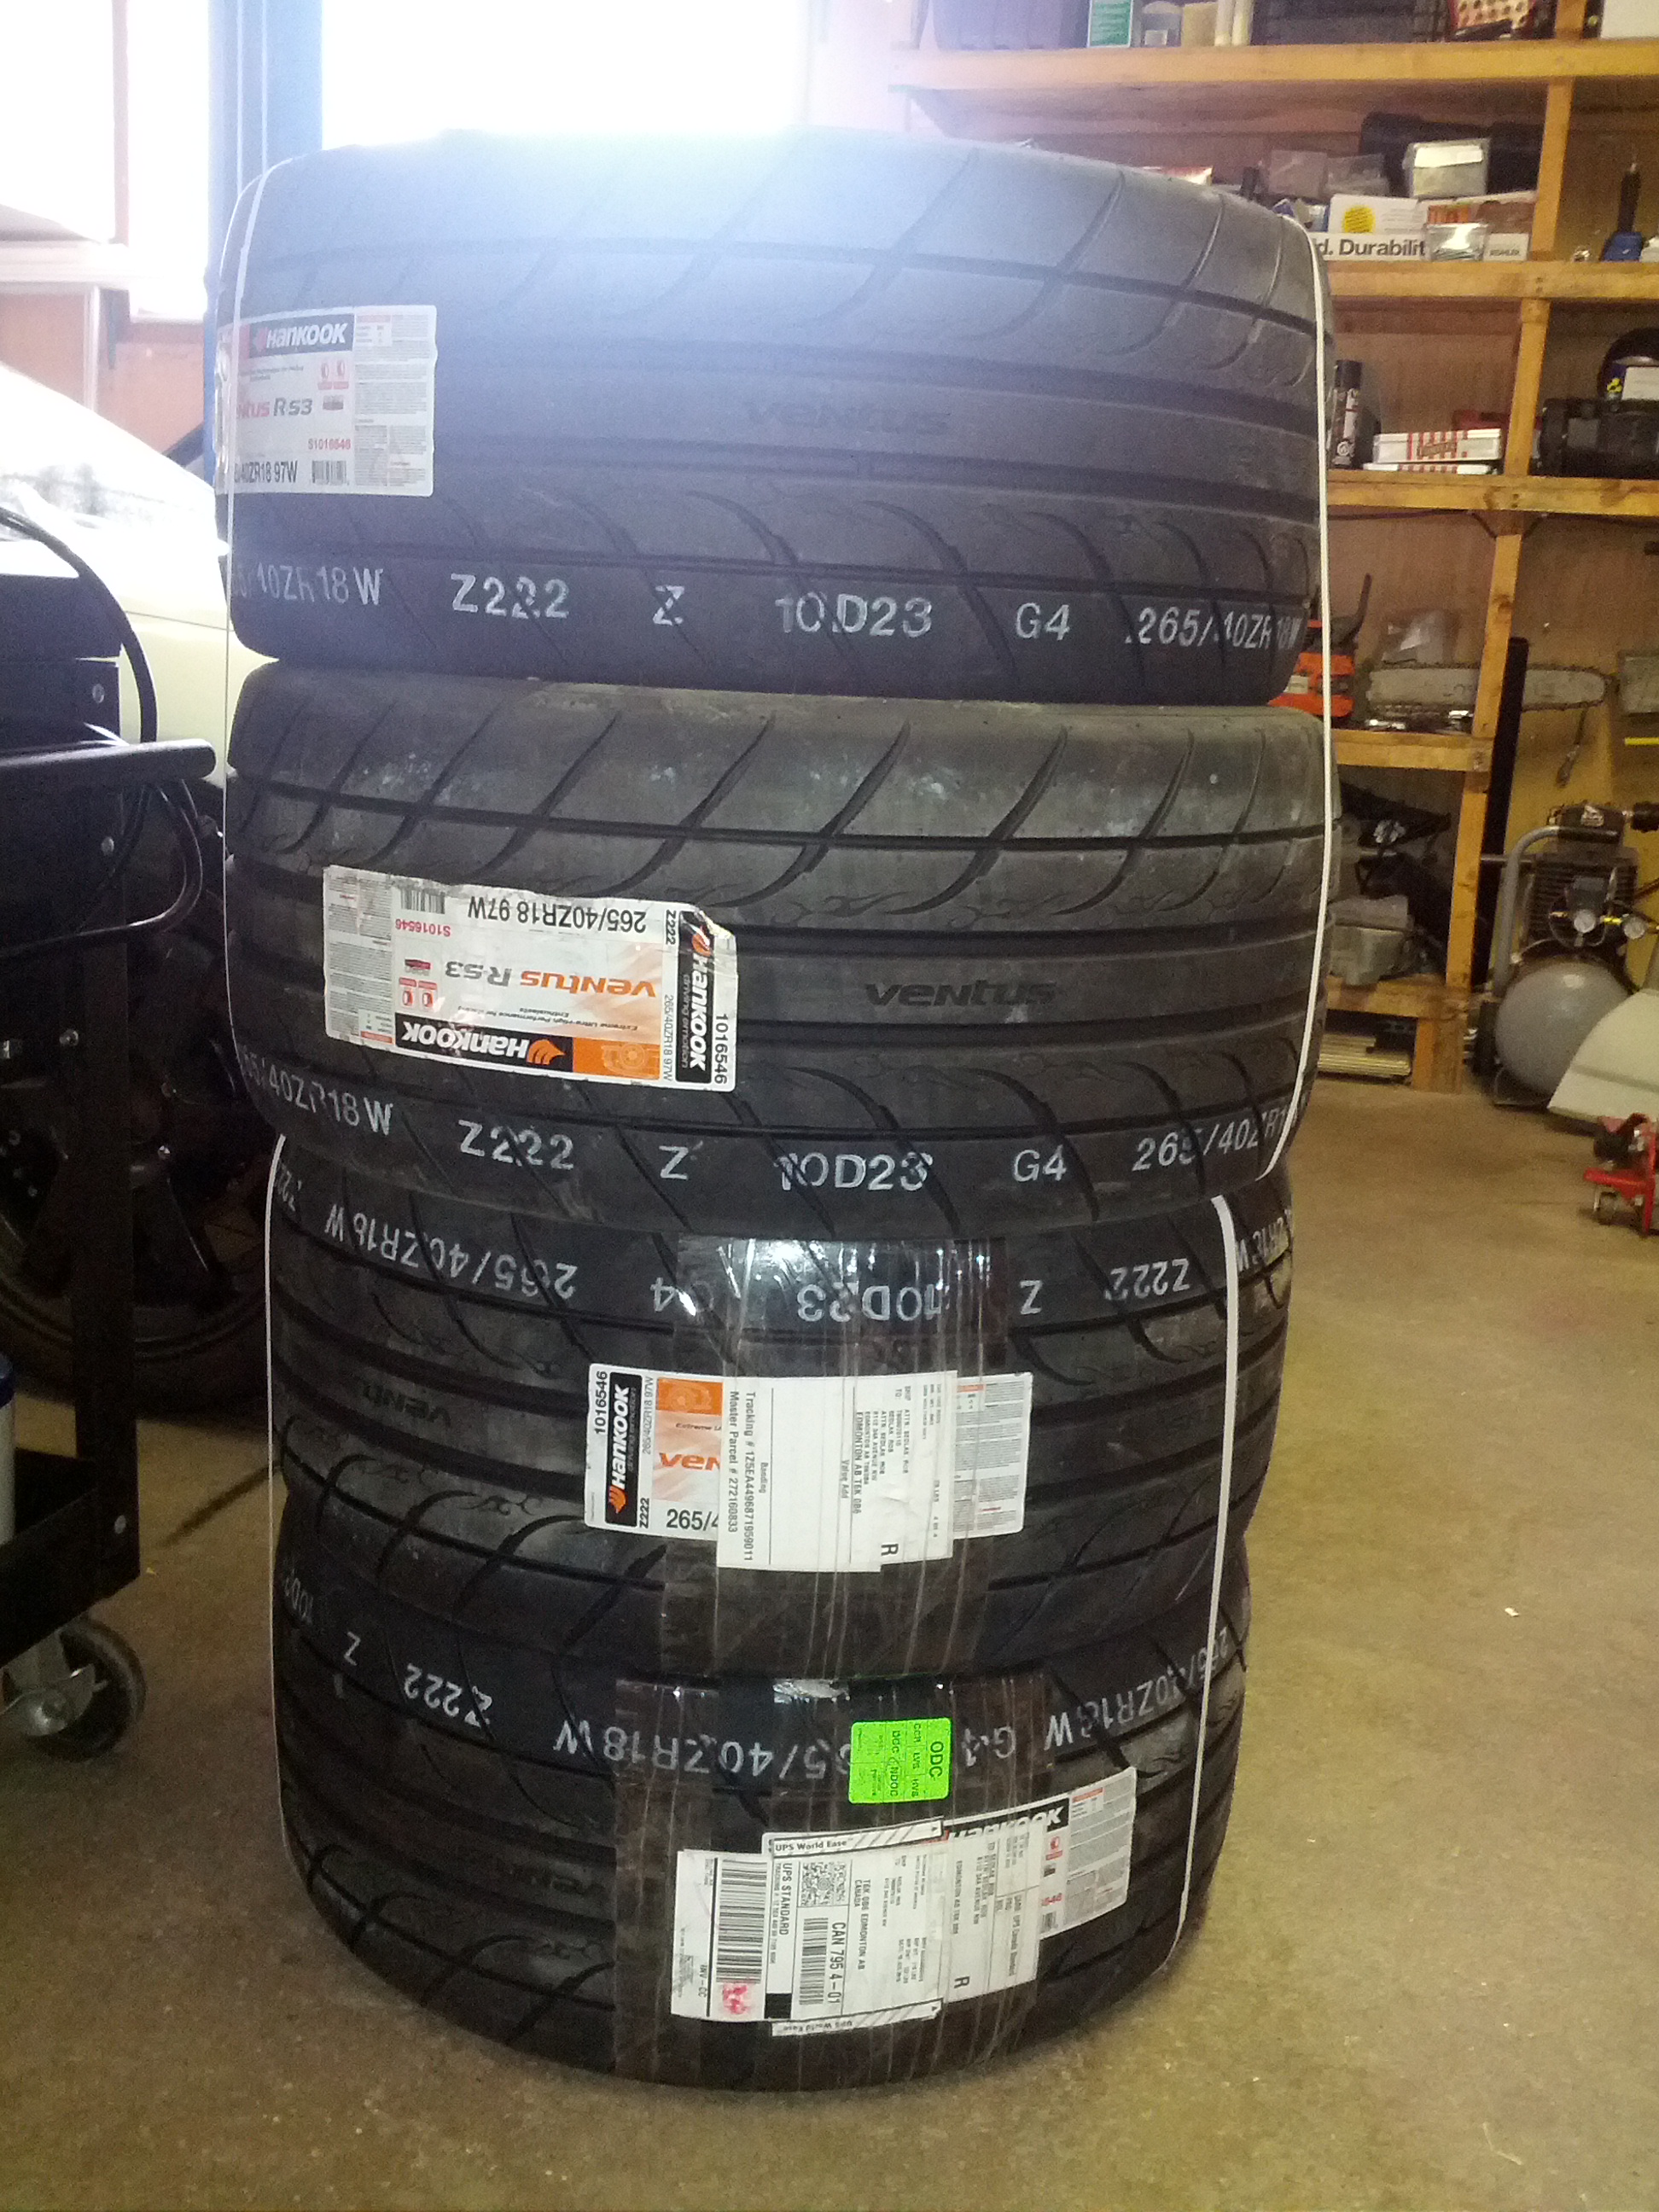
Once I took it to our road course I quickly realized my Chinese special budget tires will not cut it. I started off running Nankang 245 fronts and 275 rears. Not bad for the street, but not good enough for the track.
It was an exciting day when these arrived...

I decided to go with Hankook Ventus RS-3, 265/40/18 in all four corners. As much as I love the staggered look, the car was designed to be on square stance. I also think this gives it little extra scrubbing power on the front to prevent any understeer.
You will notice these are slightly bigger diameter tire than stock, but this works really well with the speedometer and the 3.91 rear end. It is about as big as you can go on the front without rubbing
I mounted these on a set of 9.5" rims with +45 offset and they seems to work perfect (Konig Zero-in). I did not love the look of them at first, but they have grown on me.
Obviously front suspension geometry will be bastardized to some degree by this whole undertaking. I tried to counter / remedy most changes, and by no means am I claiming a perfect outcome.
The front swaybar needed to be relocated further forward and lower. I have seen people just turn around the sway links and make the stock bar work. This approach did not work out for me, things were too close to the shocks, and car handled like ****.
I decided to extend the OEM sway bar by couple of inches and use adjustable short sway bar linkages - this seems to work.
Sorry about some of the blurry pics, only realized after I took them...

The swaybar relocation brackets and the bump steer kit were supplied by Steven at LS1RX8.

Few more things you can see in these "after the fact" pictures, is the routing of my oil cooler lines, and the steering extension.

The car will have more weight over the front axle, although it is less than most would think. I decided to go with coilover suspension with adjustable height as well as spring preload.
I came across a set of slightly used HSD coils and these have done fine for the most part. I did have some issues with the bushings on the rear basically falling apart, and I wasted 2 weeks making my own polyurethane bushings. This is what you get for second hand price I suppose.

And now fixed...

The rear sway bar and links have been upgraded while I was there. I also plan to do a full urethane bushing swap over the winter.
The one thing I really needed to have was a big brake kit. First to account for the extra weight in the front, second to have more track capability, and third for the looks
Ironically, I got so excited about this, that it was one of the first things I installed (yes, even before I put the LS3 in). I got a set of 6-piston Wilwoods on 14" rotors for a pretty decent price, and am very happy with them overall. I run the most aggressive pad and it seems to match the rear well with the OEM proportioning. These also, are designed to work with the stock master cylinder.
PART X: Getting ready for the track...
First of all, I took the car to a local dyno. Not really for the numbers, but to make sure everything runs healthy.
I put down 380 whp / 370 wtq on a Mustang Dyno. Nothing impressive, but around what you'd expect from a stock LS3 on 94 octane, at our altitude, on this dyno.
Once I took it to our road course I quickly realized my Chinese special budget tires will not cut it. I started off running Nankang 245 fronts and 275 rears. Not bad for the street, but not good enough for the track.
It was an exciting day when these arrived...
I decided to go with Hankook Ventus RS-3, 265/40/18 in all four corners. As much as I love the staggered look, the car was designed to be on square stance. I also think this gives it little extra scrubbing power on the front to prevent any understeer.
You will notice these are slightly bigger diameter tire than stock, but this works really well with the speedometer and the 3.91 rear end. It is about as big as you can go on the front without rubbing
I mounted these on a set of 9.5" rims with +45 offset and they seems to work perfect (Konig Zero-in). I did not love the look of them at first, but they have grown on me.
Last edited by Pistonized; 11-07-2015 at 01:22 PM.
11-07-2015, 01:48 PM
#19
Registered
Thread Starter
PART X: Looks.
I have always thought that RX8's look very sharp. As such, the car needed very little in that department.
I knew from the start, that I needed a Mazdaspeed front bumper (at least a good enough replica). Conveniently the original front bumper on the car was a bit beat up, so this was easy to justify.
Not unlike the brakes, it was one of the first things I installed. This one cost about $300, and took a little TLC to make fit properly. It is urethane, rather than cheap crap fibreglass. It still is not a perfect fit, but I think it looks clean and personally I prefer the look over OEM.

Funny thing...
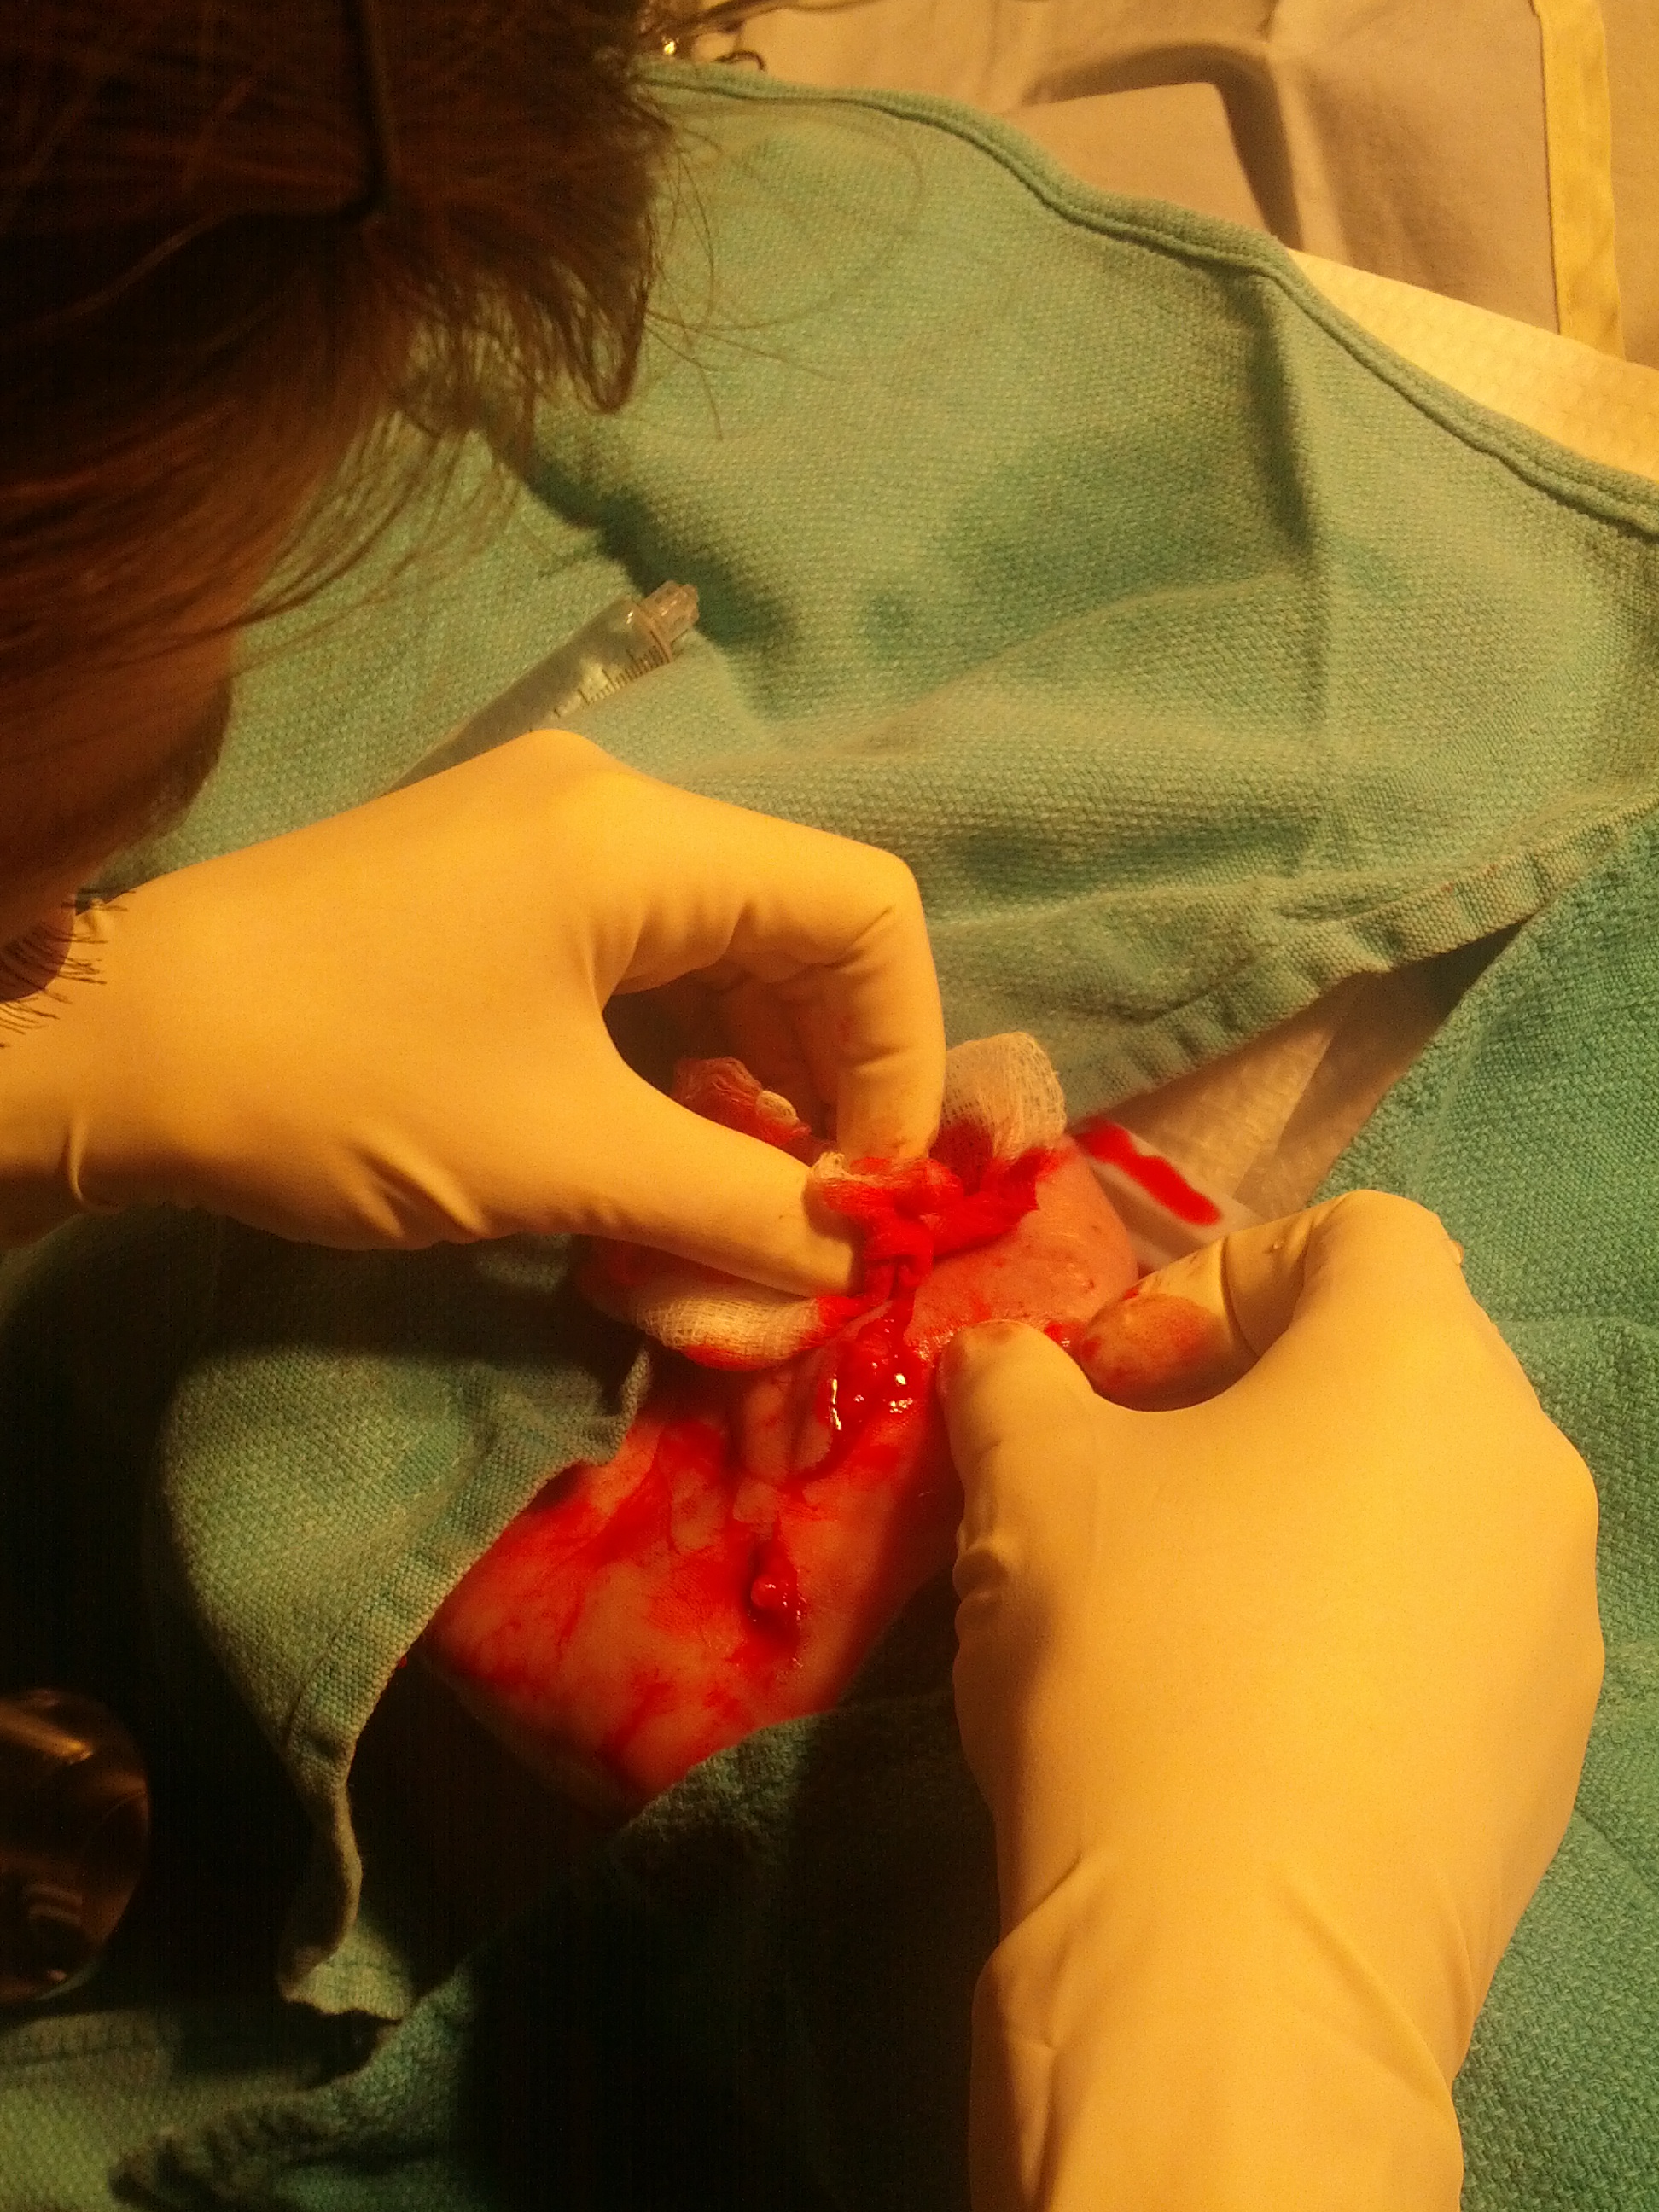
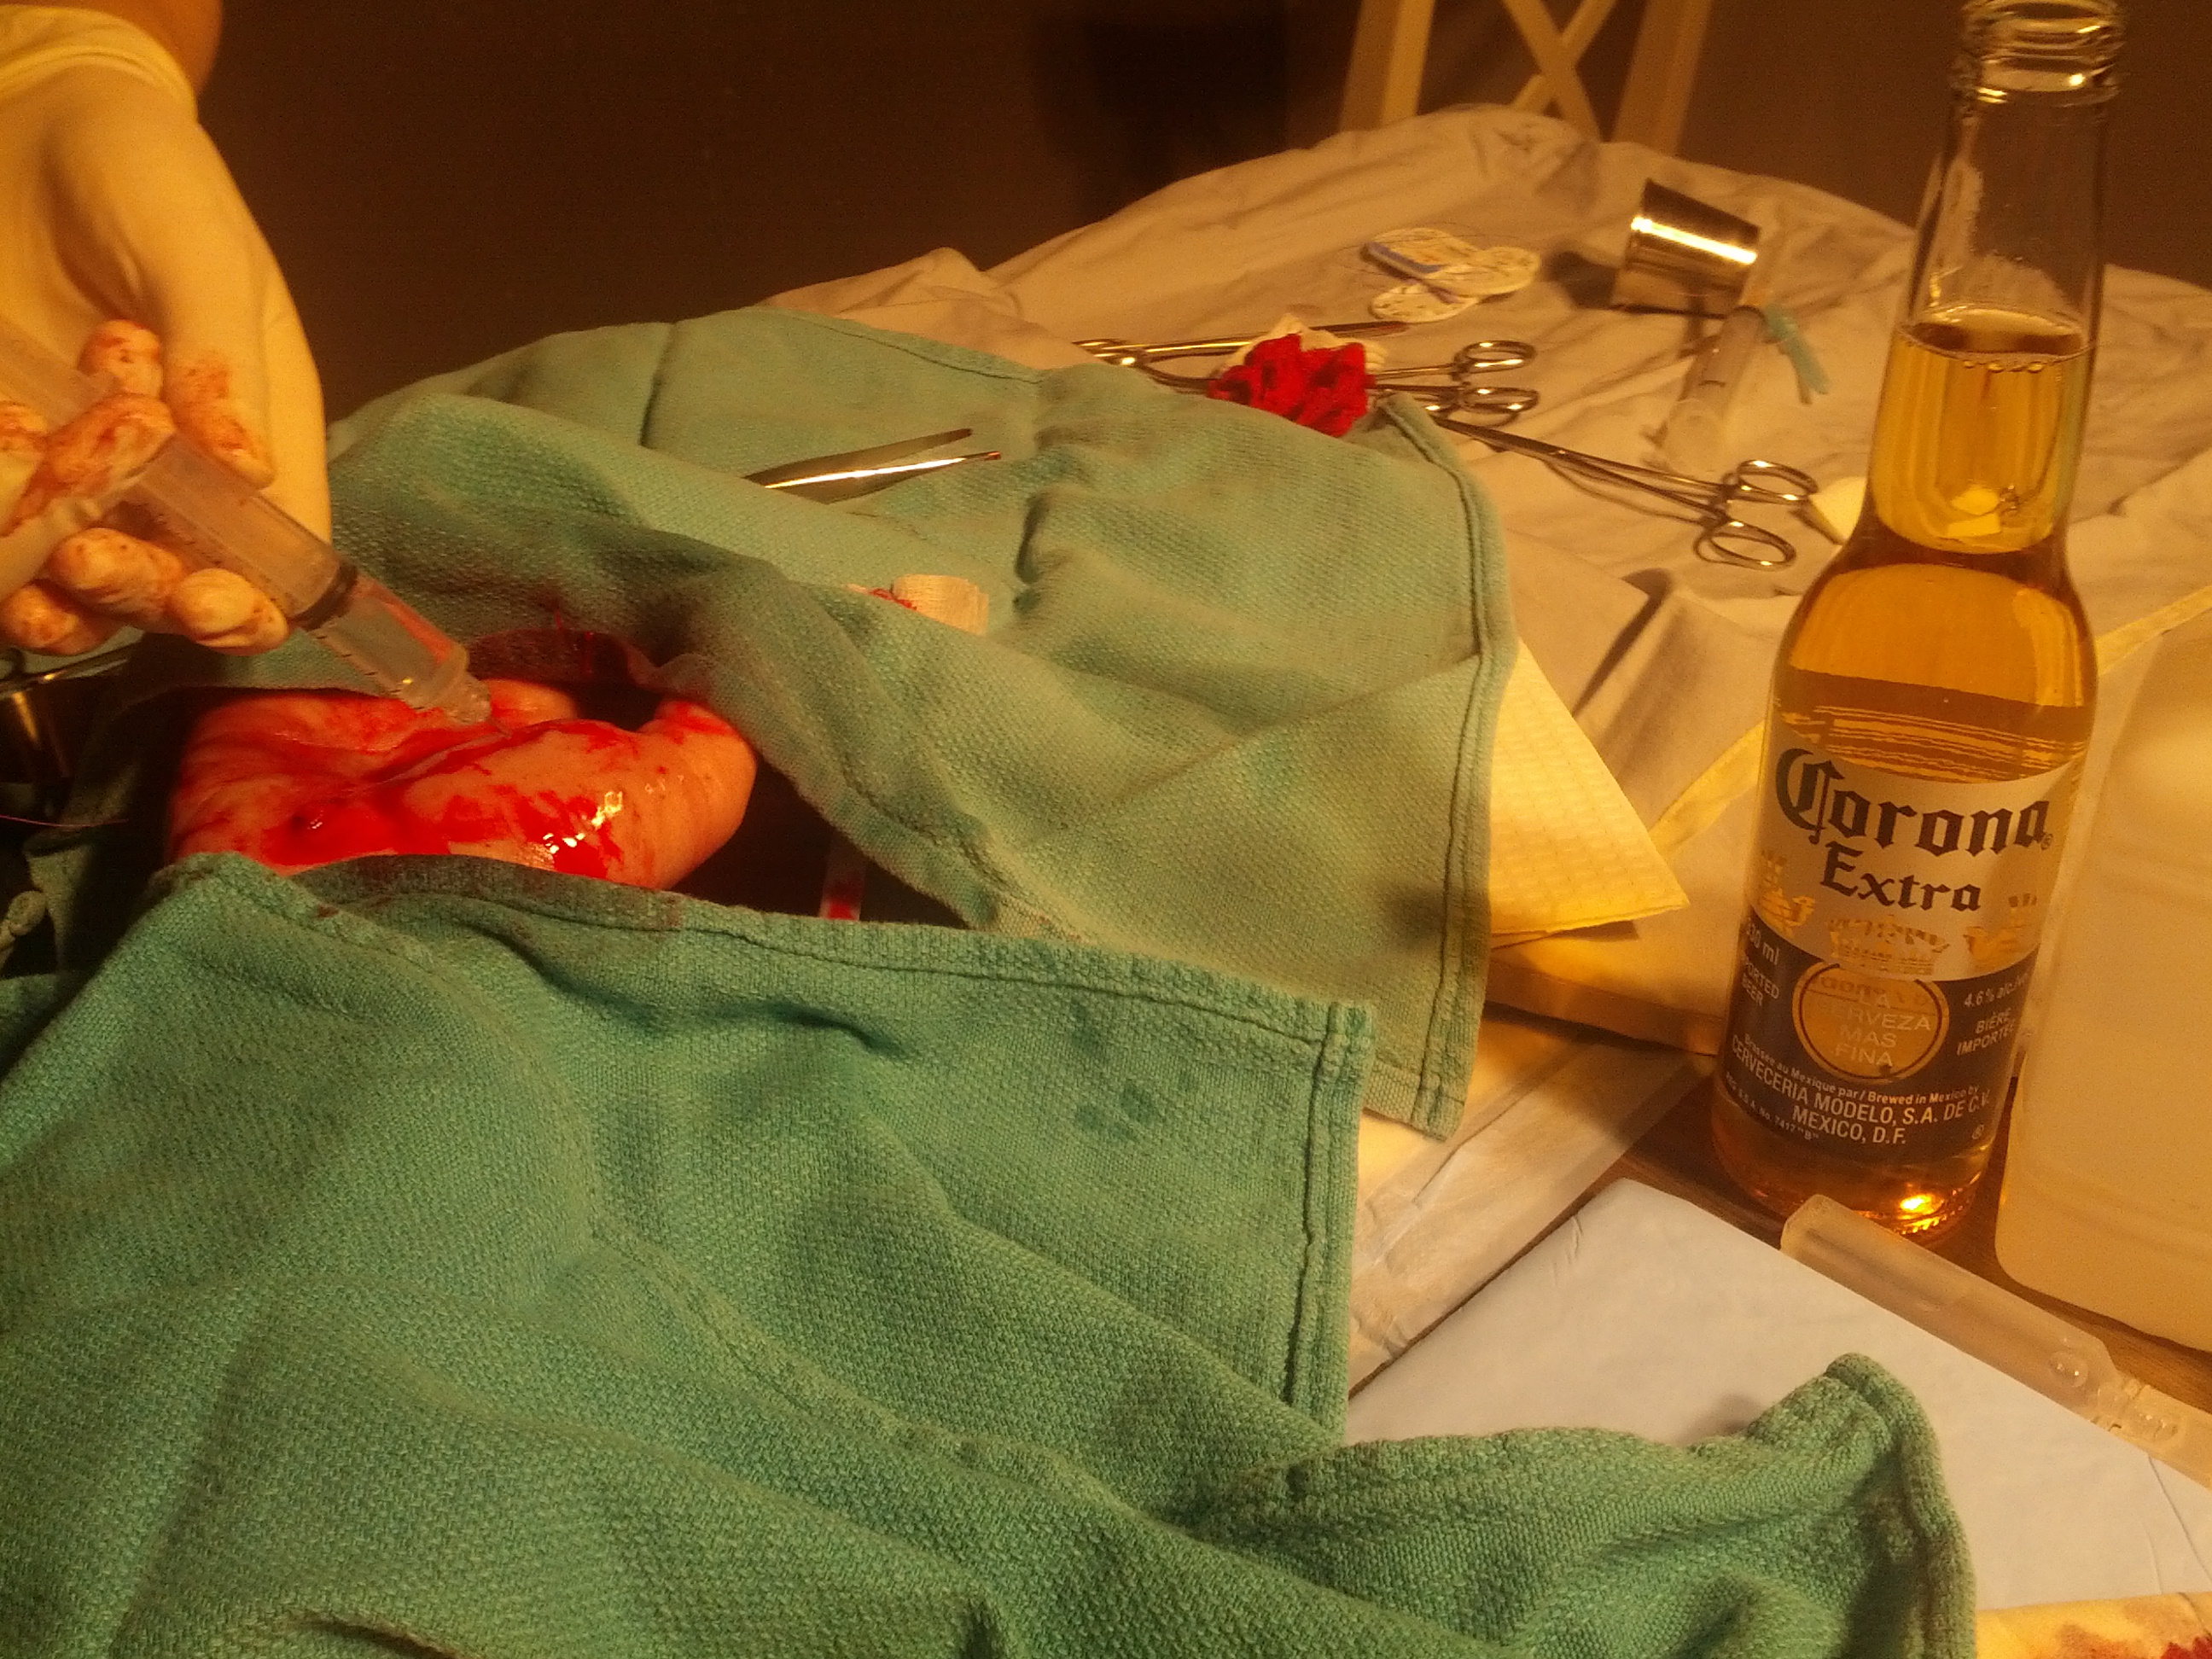
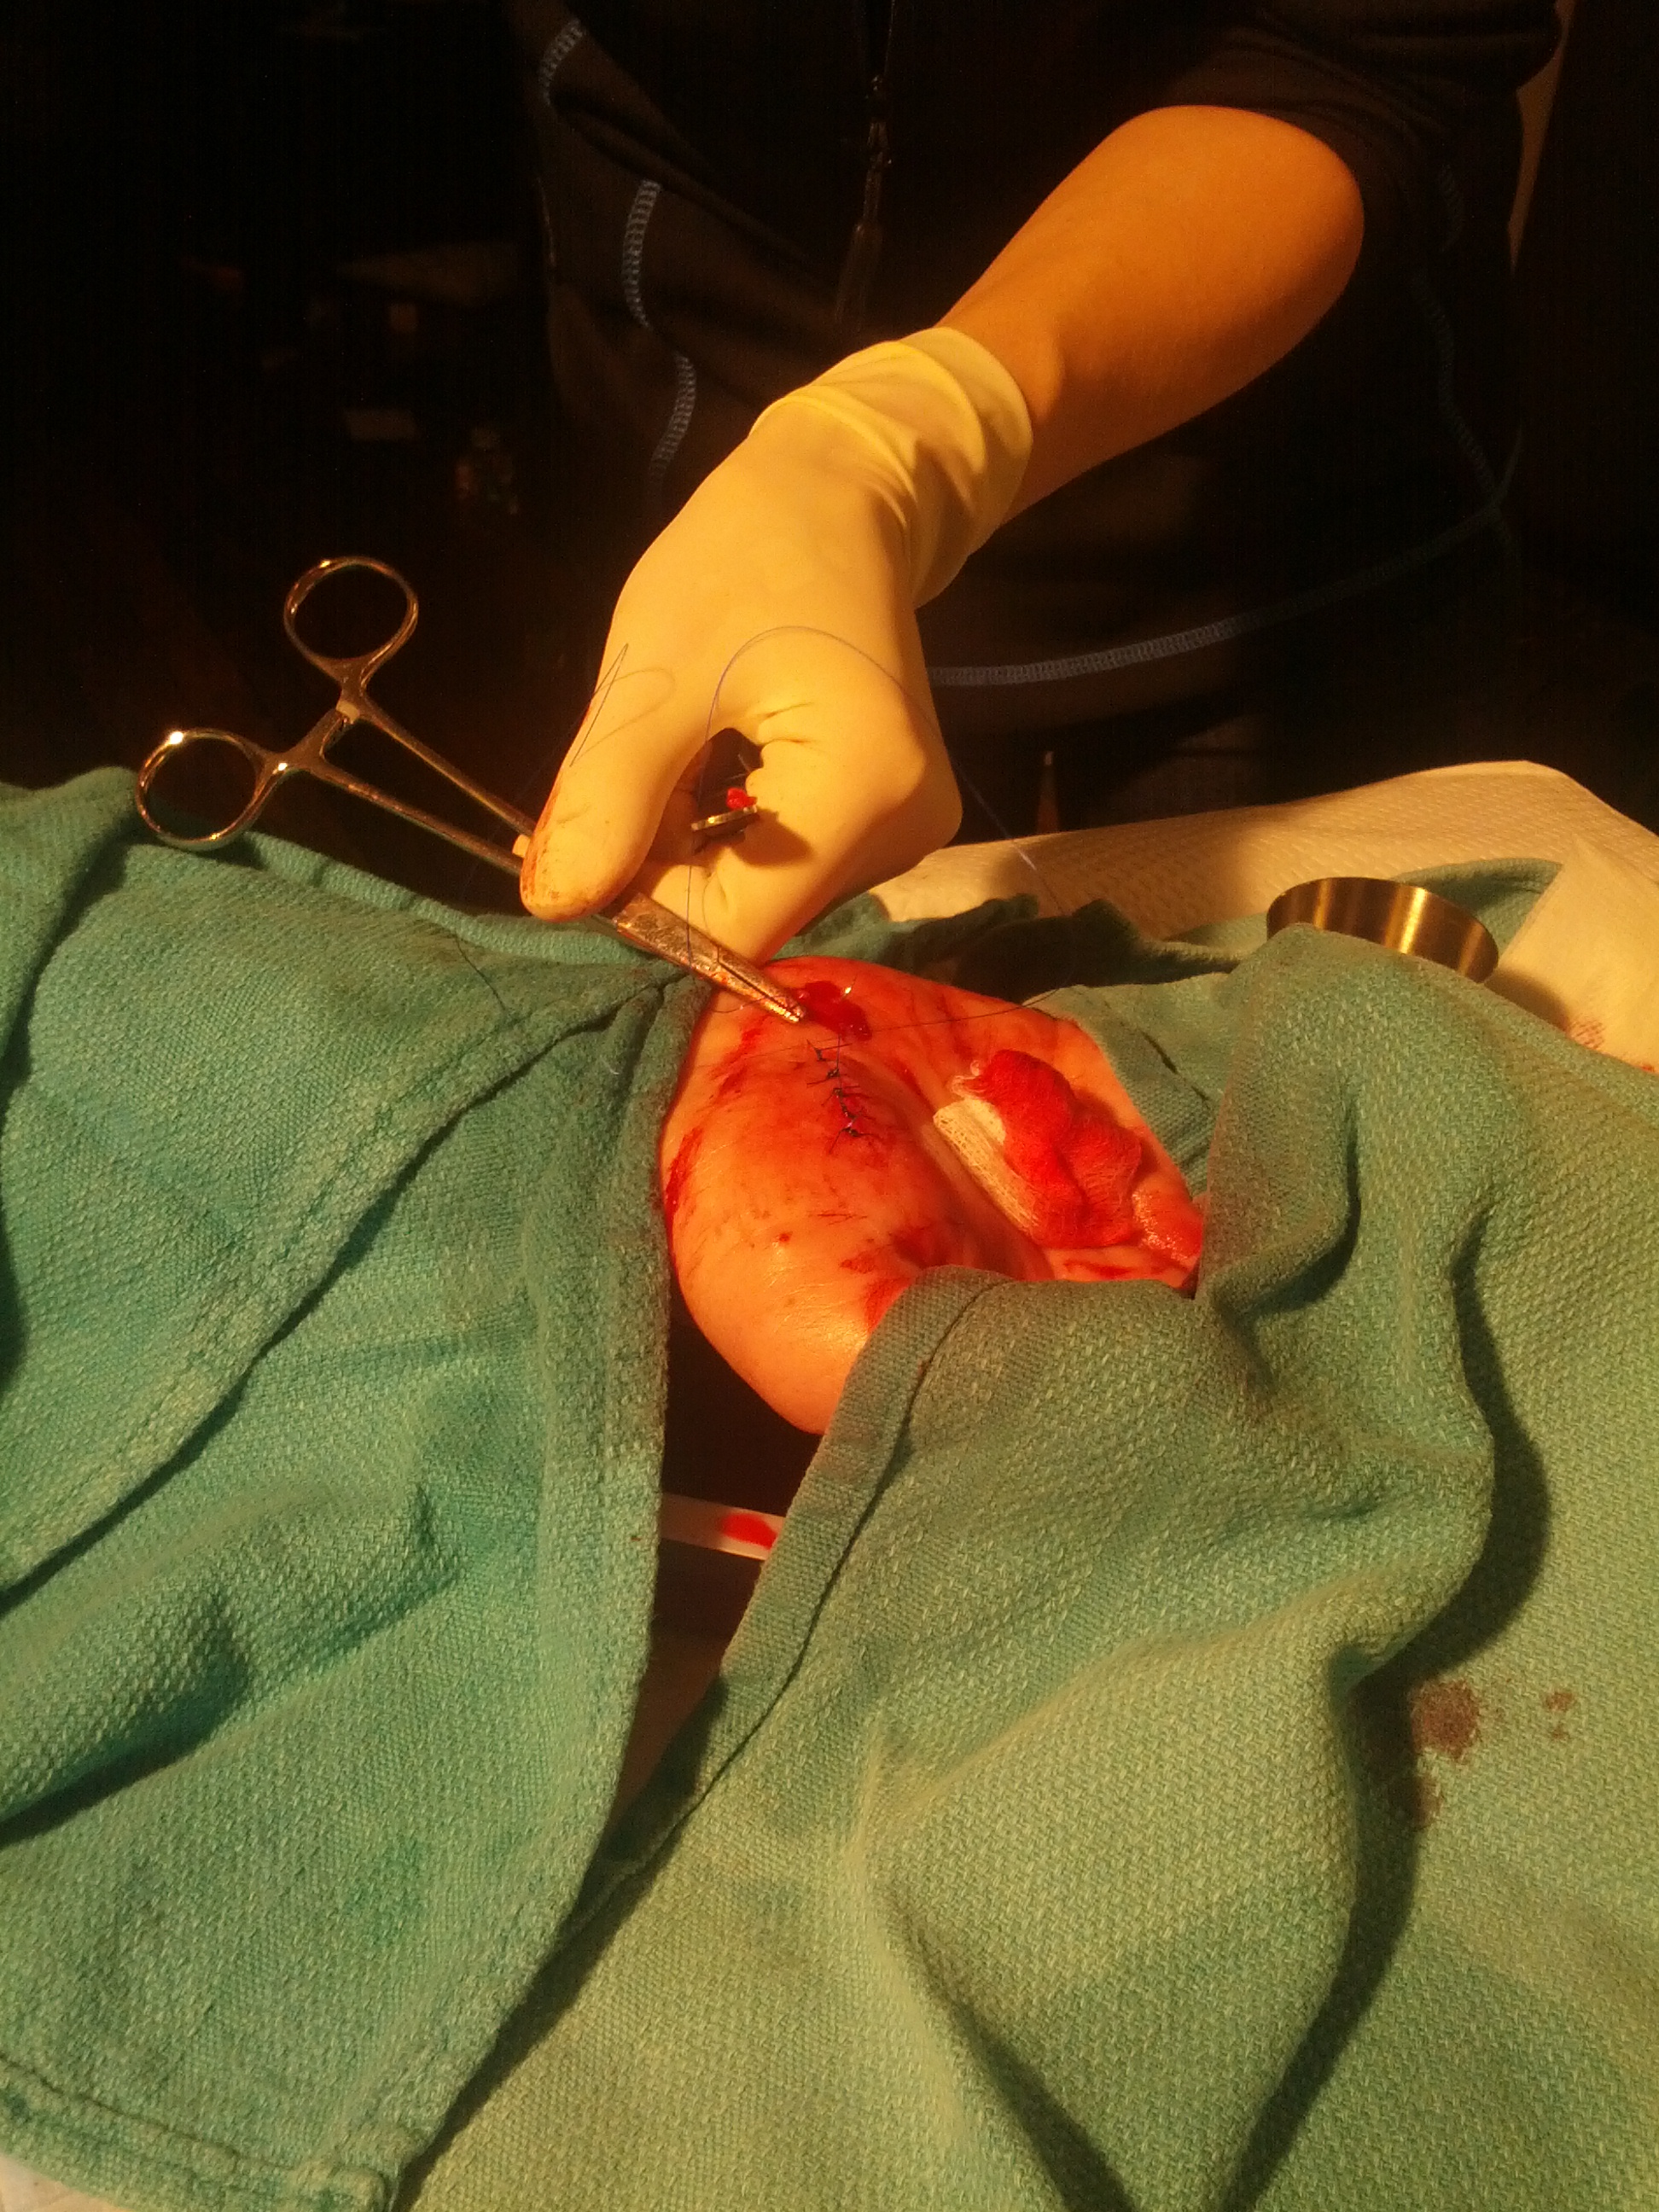
While making the cheap replica bumper fit, I sliced open my wrist with an exacto knife. Clipped a small artery and just missed my median nerve.
Luckily my sister is a surgeon, and this was a quick home repair... and back at it!


While getting the bumper painted, I decided to fix some small rust spots around the third brake light and debadge the trunk.
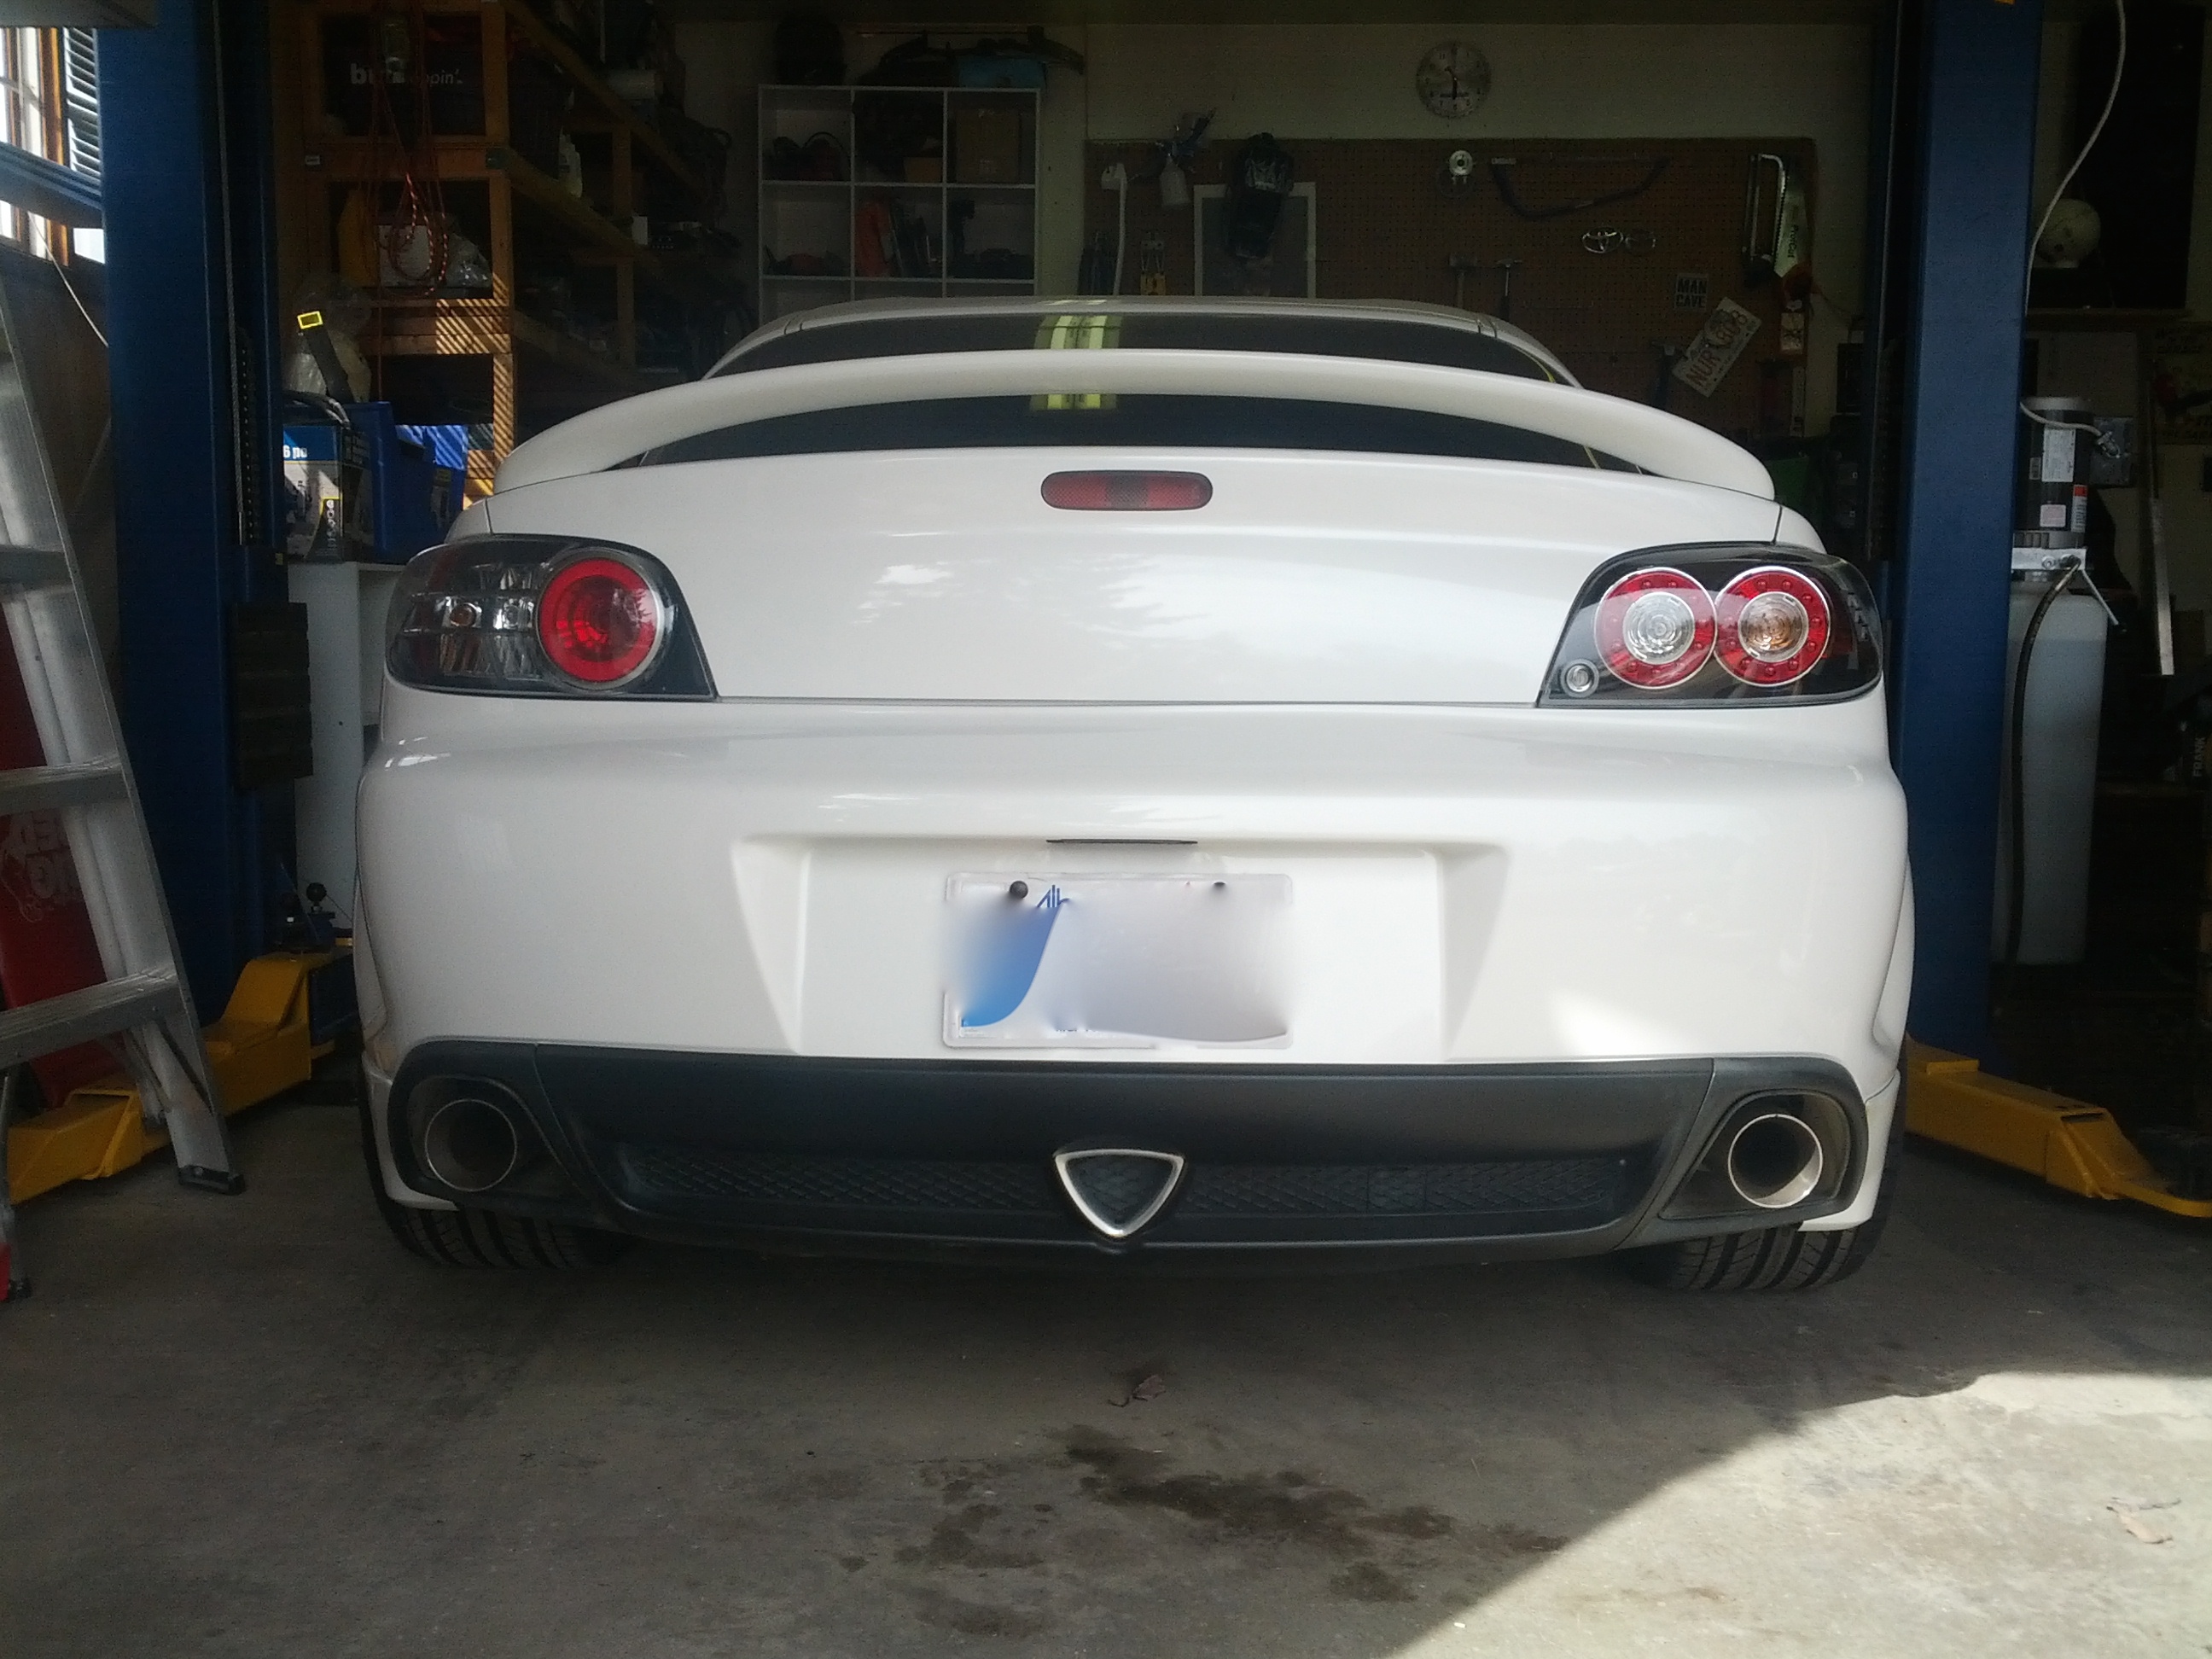
Lastly, I spent number of months contemplating aftermarket tail lights... Surprisingly little options out there I thought. In the end, my favorite look is the 2009-11 OEM look.
I have seen guys use those OEM lights but the fitment is not ideal (you have to modify the housing/bracket and they still protrude about 1" past the natural trunk line).
I found a replica kit designed to fit the 2004-08 cars perfectly from Taiwan. This was likely the biggest splurge on a non-essential part. They ran me about $600, but are great quality and look awesome... you be the judge.
Almost forgot...
If you pay close attention to the pictures you have probably noticed already. I decided to swap the entire black leather interior (seats, panels, steering wheel) for a red one. This came out of a clean red car, and my friend has graciously agreed to take my black interior for his red.
I realize this is very subjective, but I love the pearl white exterior and red interior combo.
I have always thought that RX8's look very sharp. As such, the car needed very little in that department.
I knew from the start, that I needed a Mazdaspeed front bumper (at least a good enough replica). Conveniently the original front bumper on the car was a bit beat up, so this was easy to justify.
Not unlike the brakes, it was one of the first things I installed. This one cost about $300, and took a little TLC to make fit properly. It is urethane, rather than cheap crap fibreglass. It still is not a perfect fit, but I think it looks clean and personally I prefer the look over OEM.

Funny thing...
While making the cheap replica bumper fit, I sliced open my wrist with an exacto knife. Clipped a small artery and just missed my median nerve.
Luckily my sister is a surgeon, and this was a quick home repair... and back at it!
While getting the bumper painted, I decided to fix some small rust spots around the third brake light and debadge the trunk.
Lastly, I spent number of months contemplating aftermarket tail lights... Surprisingly little options out there I thought. In the end, my favorite look is the 2009-11 OEM look.
I have seen guys use those OEM lights but the fitment is not ideal (you have to modify the housing/bracket and they still protrude about 1" past the natural trunk line).
I found a replica kit designed to fit the 2004-08 cars perfectly from Taiwan. This was likely the biggest splurge on a non-essential part. They ran me about $600, but are great quality and look awesome... you be the judge.
Almost forgot...
If you pay close attention to the pictures you have probably noticed already. I decided to swap the entire black leather interior (seats, panels, steering wheel) for a red one. This came out of a clean red car, and my friend has graciously agreed to take my black interior for his red.
I realize this is very subjective, but I love the pearl white exterior and red interior combo.
Last edited by Pistonized; 11-09-2015 at 03:04 PM.
11-07-2015, 02:23 PM
#20
Registered
Thread Starter
PART XI: The finished product...
My friends have often asked me... "Was it worth it?" and I do not have a clear cut answer.
If you are looking for a car that goes around the track fast, you can do it for much cheaper, and save yourself months of work. If you want a car that is really fast in a straight line, look elsewhere. (#dragqueen)
If you love the look of the RX8, but do not need extra power, do not bother with a swap.
If you want a car that does all of the above reasonably well and more, is an absolute riot to drive; if you are not afraid of getting your hands dirty; and if you have the need to add your personal touches to whatever you drive, like myself; then by all means... It is definitely worth it.
I love the feeling of spanking a GTR on the track in a car that looks completely stock, and costs a fraction of the price. I also love popping the hood and being able to say "I swapped a V8 in there".
Finally, I'd like to thank my friends for their help:
Andrew Nelson and Academy Petroleum for machining and welding odd bits when needed.
Andy Pollack for help with bodywork and painting.
Russell Schwesinger and Brad Bell for more welding help.
Conroy Ganson for part support and unmatched Mazda expertise, and for showing me how to drive my car
Ryan at Moretto Motorsportz for putting together my differential.
Stephen at LS1RX8 for getting me started on this journey and exchanging ideas along the way.
My sister, of course, for fixing my hand.
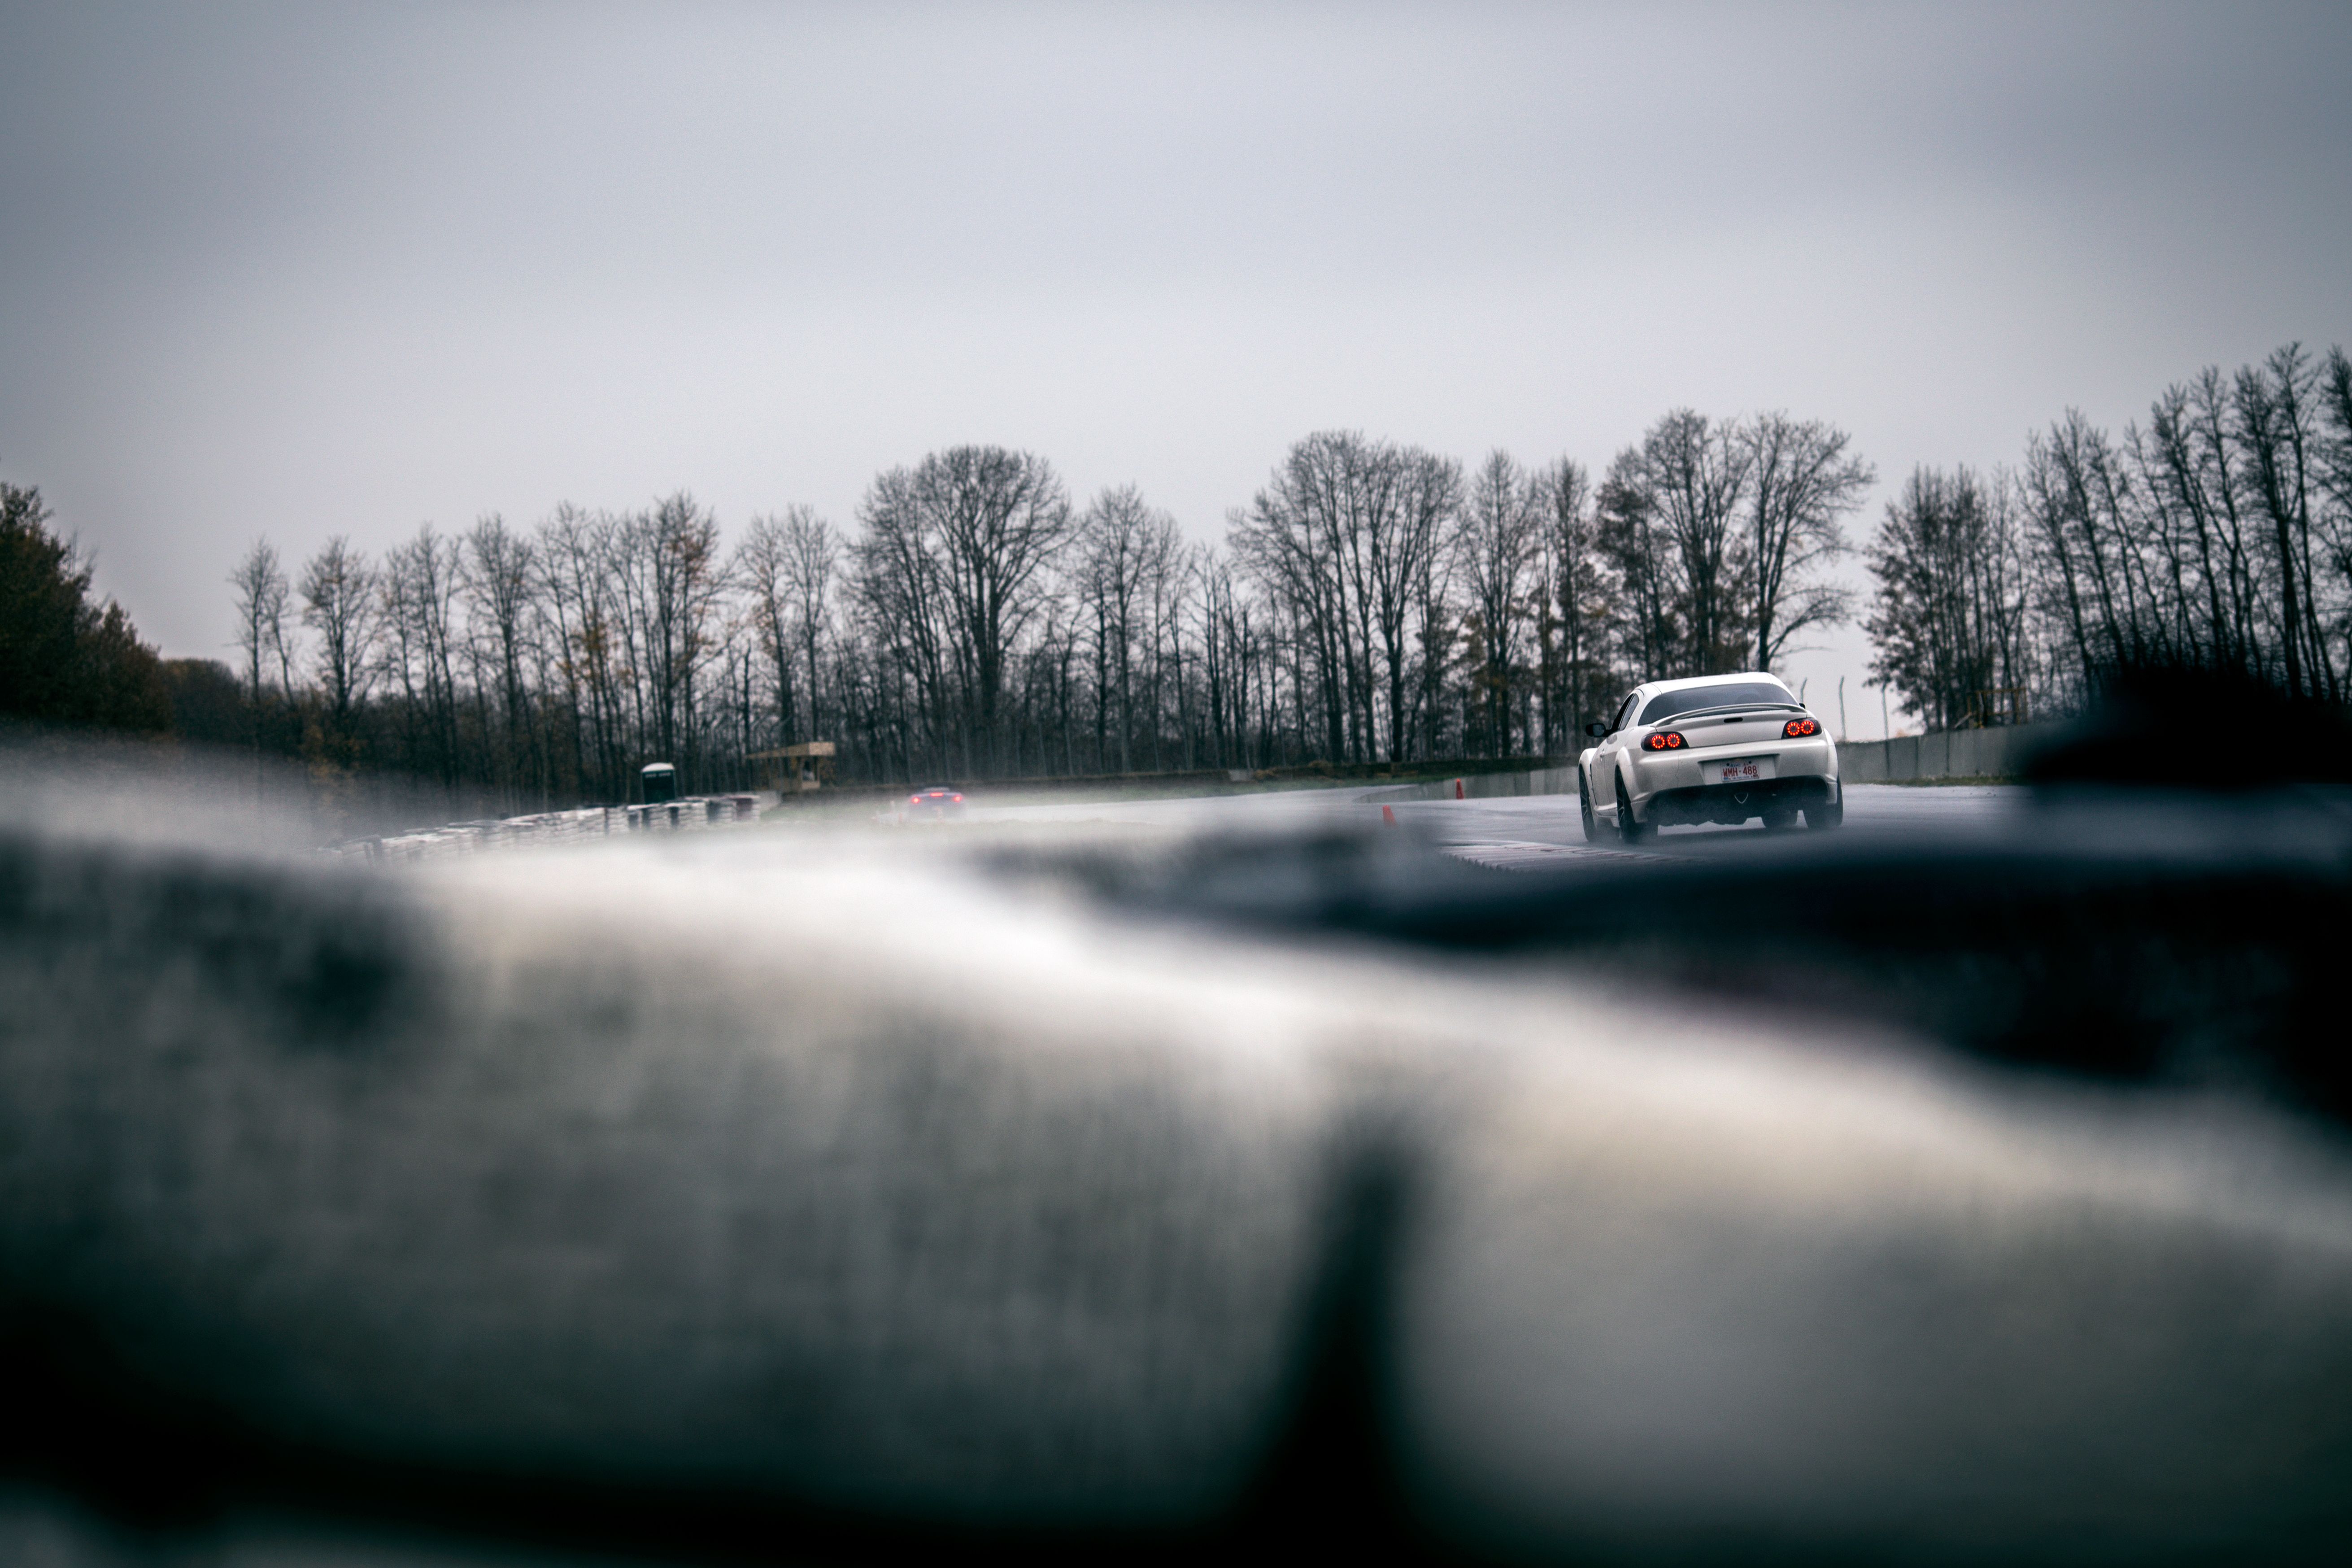
Last but not least, here are some amazing pictures:
Special thanks to my friend Danny Roberts, who is equally as gifted behind the camera as he is behind the wheel.
He took these and put together an unbelievable album, enjoy:
https://m.flickr.com/#/photos/979208...7659973241480/
Couple track shots left over (taken by our friend Tom)


My friends have often asked me... "Was it worth it?" and I do not have a clear cut answer.
If you are looking for a car that goes around the track fast, you can do it for much cheaper, and save yourself months of work. If you want a car that is really fast in a straight line, look elsewhere. (#dragqueen)
If you love the look of the RX8, but do not need extra power, do not bother with a swap.
If you want a car that does all of the above reasonably well and more, is an absolute riot to drive; if you are not afraid of getting your hands dirty; and if you have the need to add your personal touches to whatever you drive, like myself; then by all means... It is definitely worth it.
I love the feeling of spanking a GTR on the track in a car that looks completely stock, and costs a fraction of the price. I also love popping the hood and being able to say "I swapped a V8 in there".
Finally, I'd like to thank my friends for their help:
Andrew Nelson and Academy Petroleum for machining and welding odd bits when needed.
Andy Pollack for help with bodywork and painting.
Russell Schwesinger and Brad Bell for more welding help.
Conroy Ganson for part support and unmatched Mazda expertise, and for showing me how to drive my car
Ryan at Moretto Motorsportz for putting together my differential.
Stephen at LS1RX8 for getting me started on this journey and exchanging ideas along the way.
My sister, of course, for fixing my hand.
Last but not least, here are some amazing pictures:
Special thanks to my friend Danny Roberts, who is equally as gifted behind the camera as he is behind the wheel.
He took these and put together an unbelievable album, enjoy:
https://m.flickr.com/#/photos/979208...7659973241480/
Couple track shots left over (taken by our friend Tom)

Last edited by Pistonized; 11-07-2015 at 06:31 PM.
The following users liked this post:
fask25 (01-27-2023)


The following users liked this post:
fask25 (01-27-2023)
11-09-2015, 03:15 PM
#24
Registered
Thread Starter
I was able to do some blending on the rear which turned out amazing. The front bumper however is definitely a little off color. Looks amazing in direct sun, but you can see the difference when it's cloudy or under artificial light.
11-09-2015, 03:19 PM
#25
Registered
Thread Starter
I am roughly $30k CAD into it. This would be around $25k USD or even less, since most of my parts came south of the border to begin with and shipping costs add up.
If I was doing it again, I am pretty sure I could do it for well under $20k USD including the car. Even less if going with a aluminum block truck motor or an F-body LS1.
I had the car appraised for insurance purposes, and the value was a tad under $40k CAD, which I am extremely pleased with.
If I was doing it again, I am pretty sure I could do it for well under $20k USD including the car. Even less if going with a aluminum block truck motor or an F-body LS1.
I had the car appraised for insurance purposes, and the value was a tad under $40k CAD, which I am extremely pleased with.
Last edited by Pistonized; 11-09-2015 at 03:24 PM.